Bathroom Remodel
In mid-May 2008, we decided to remodel our master bathroom. The house is 36 years old and the bathroom is due for an upgrade. So we talked to a few neighbors, found a designer with a good reputation, and started talking with her. She created several floor plan sketches for us, and we agreed on a design in about a week. The designer works with a builder and his quality was supposed to be great, so we anticipated the best.
Unfortunately, we learned that home improvement projects can be really expensive if you are a "hands-off" consumer. In other words: getting personally involved can save a great deal of money.
Lessons Learned Early
The homework we did before signing any paperwork taught us a few things:
- general contractors add 20 to 30% to the labor rates of their subcontractors. OK for small jobs, but not for big ones or when the GC is not directing the work himself. Always insist that the GC let you deal directly with the subcontractors yourself1.
- Demolition is expensive. Our GC was going to charge us almost $4000 to demolition the bathroom. That included everything--a dumpster, trash removal and cleanup, qualified people, etc... But after a good bit of thought, we decided to do it ourselves because
- the skill required is pretty low
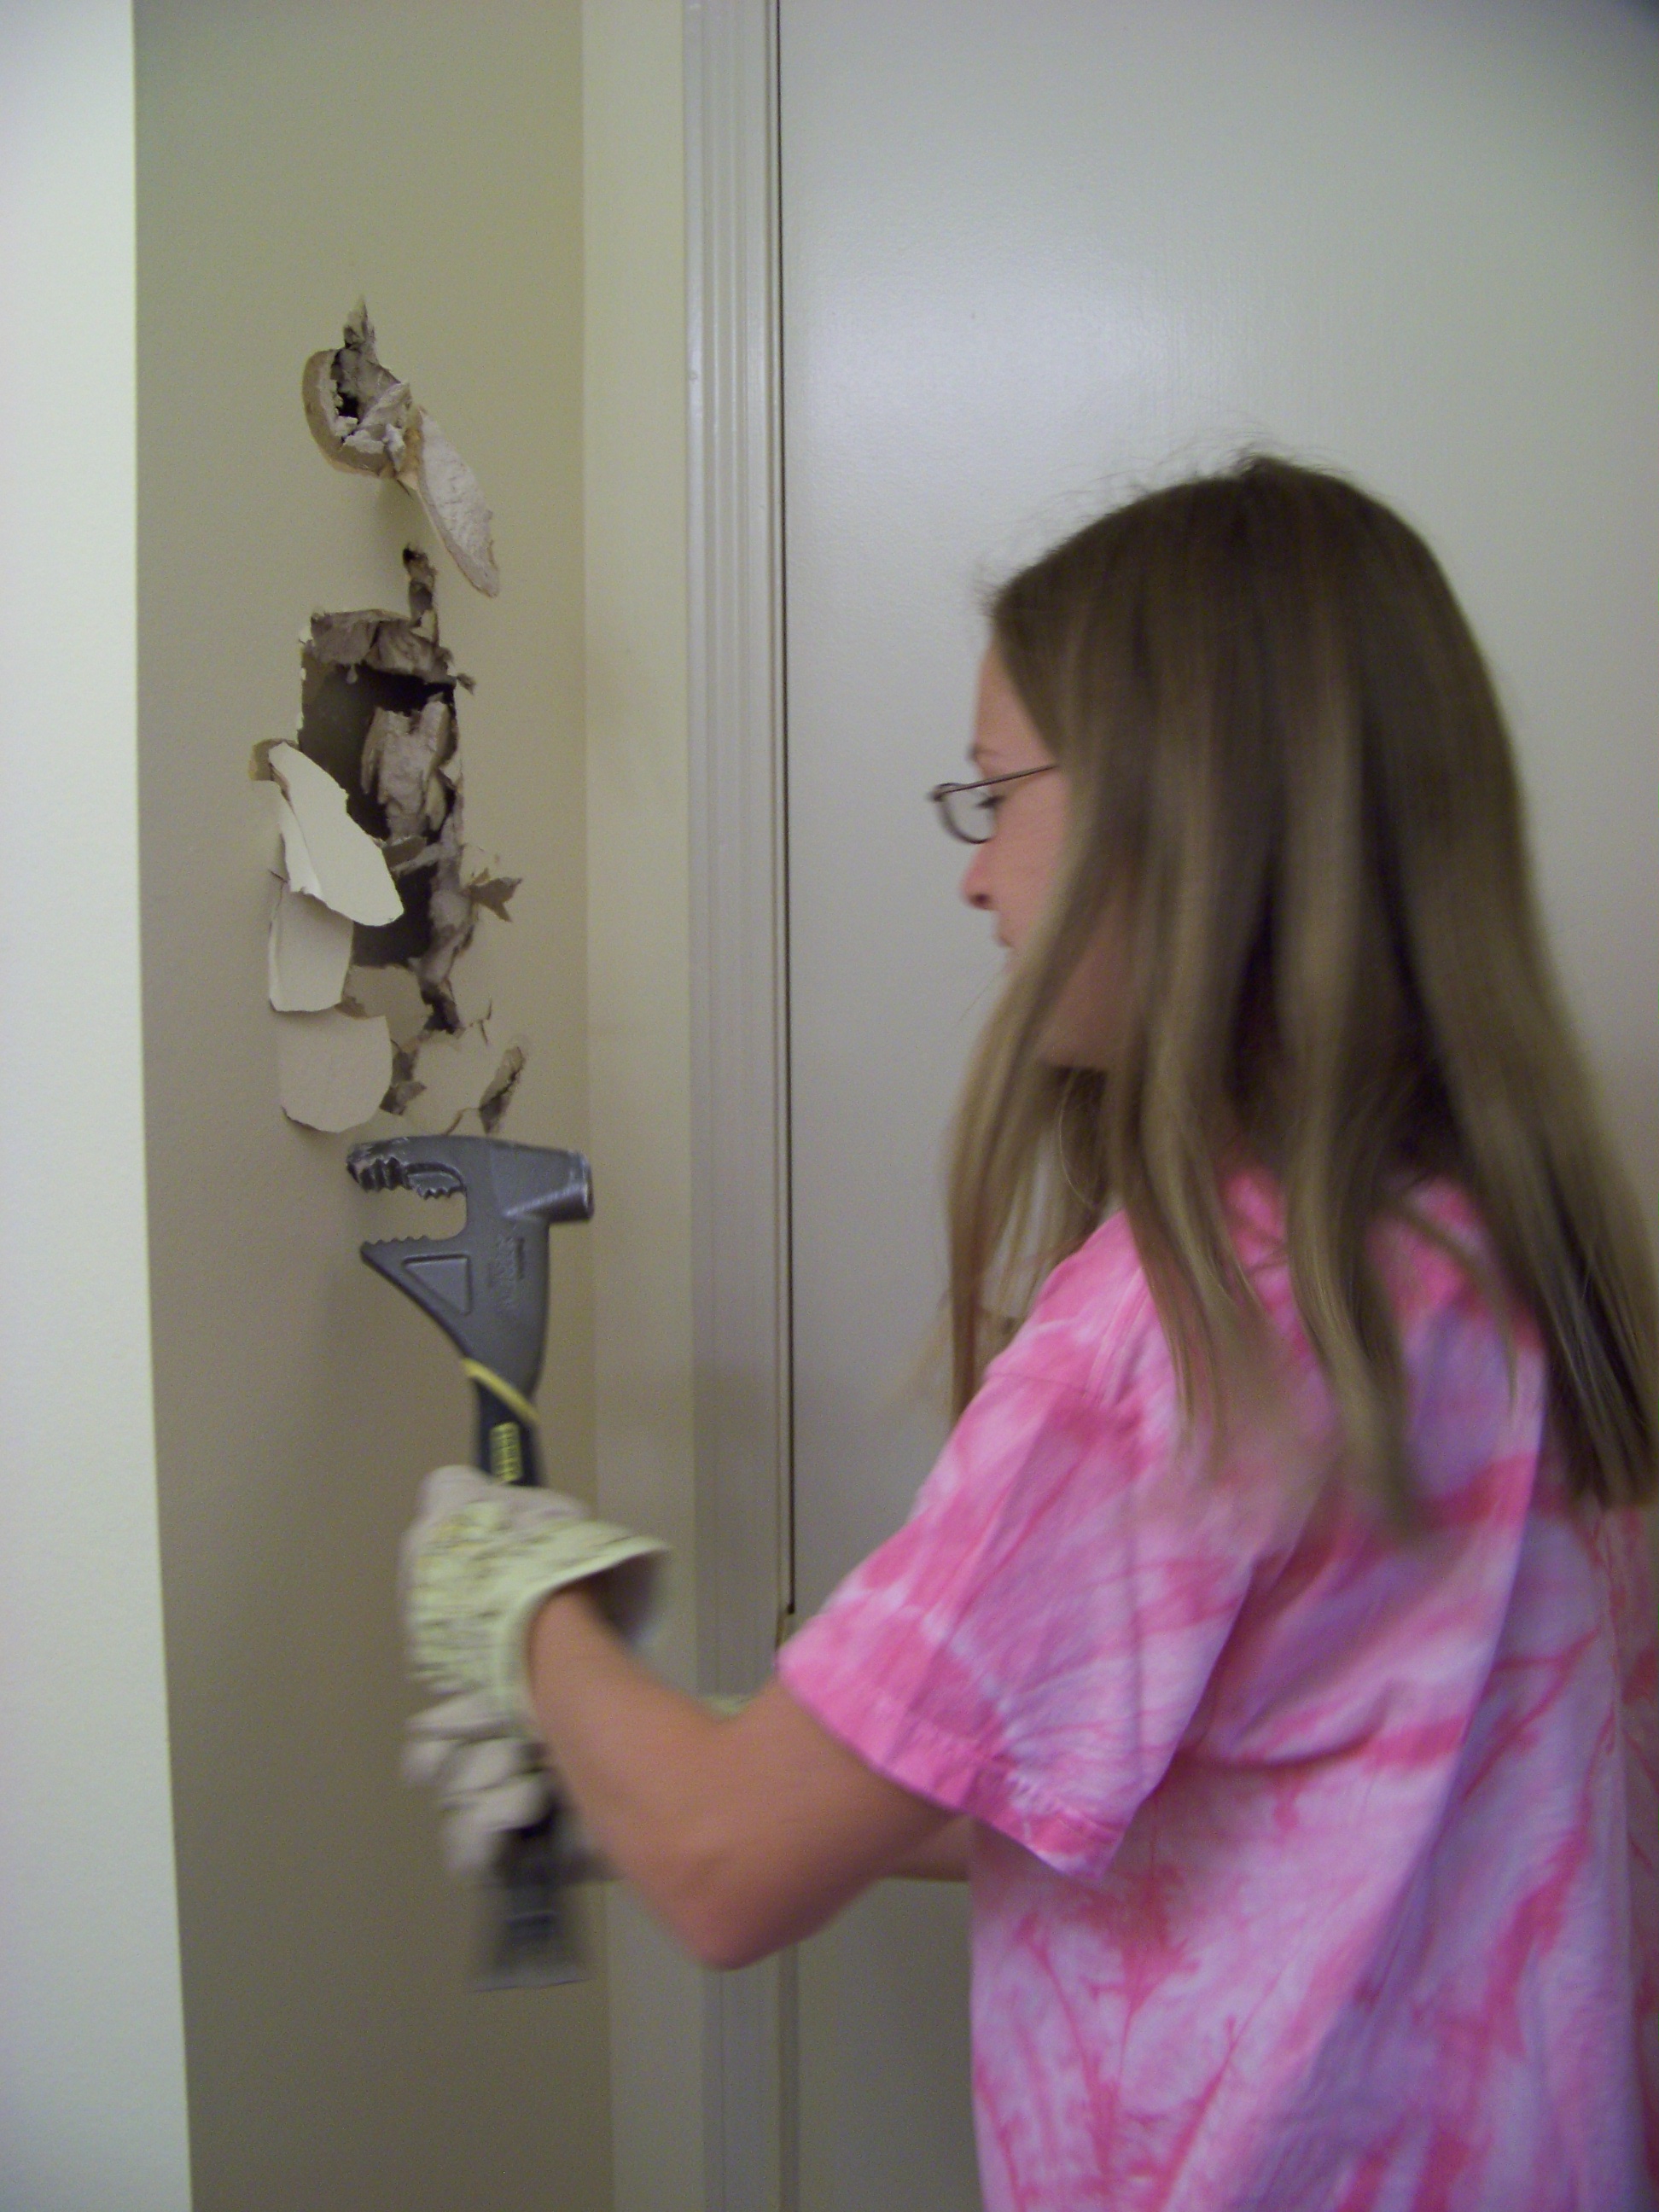
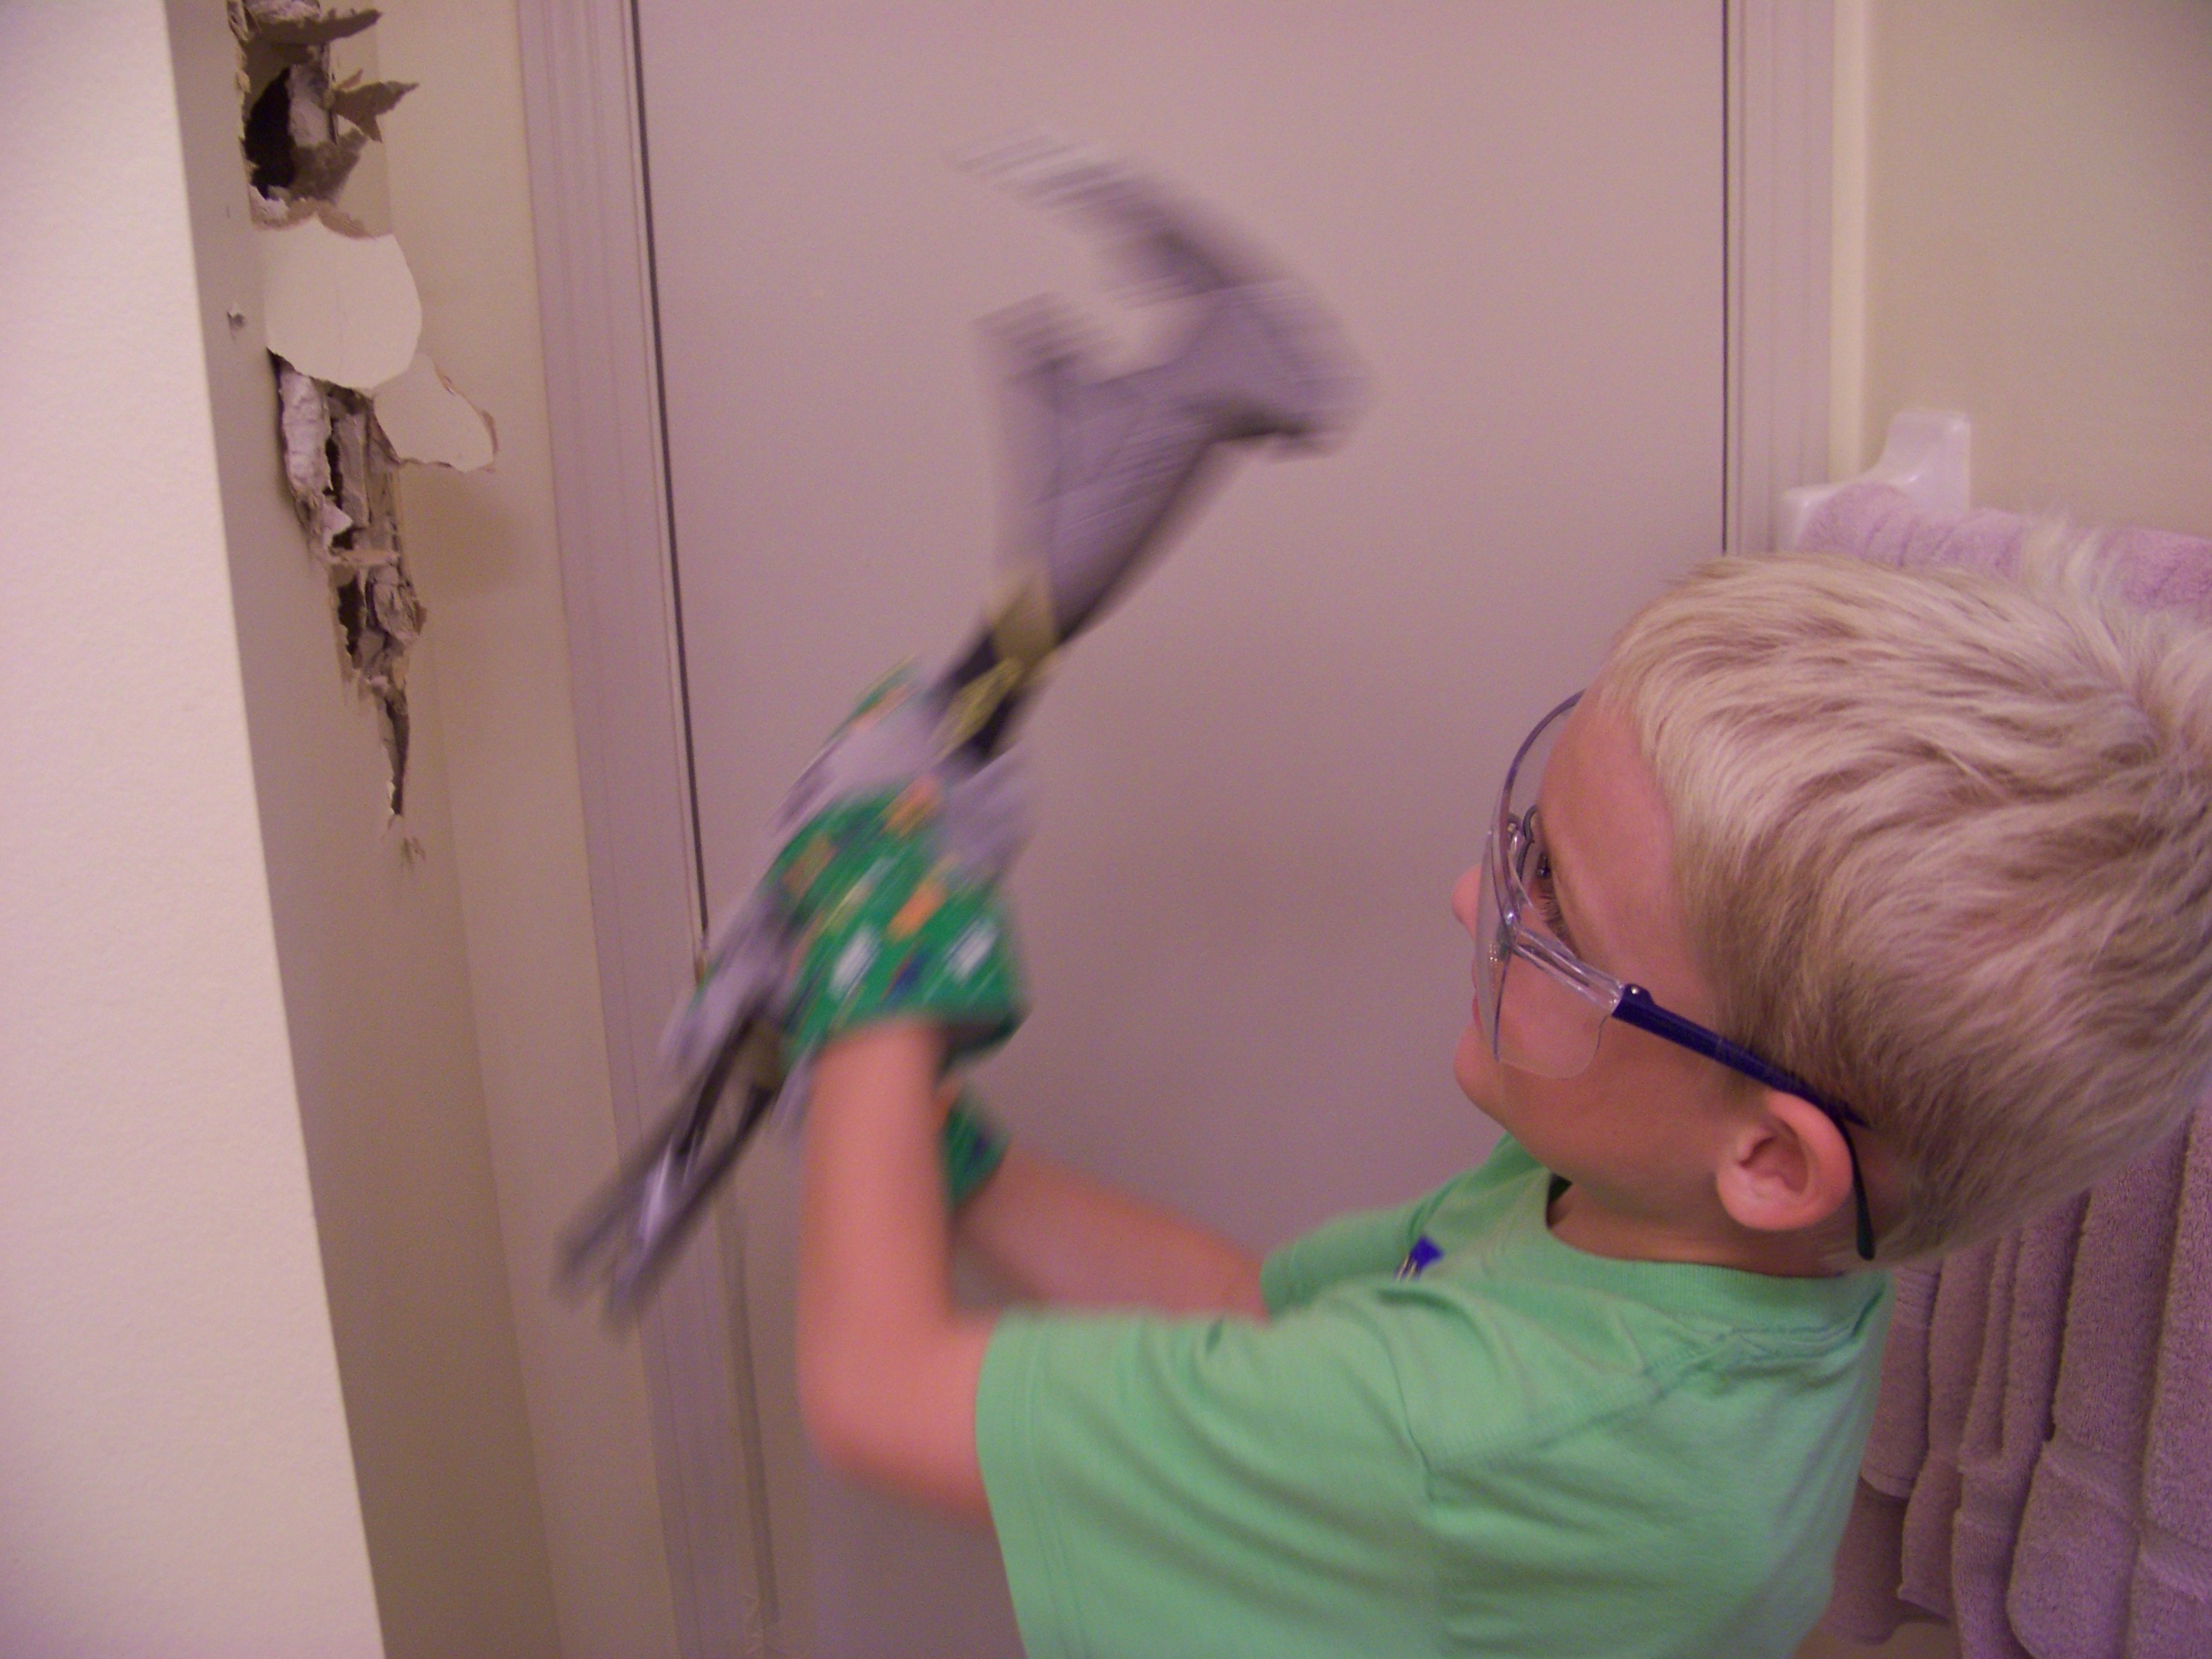
- our kids thought it would be fun to destroy walls and cabinets
- our waste management company agreed to take the construction debris
- I have a good bit of experience with wood and electrical work
- the do-it-yourself resources on the web are really good
- we already have lots of tools (saws-all, fubar, hammers, etc..)
Demolition
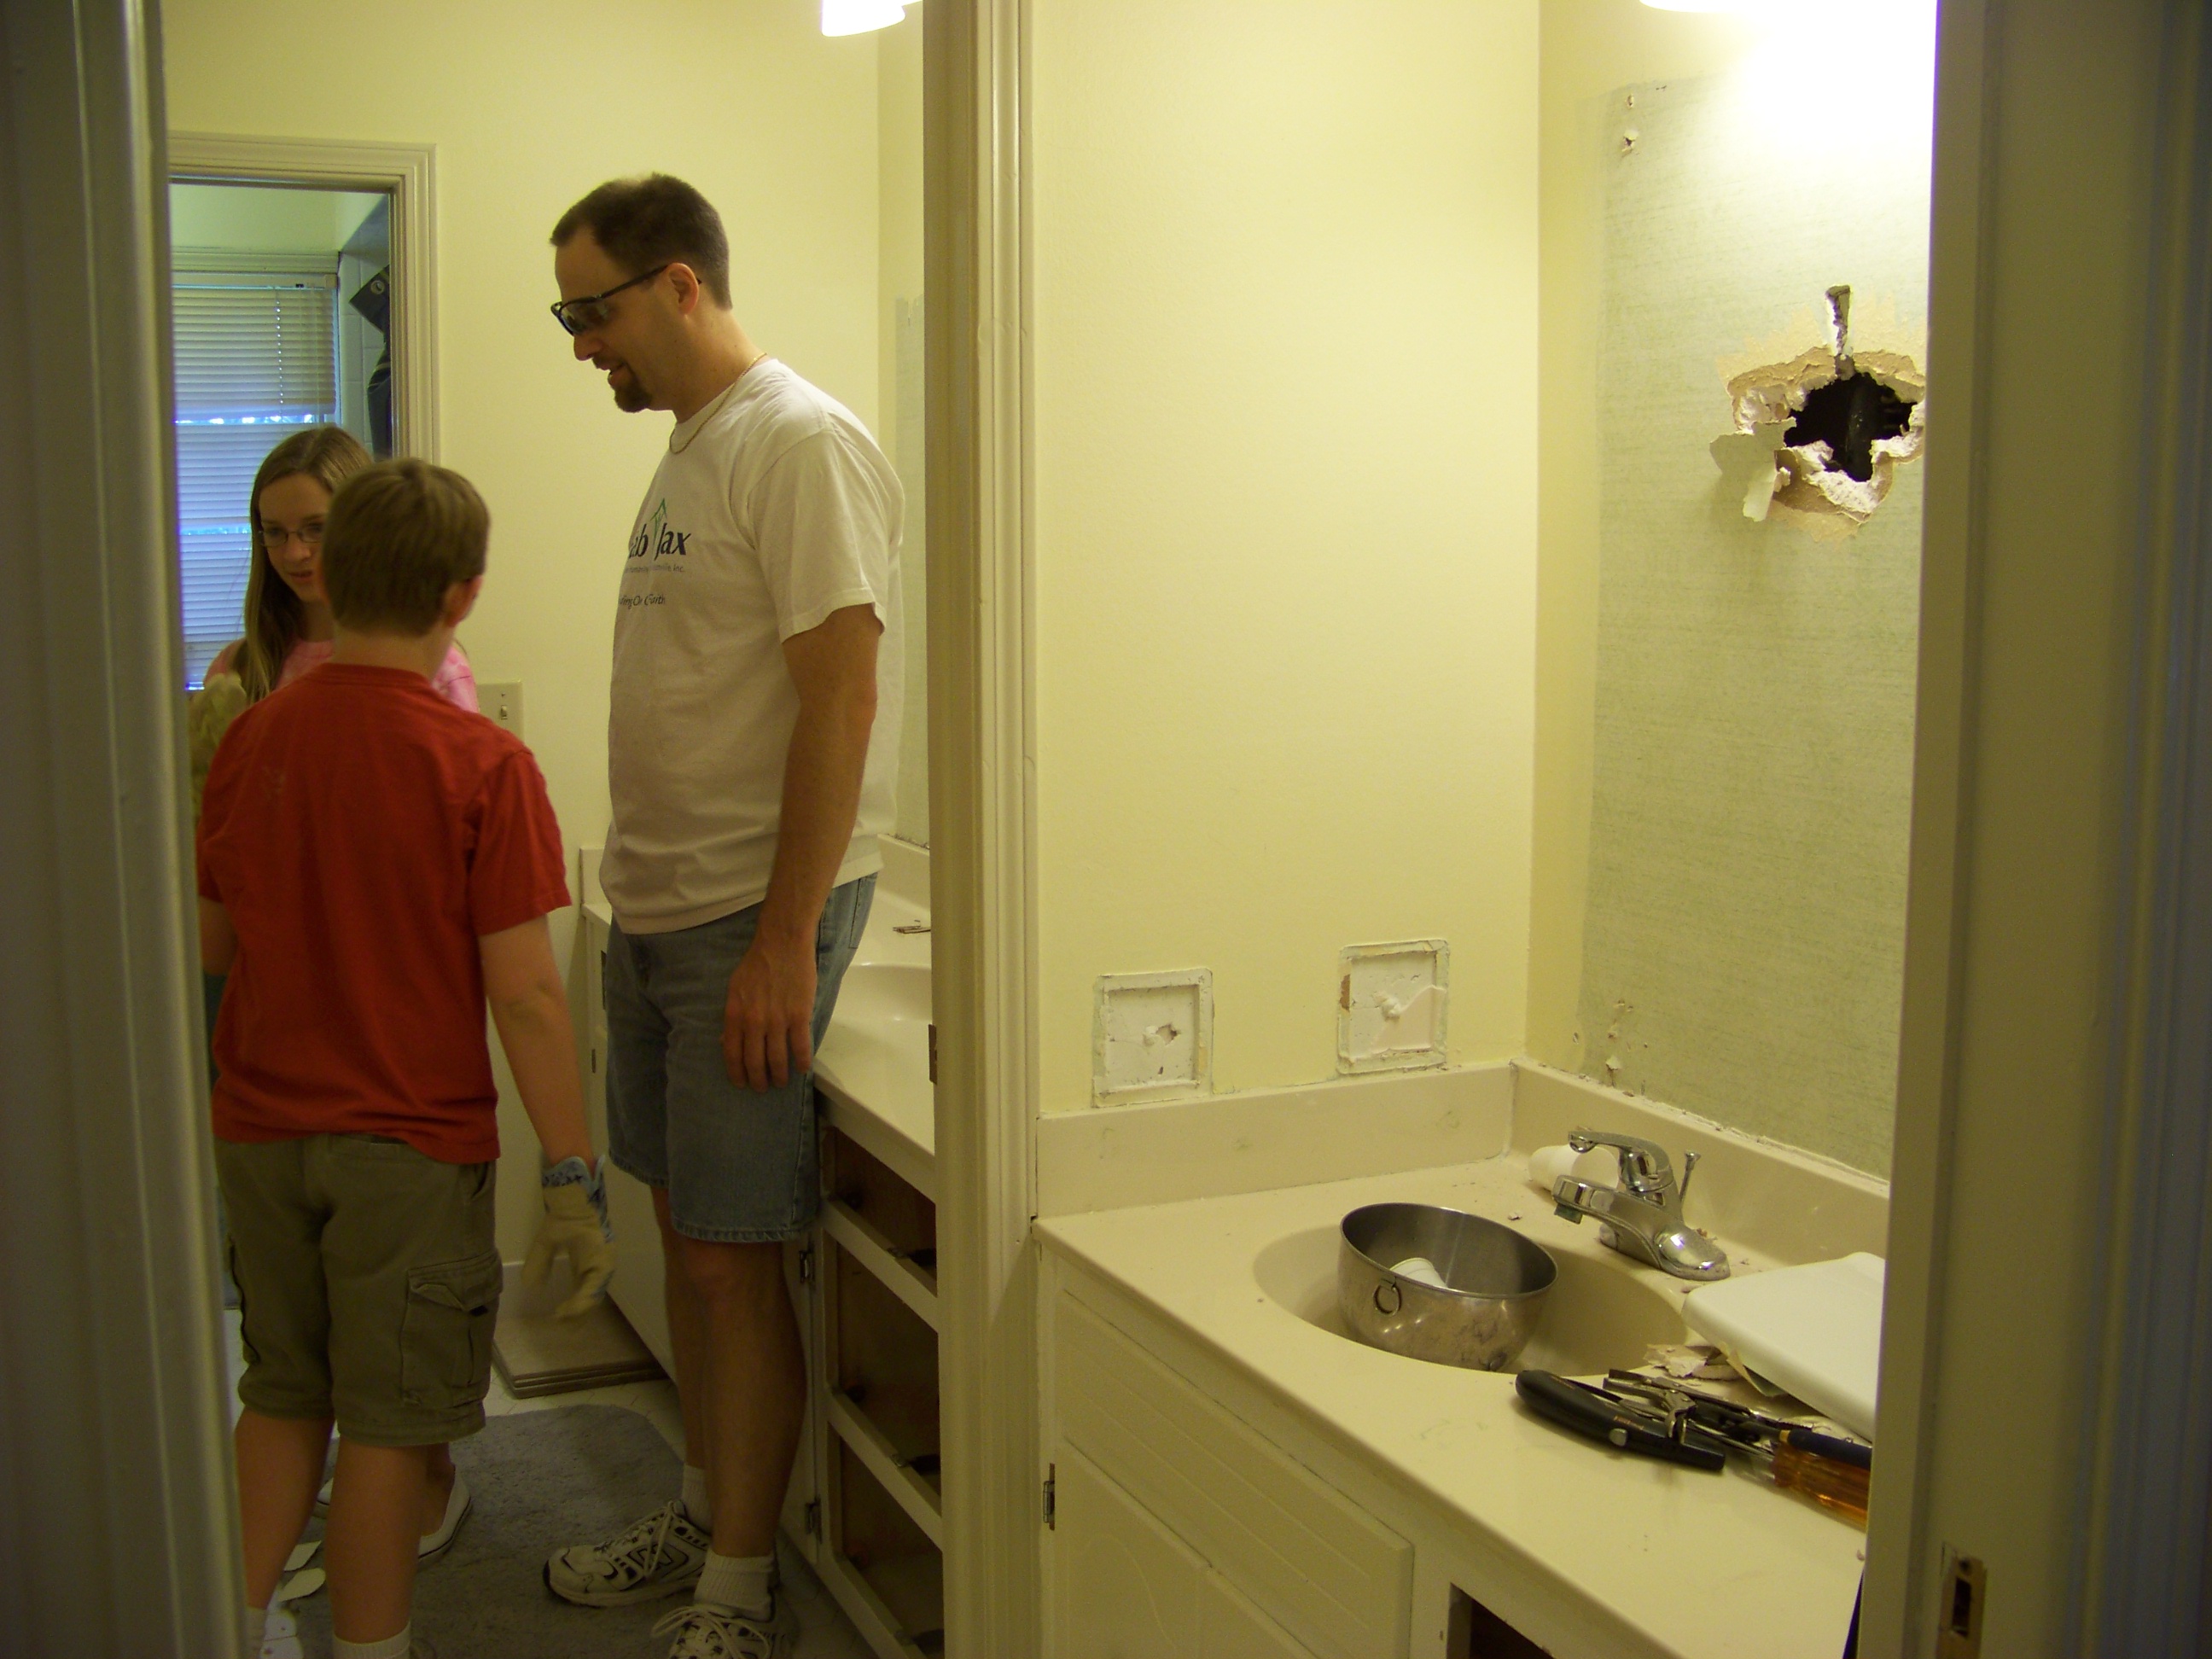
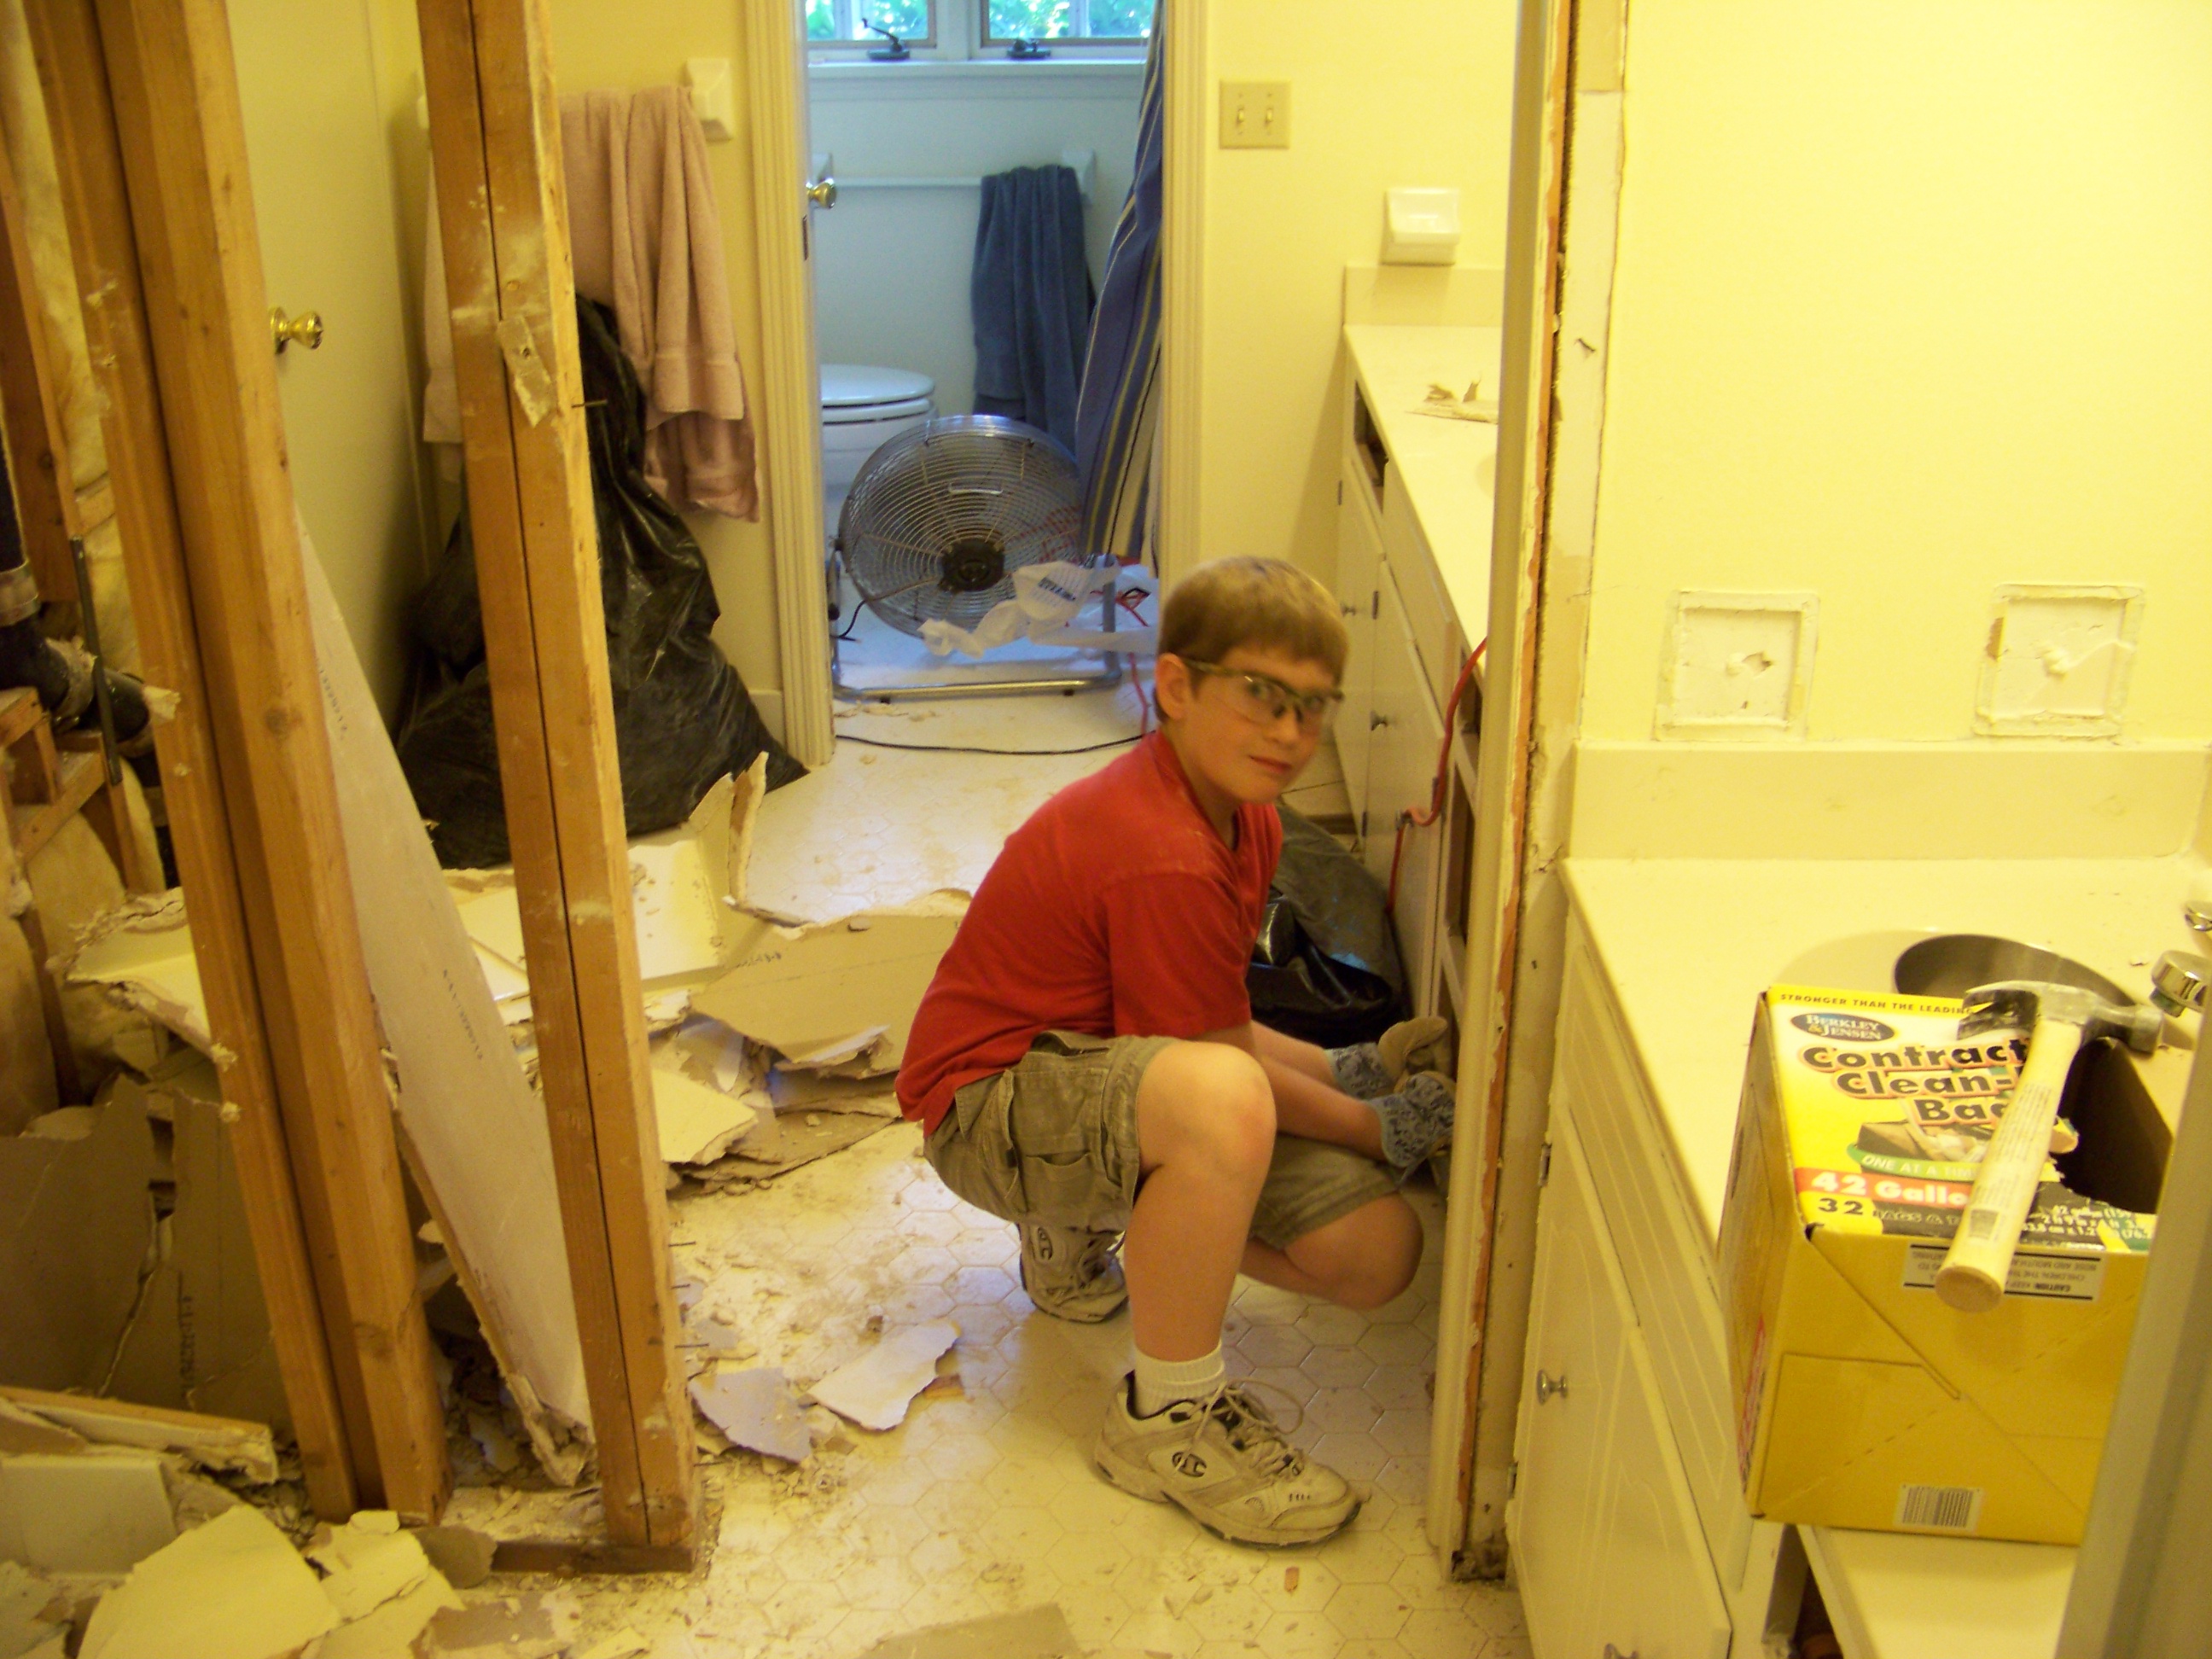
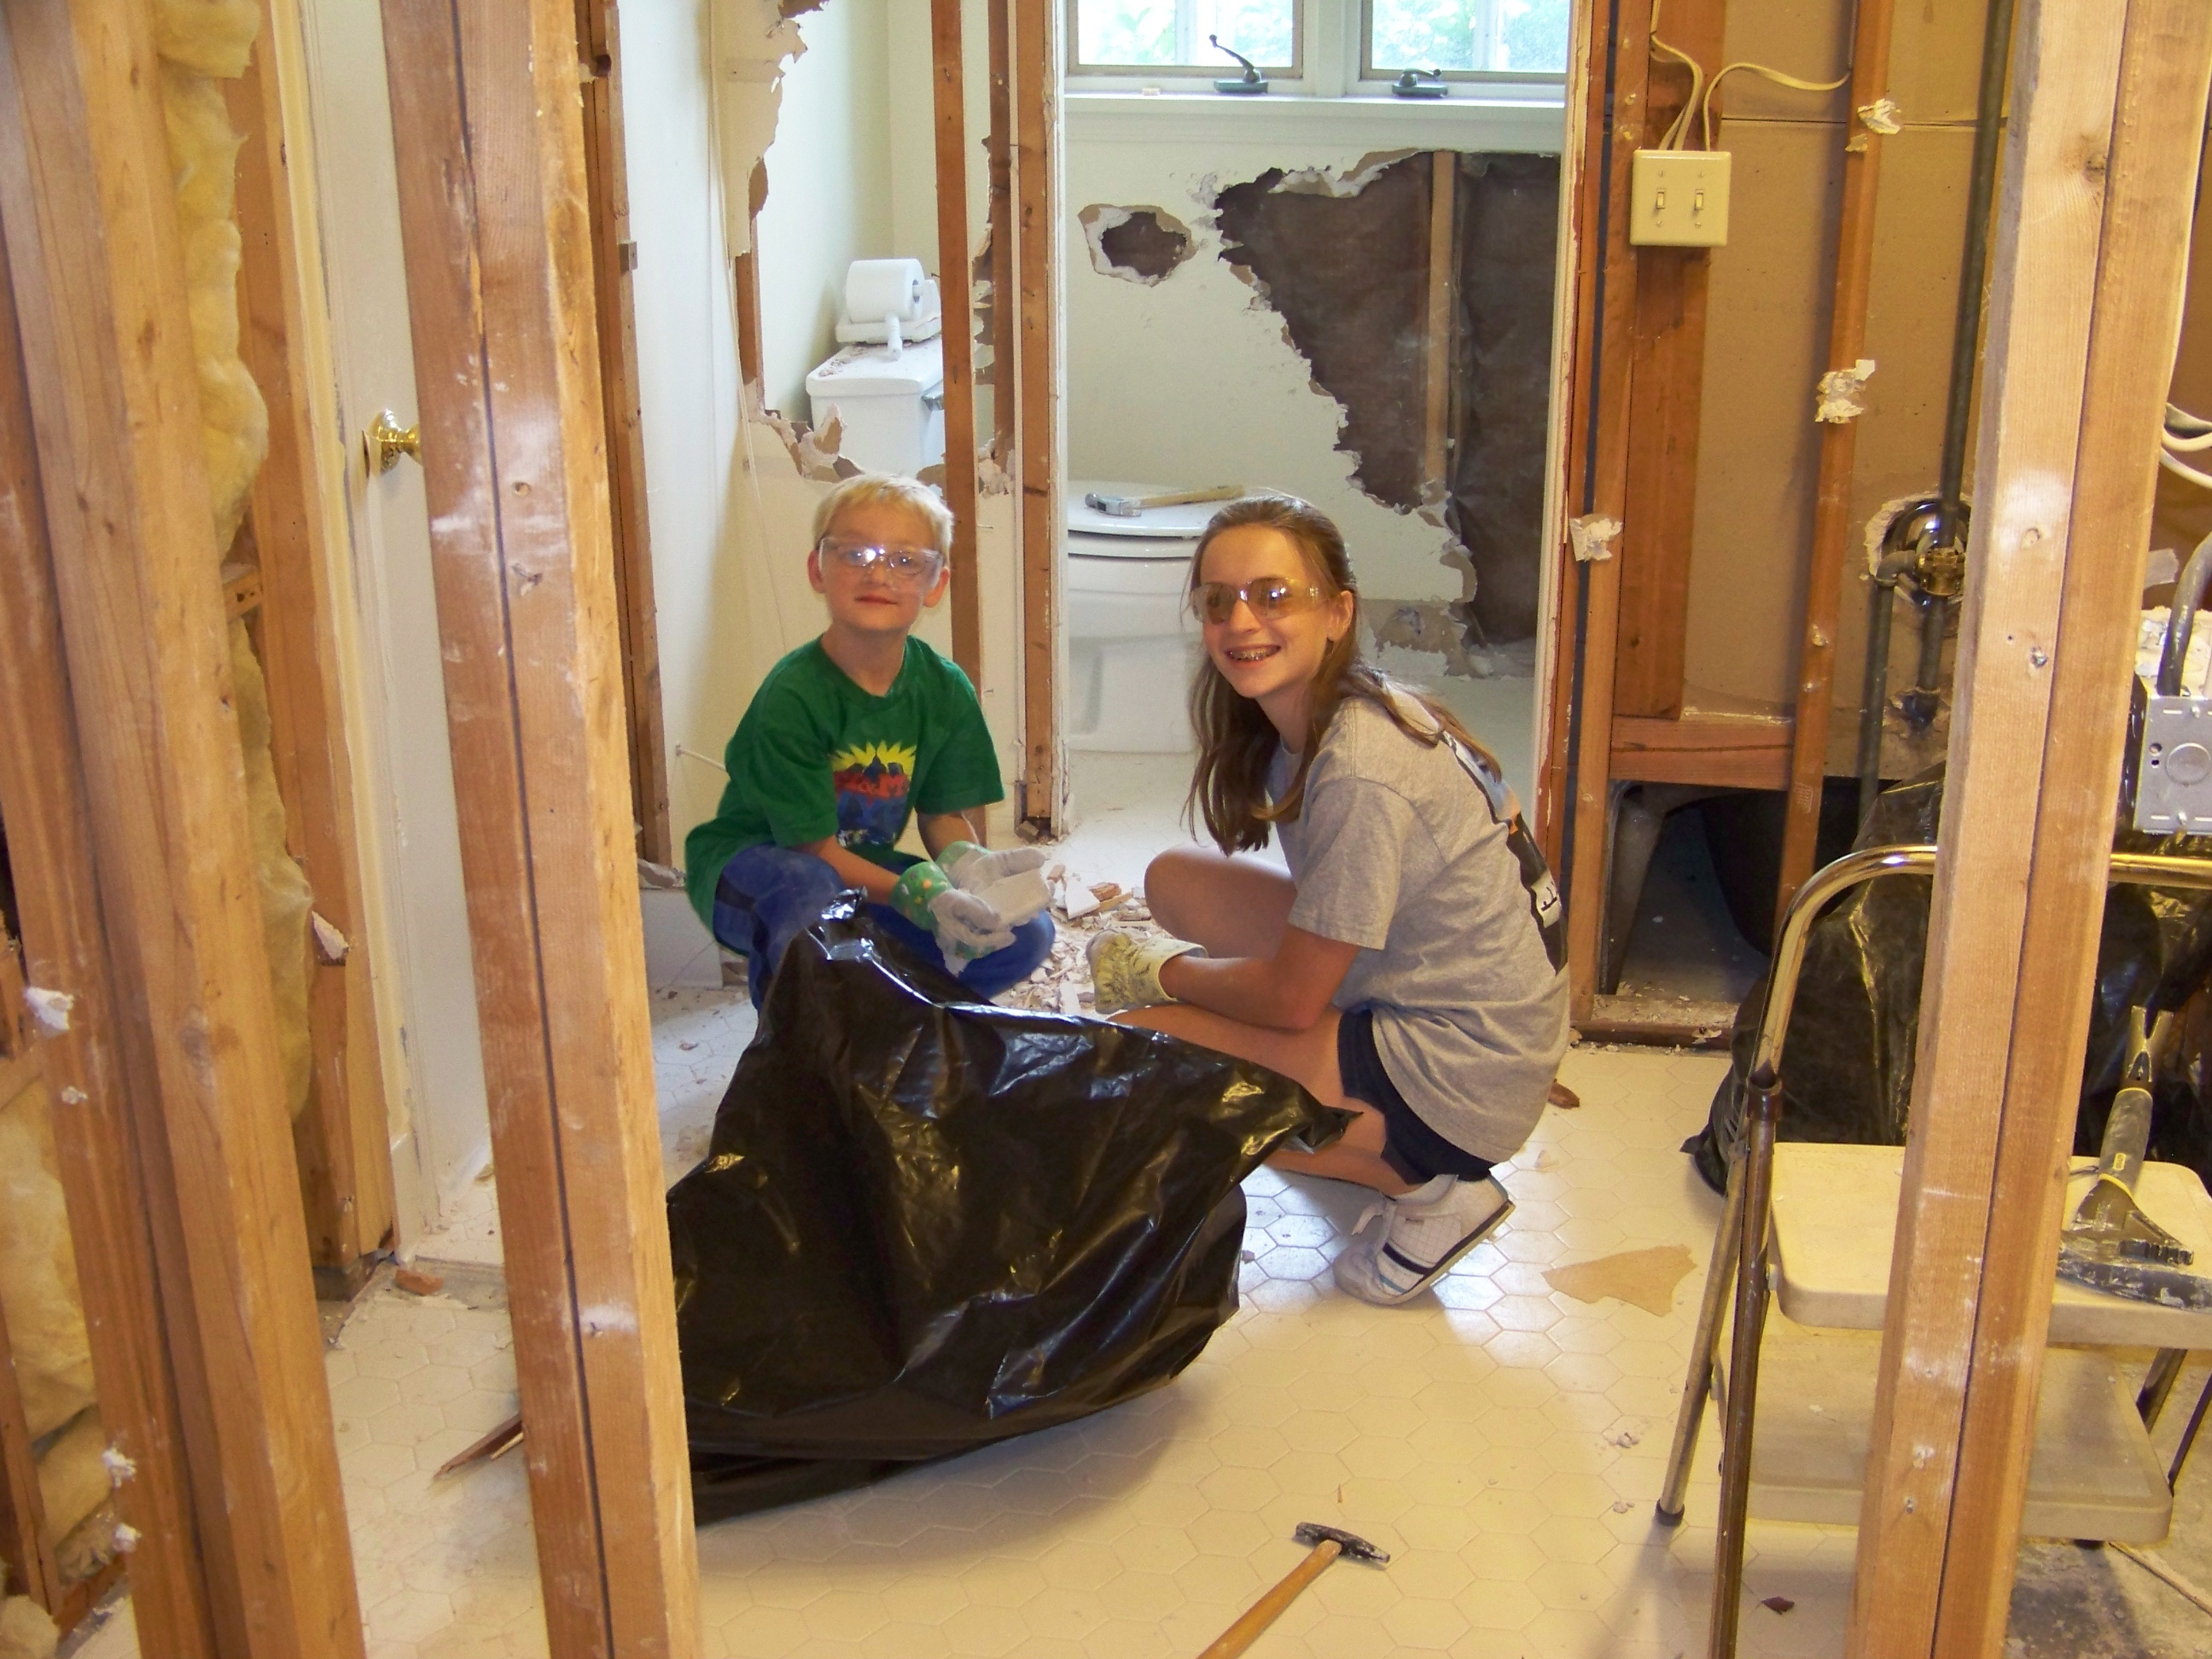
So we got started on our own. We captured a few pictures along the way. Lucky for us, there were no scrapes or bruises, and everyone had a good time.

The last part of our demolition was destroying our cast iron + porcelain tub. This is an unbelievably labor-intensive task. Our tub was made of 3/8" thick cast iron, coated with porcelain. I borrowed a 16-pound sledge hammer from our plumber and was looking forward to a little quality time with it.
I donned my safety glasses and hit the tub on the outer edge near the bottom, thinking it would break immediately. No such luck, but the porcelain exploded in a million little pieces. I decided to wear jeans, a long sleeve shirt, and a hat for the rest of the experience. I continued hitting the same spot and after 4 or 5 strokes, a triangular chunk of iron hit the floor. That was the beginning of the end...it only took another 30 minutes of hard hitting to reduce the entire tub to chunks of iron.
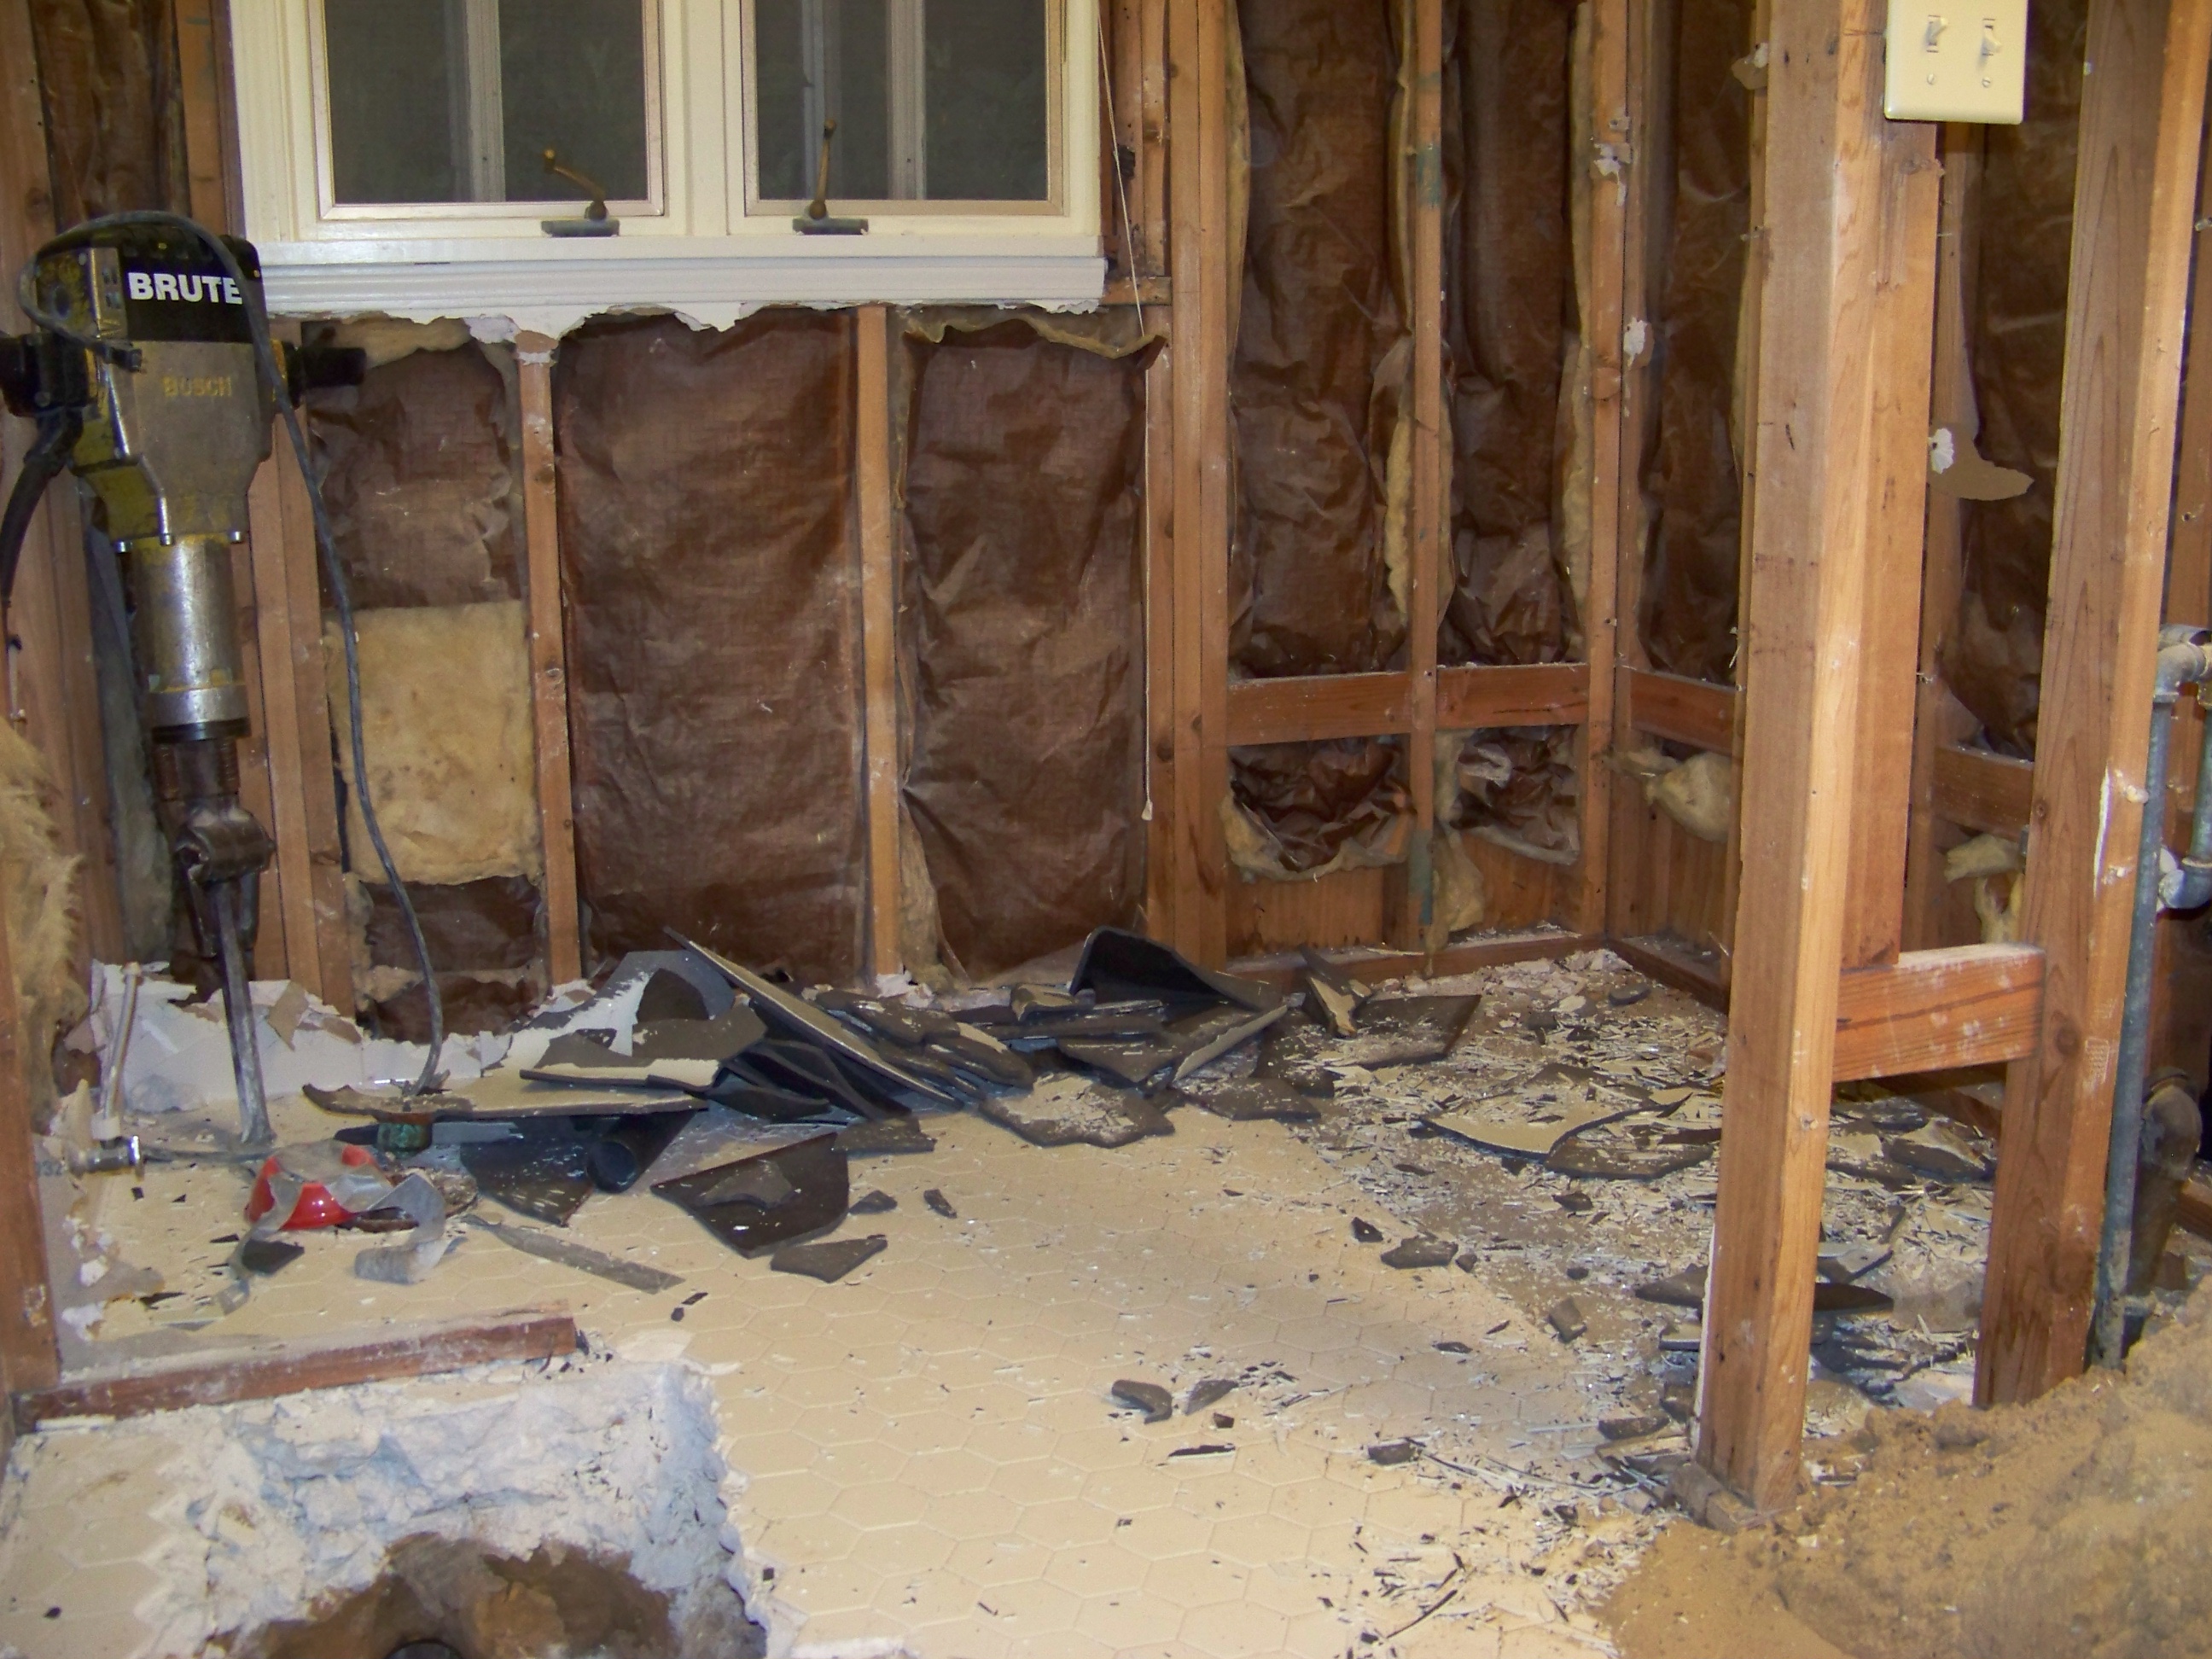 | The tub after destruction and before cleanup. Porcelain is everywhere...in the insulation, in my clothes, and even out in the hallway 20 feet away. This is definitely the most hazardous task I've ever done in terms of eye safety. |
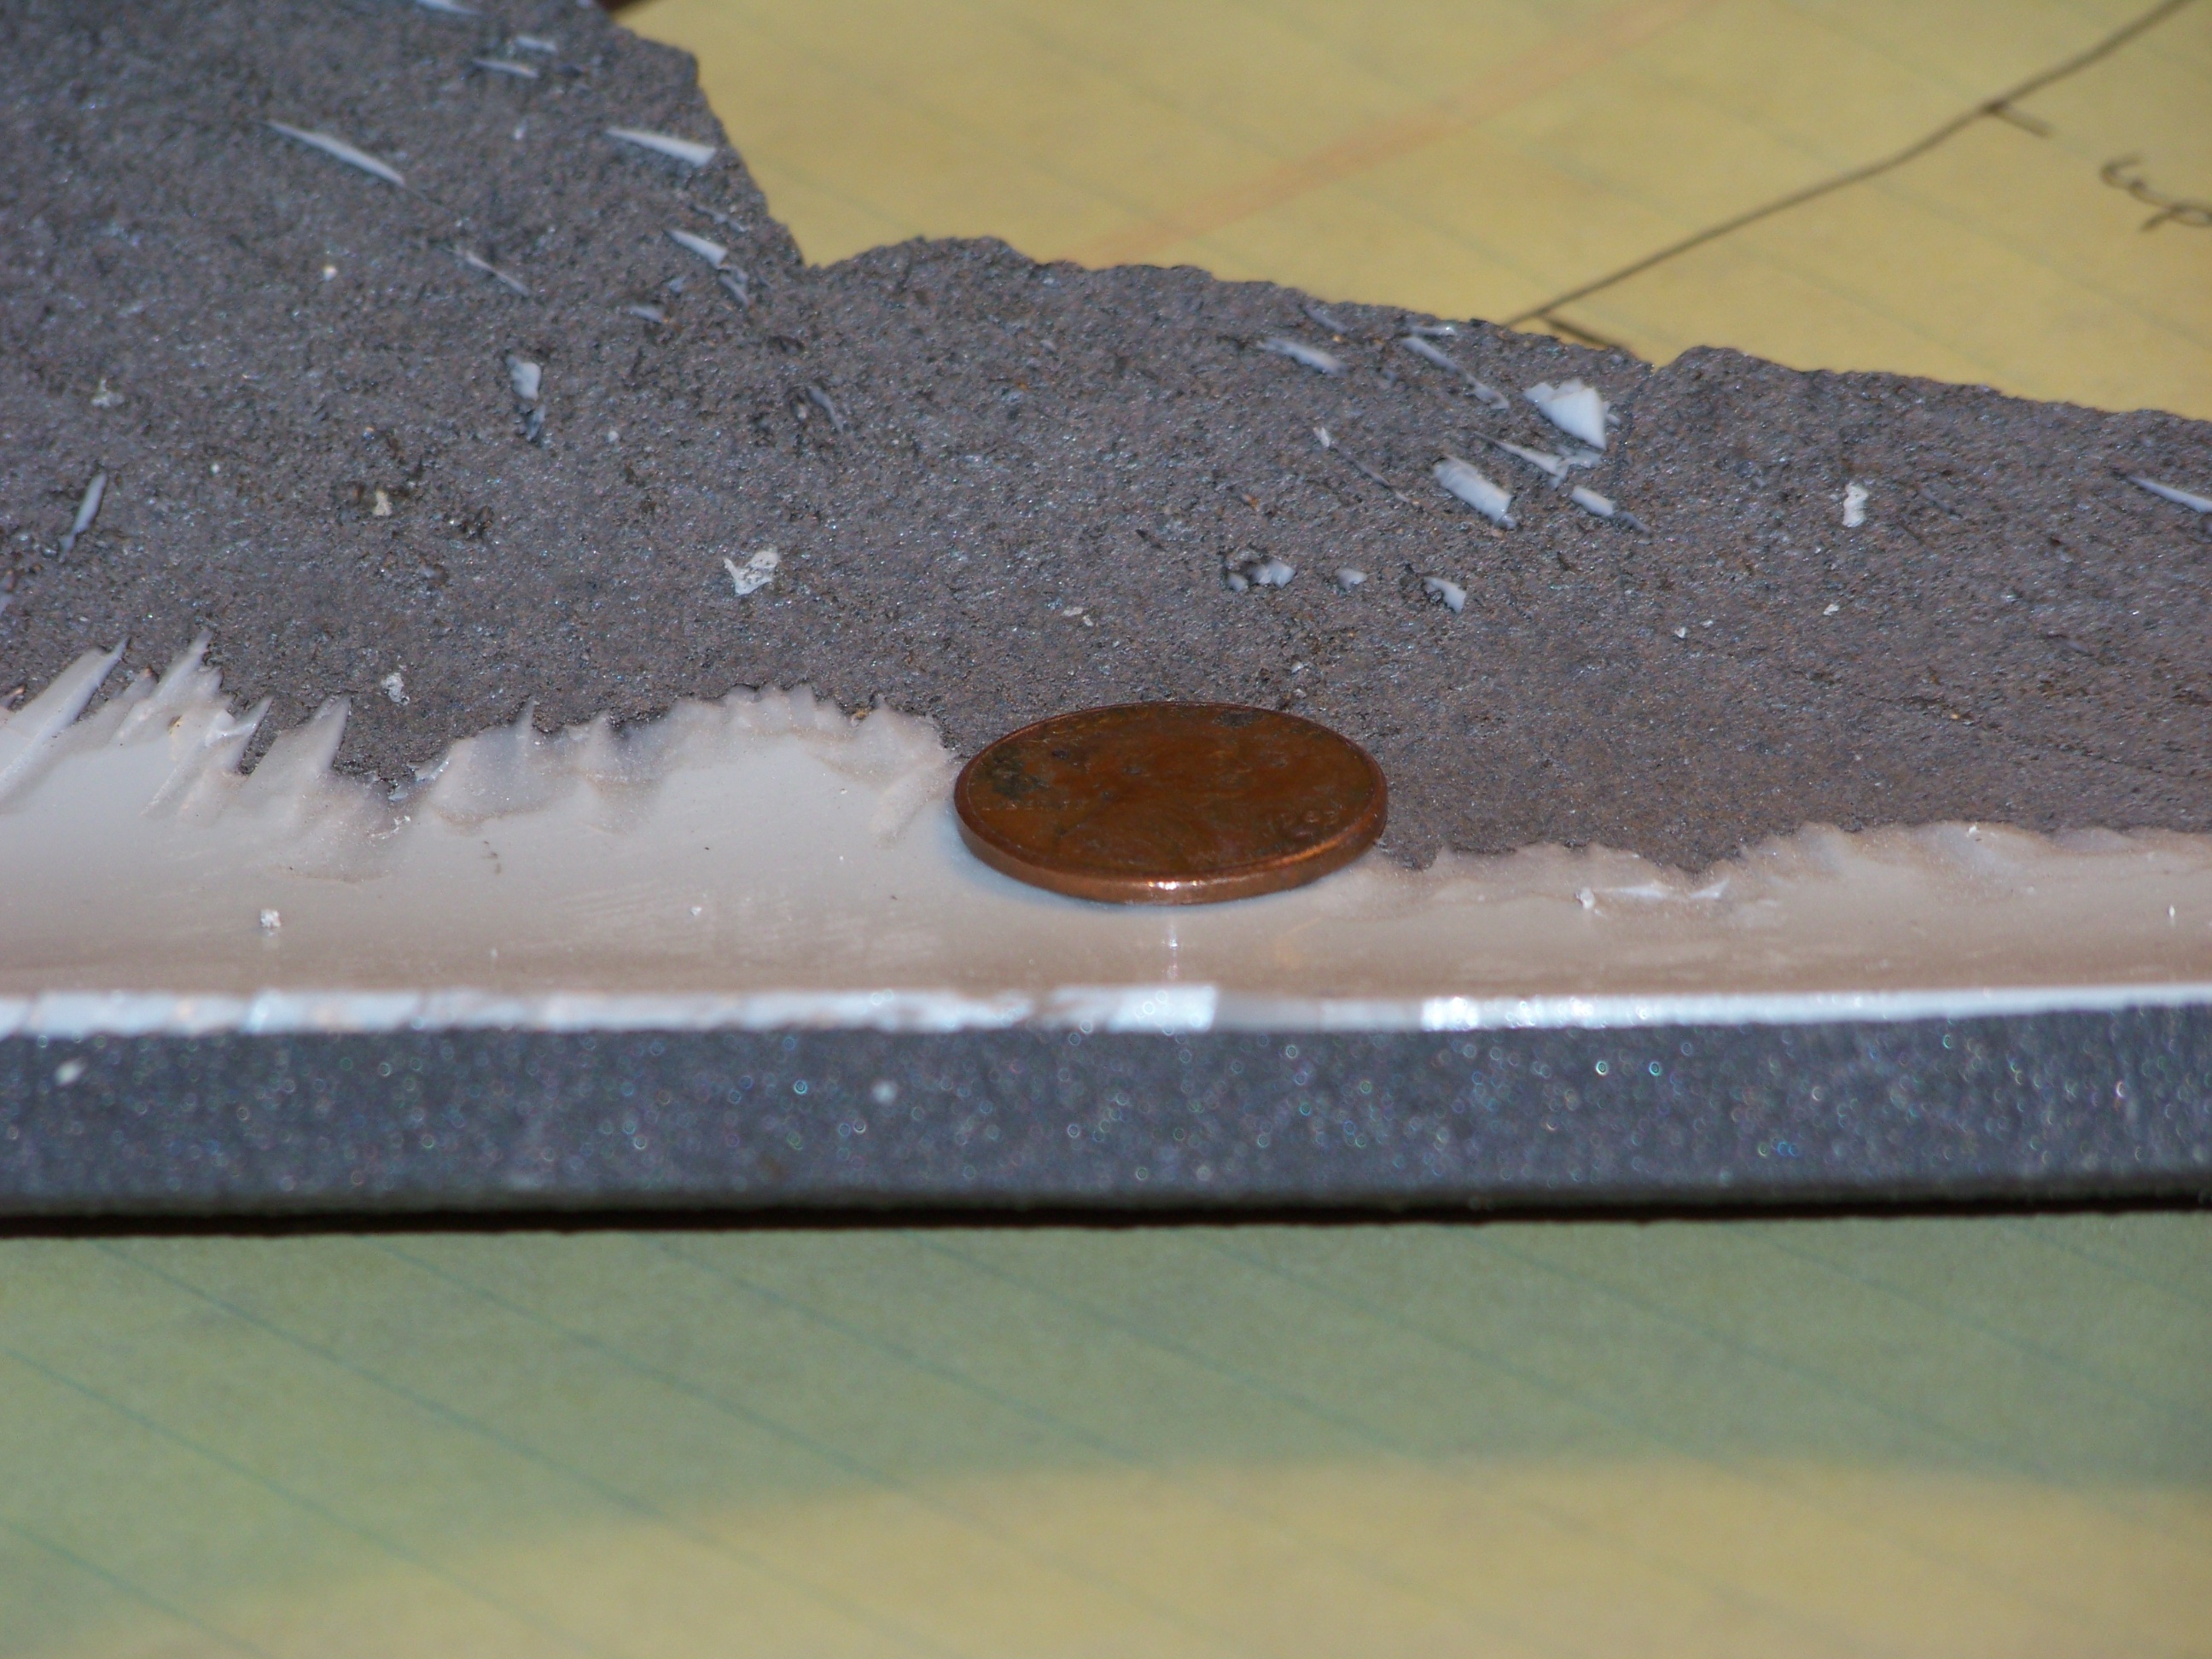 | Close-up showing the thickness of the cast iron and porcelain, relative to a penny |
Plumbing
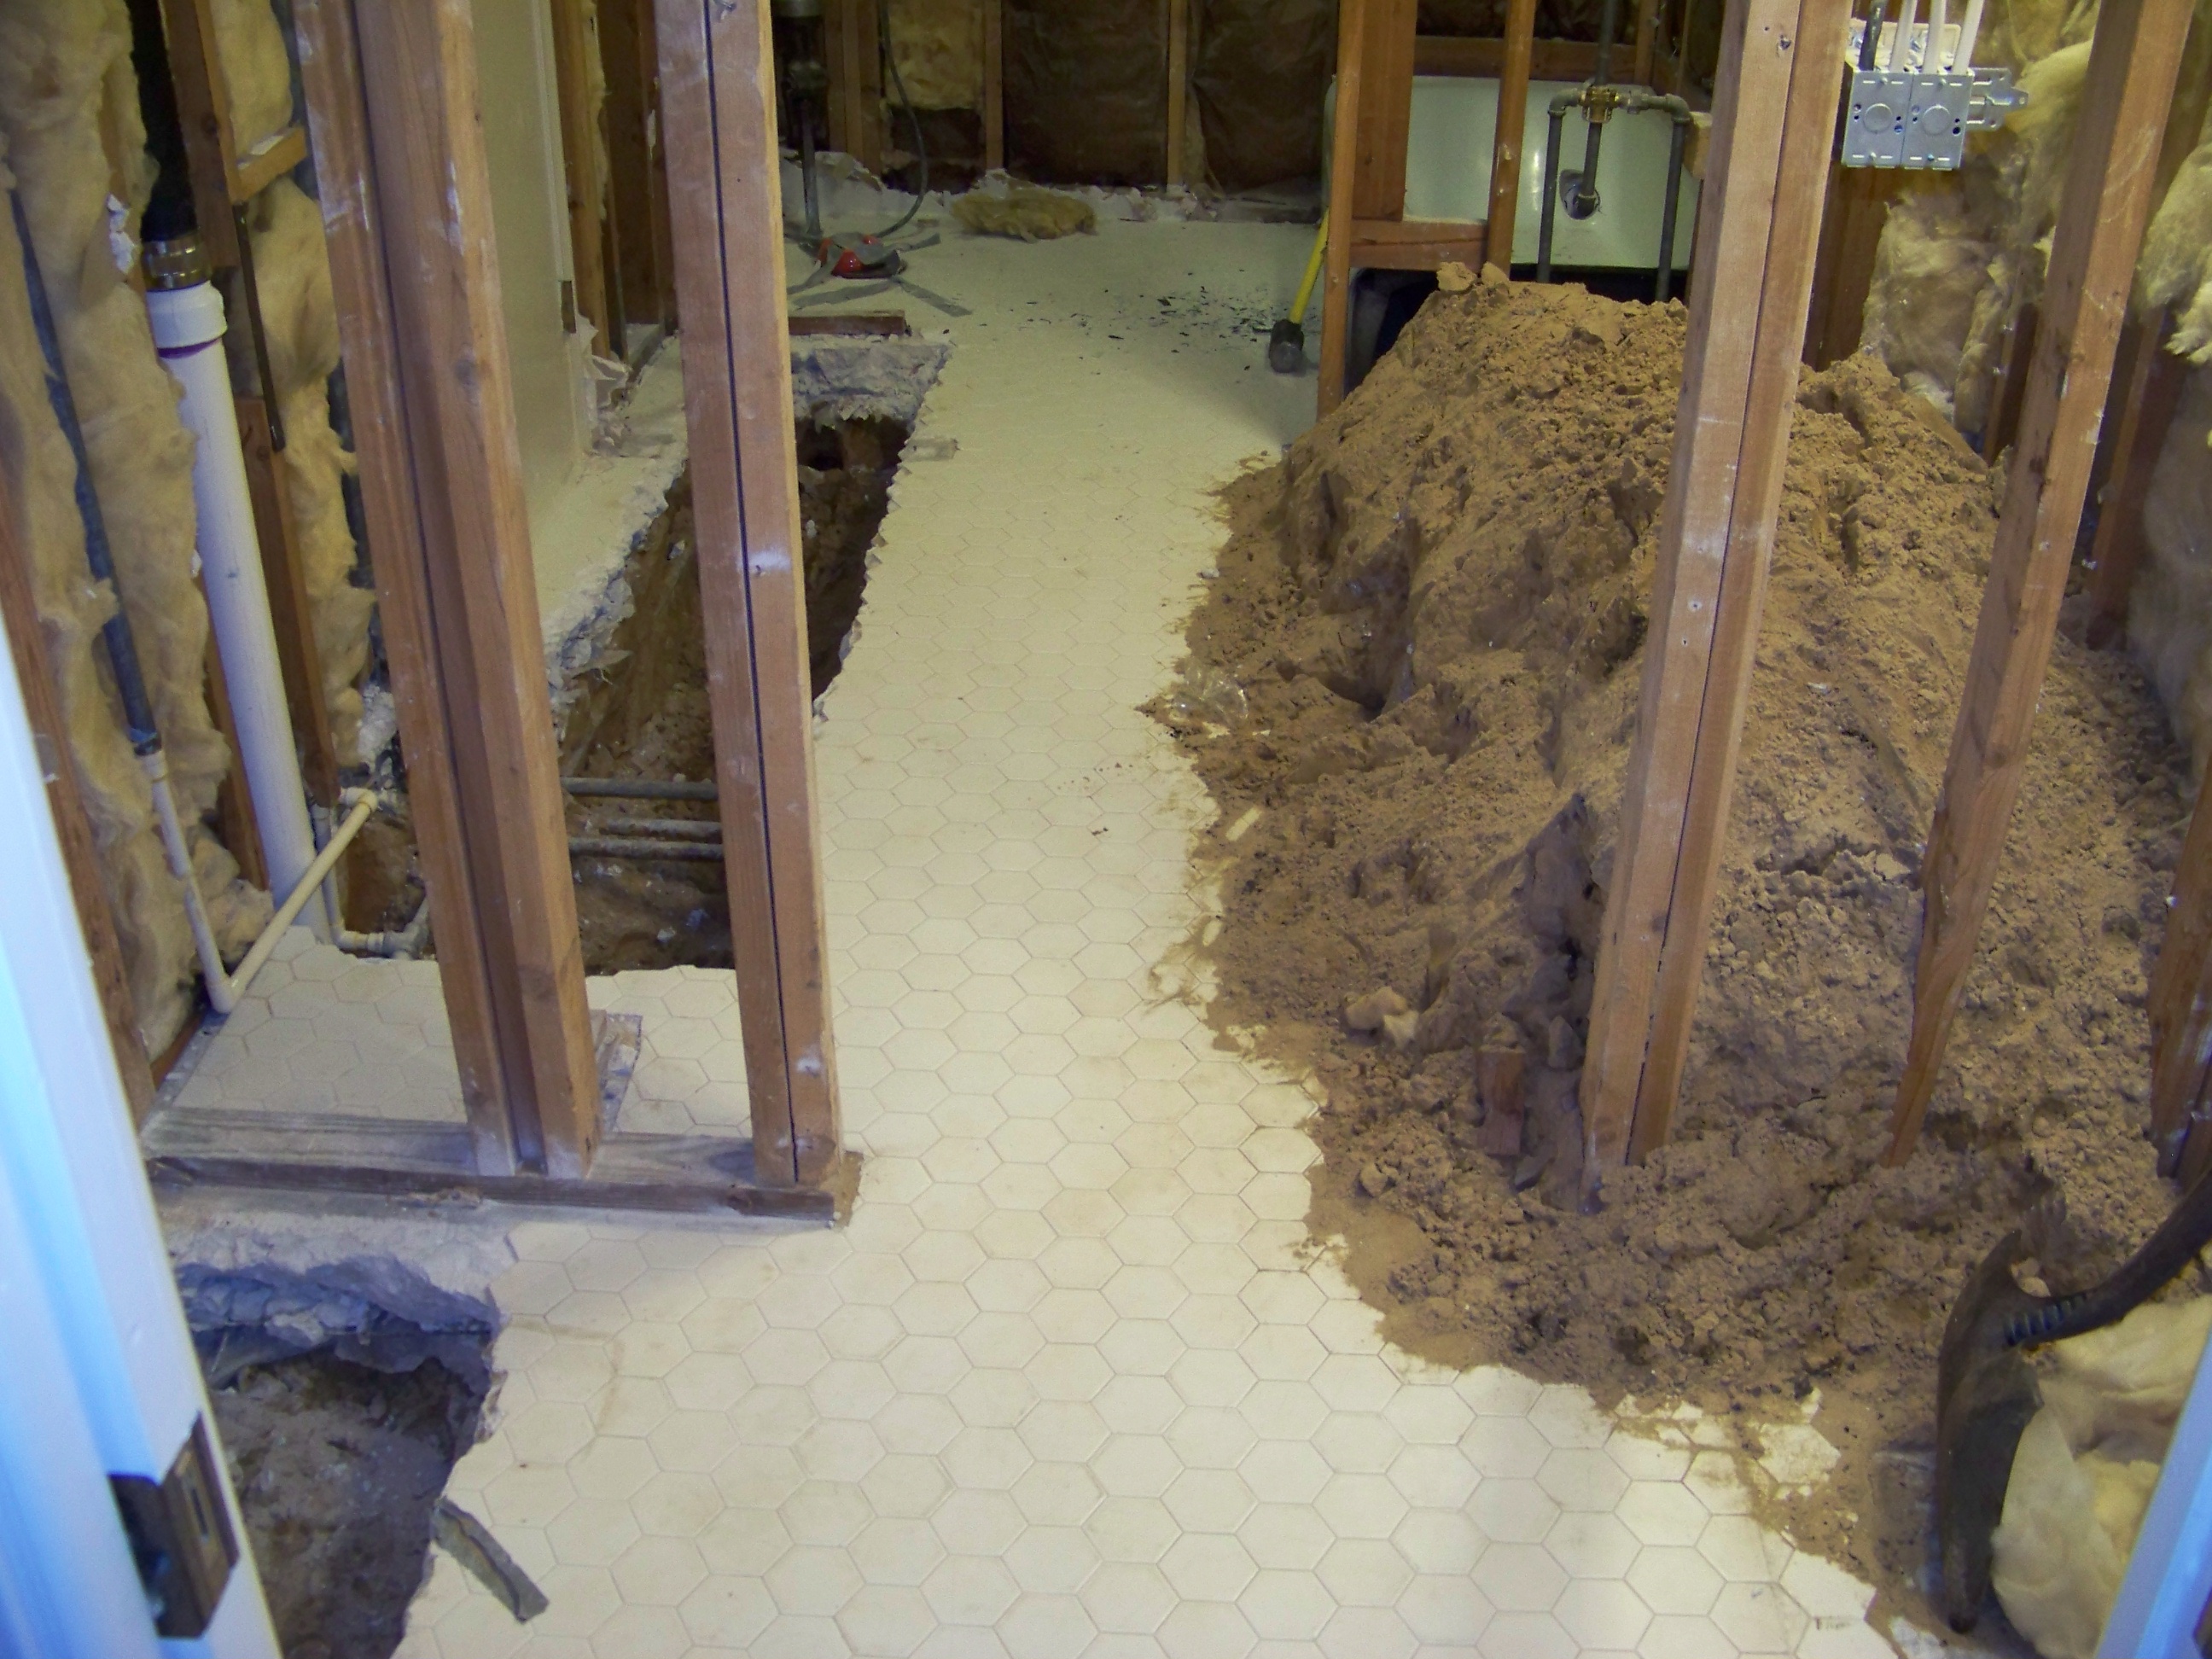 The single largest job in this bathroom remodel is the plumbing. We needed a few fixtures moved (2 toilets and a tub), so we decided to let the professionals do that. They used a jack hammer to do the dirty work, and relocated our plumbing as needed. Here you can see the work in progress...the concrete is partly dug up and the dirt is on the bathroom floor.
Actually, we had the plumbers do more than move a few fixtures. The plumbing in our house is 36+ years old. We've had low water pressure2 since we moved in 7 years ago, and we knew it was caused by mineral build-up inside the pipes. So since the plumbers are already here, we decided to have them re-do the plumbing in our entire house. It makes sense to do it now because more than half the plumbing in our house is exposed.
They spend 3 days digging trenches in our yard, boring through our brick walls, and connecting PVC pipes through our attic. Everything was staged just right, and on the 4th day it was all connected. I was the first to get home that afternoon and was hoping for the best. I turned on every device and fixture I could, started the washing machine and the dishwasher, flushed all the toilets, and turned on the shower. It worked perfectly!
Its going to be interesting to watch our water usage behaviors change now.
Bathroom Design
Maybe now is a good time to explain the bathroom design. Our space is 7' wide and 16' 4" long. It is used as a 1-1/2 bath area, meaning there is about 13' for the master bath and 4' for a guest half bath. The two areas are connected via a pocket door. We like the idea of keeping the two halves connected, but there are several changes needed:
- reduce the space given to the half bath
- replace the tub with a walk-in shower area
- keep the tub/toilet area separate from the main bathroom space.
With that in mind, we designed our own space (click for a larger image):
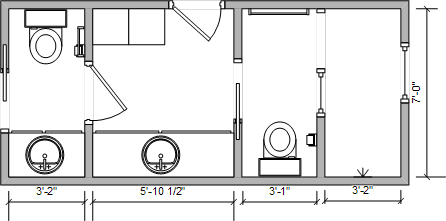
Artifacts that aren't visible in the diagram:
- the wall that separates the shower from the toilet is 2' of frame & tile (floor to ceiling), 2' of glass, and 3' open air
- shower drain is in center of shower area
- shower area is separated from toilet area by 5" ridge on floor
- single-blower ventilation system pulls air from both toilet areas simultaneously via 2 switches
- GFI receptacles near all wet surfaces
- receptacles on both sides of mirror in center space
- receptacle near ceiling for lighting above closet
- new AC return vent in ceiling to pull from hallway outside bathroom
- network + coax jack to be installed for adjacent bedroom and cables pulled to crawl space (for future use)
- all surfaces drywalled (shower to use hardy backer or equivalent
- all floors tiled
- shower area tiled
- tile on walls (pending the cost of mtrls + labor)
Construction Phase 1
Construction got started pretty slowly. There were lots of odds and ends to buy: wire and electrical supplies, ventilation tubing and supplies, lumber and supplies, etc. Then there were decisions to make: exactly where should each wall be? Where should the light switches and electrical outlets go? Where should the AC vents, exhaust fans, and light fixtures be placed? Easy decisions, but each with complications. We spent an entire night marking up a printed diagram so we'd know what to do from this point on.
 | A picture of the new load bearing wall we built. It makes the new half bath about a foot narrower than before. I made sure to cut the vertical 2x4's about 1/8" longer than they needed to be and wedge them into place, which helped transfer the ceiling load from the other 2x4 wall (behind it). That wall will be removed shortly. |
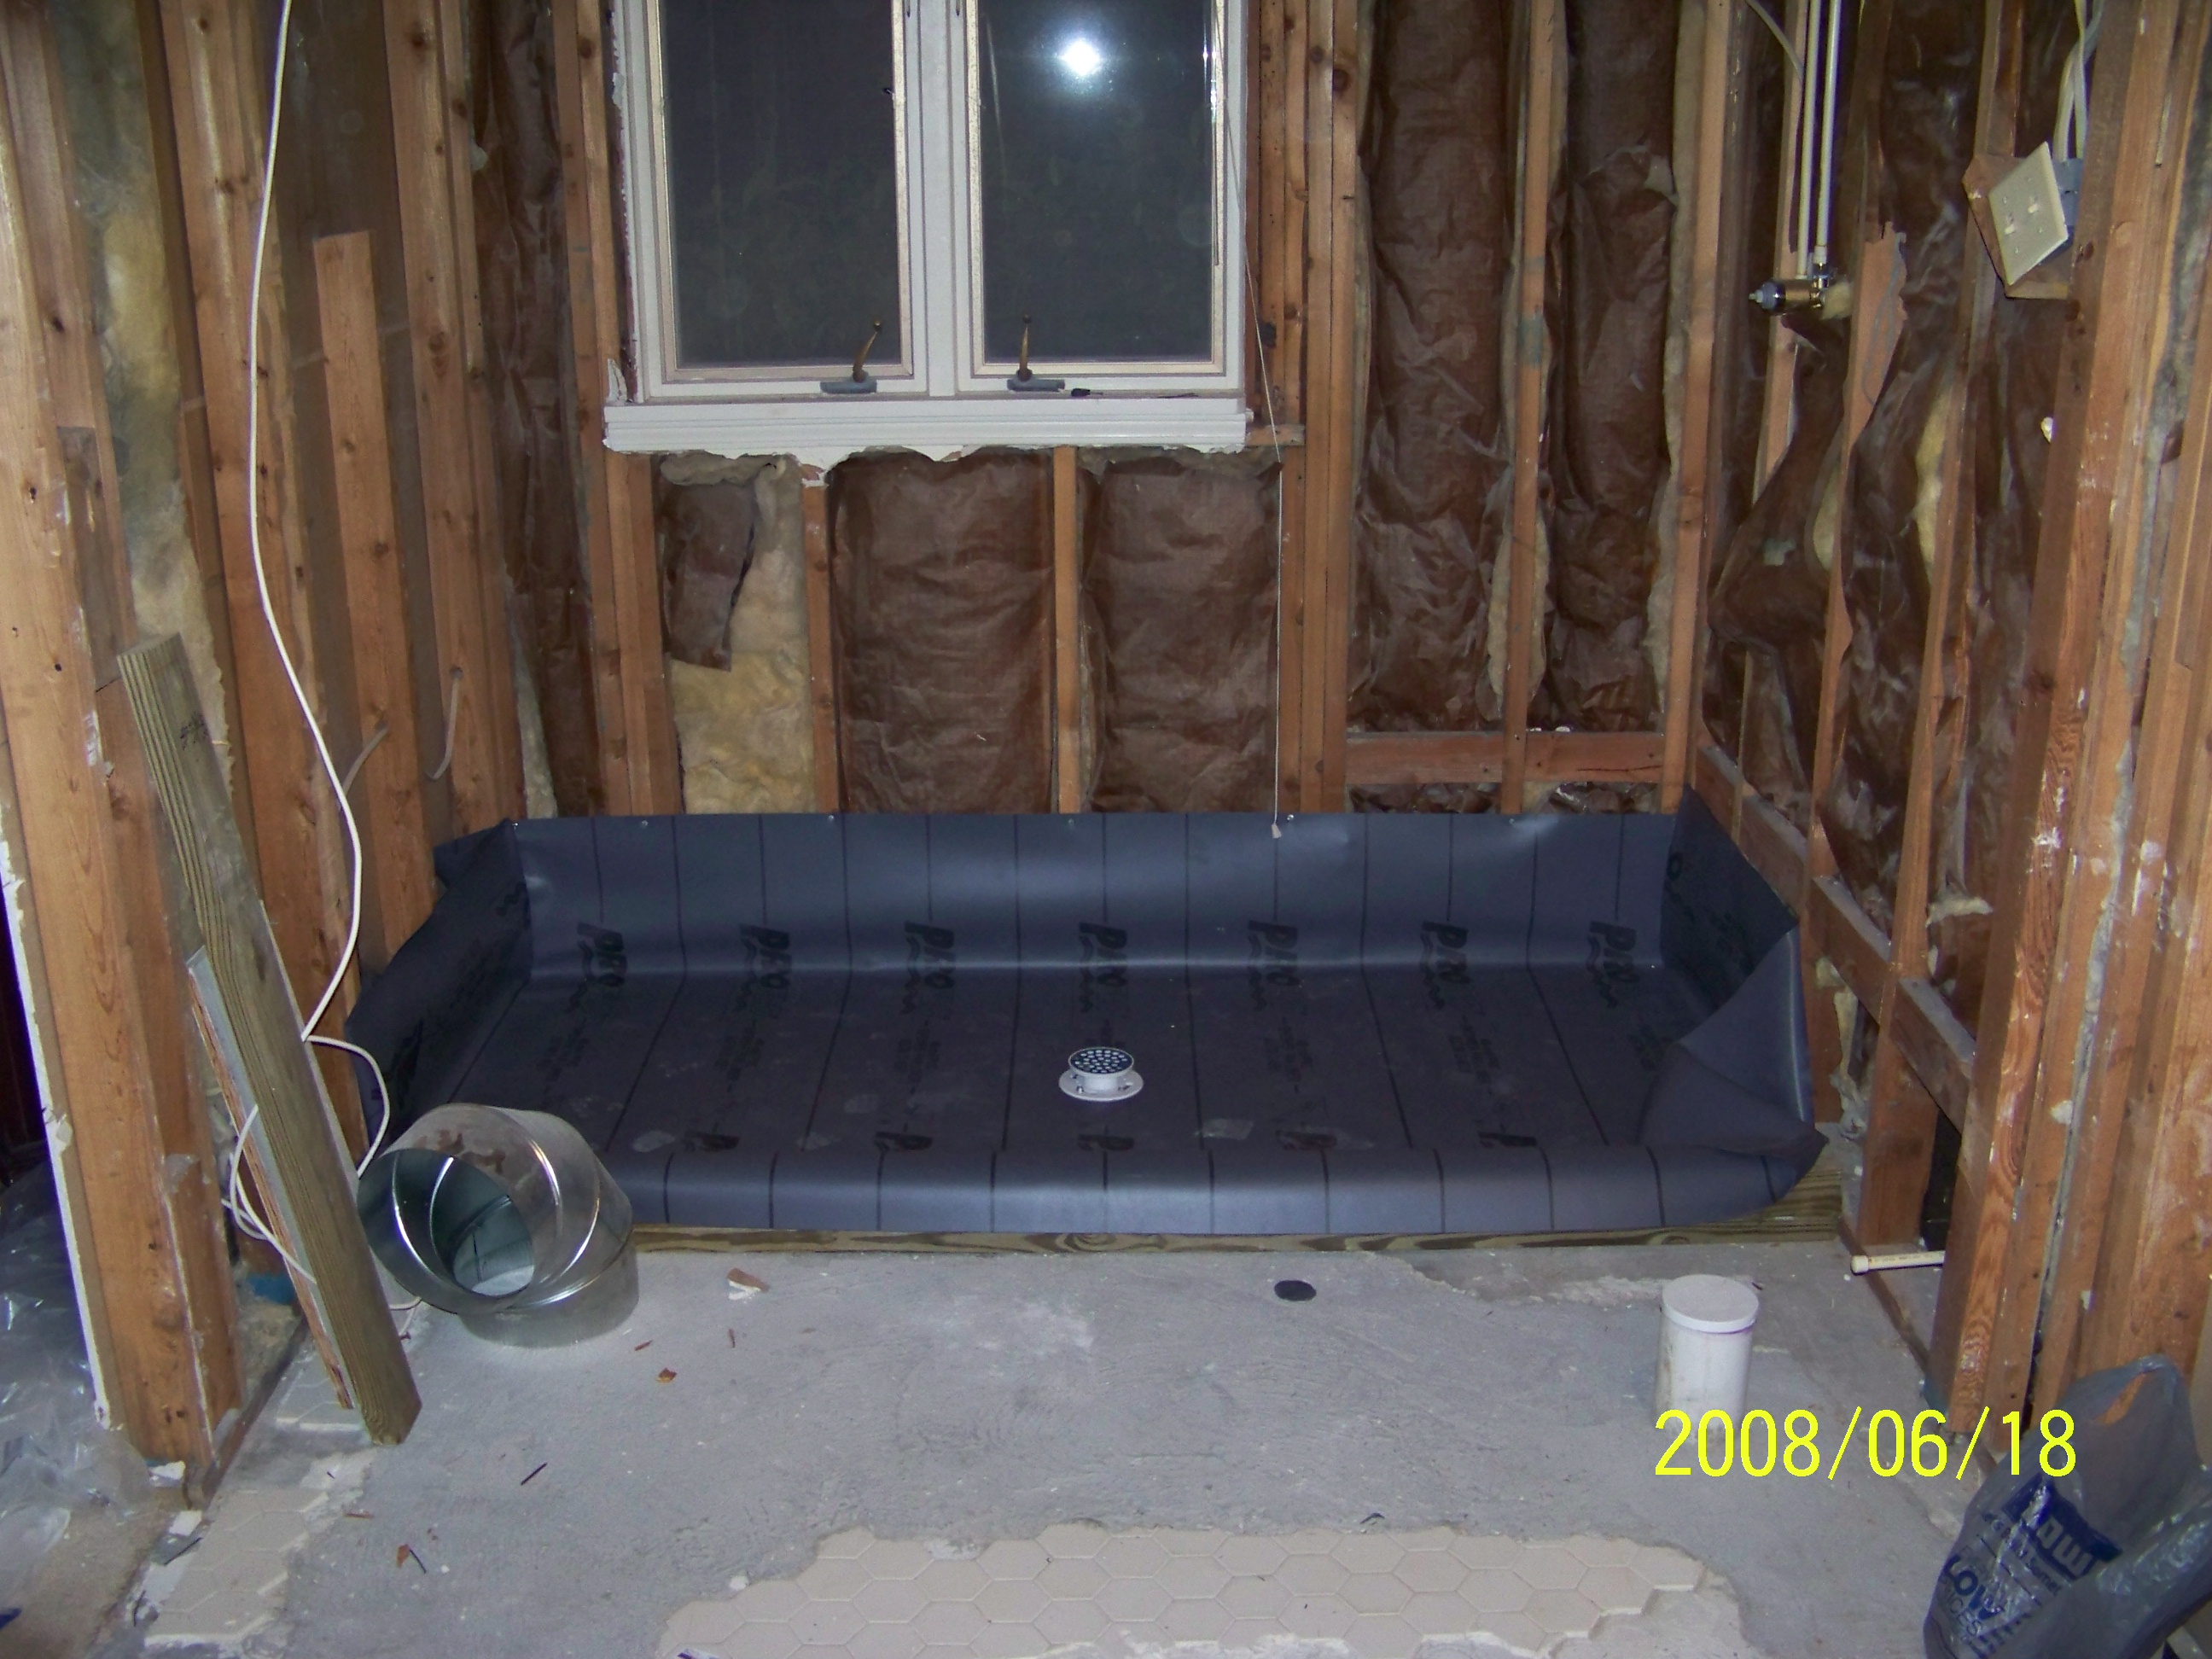 | The new shower area. Underneath the plastic is a footer made of pressure-treated lumber. There will be a 1/2-wall here about 5 feet high, with glass going up to the ceiling. The opening will be on the left side and the shower will be on the right wall. We had originally wanted to do a sunken shower, but the cost and labor made it impossible. Too much concrete. Not to mention that the shower is next to the footer of the exterior wall. I'm happy we avoided that experience. :-) |
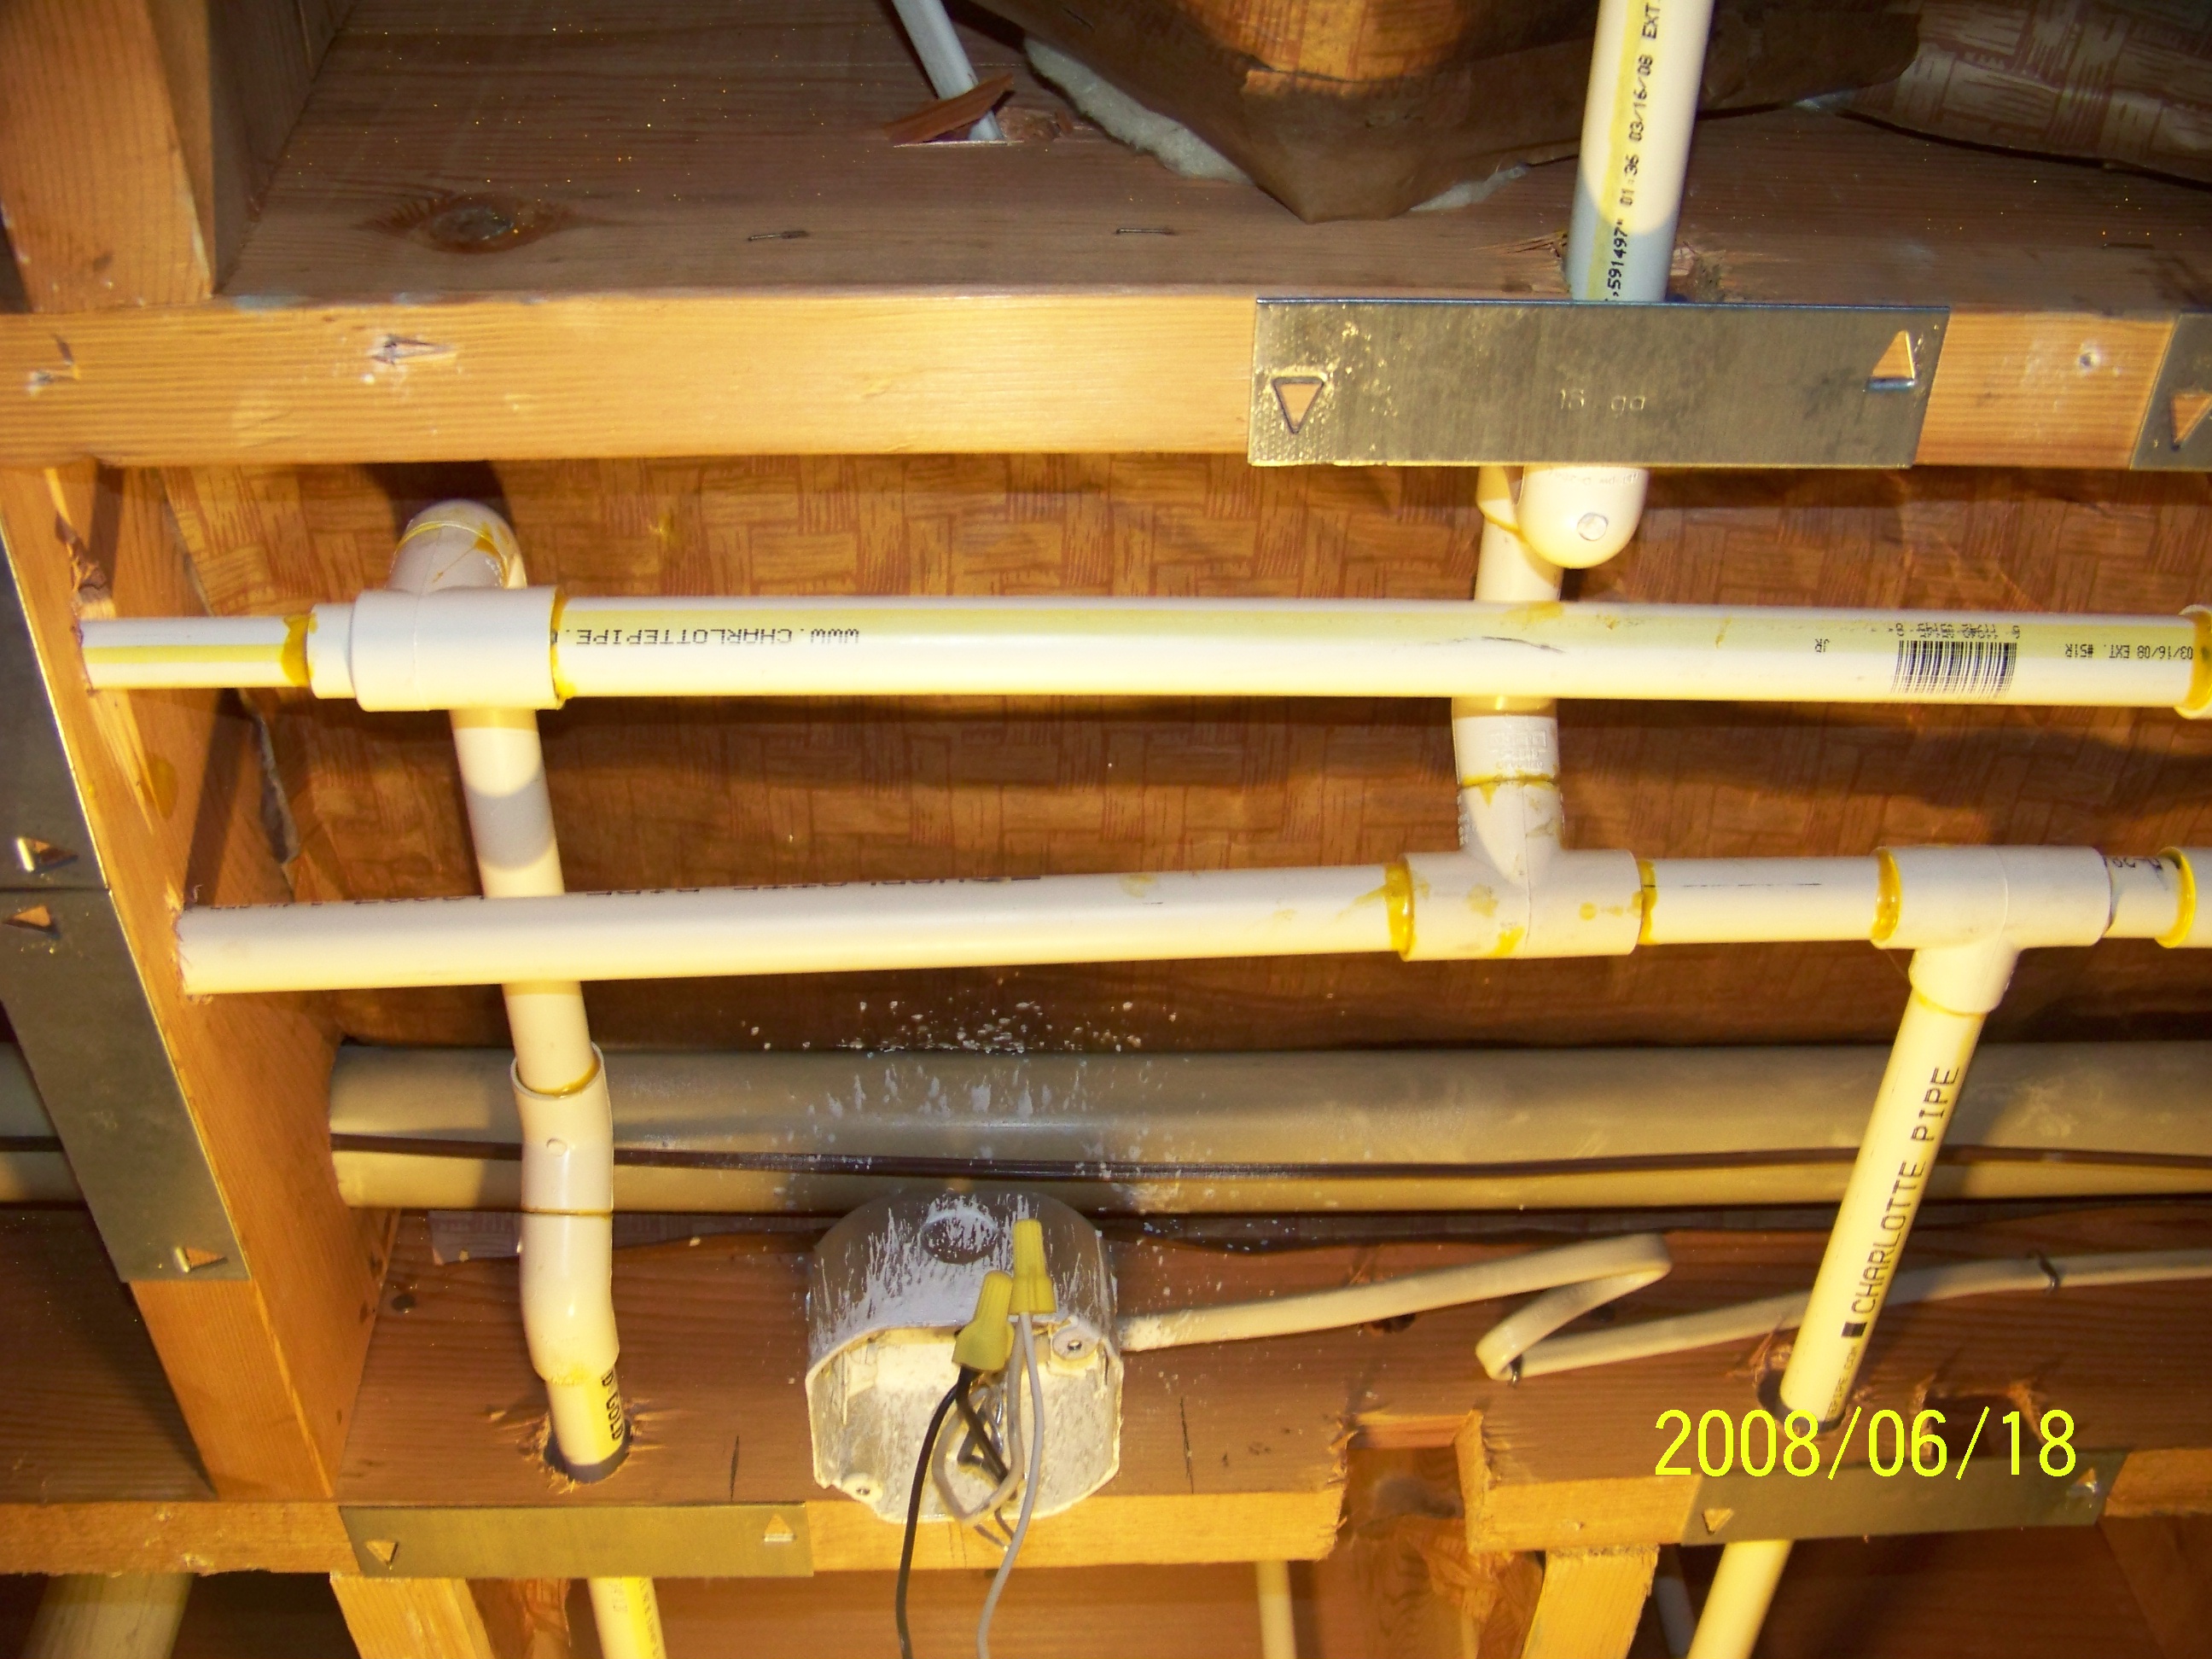 | Some of the new plumbing in the ceiling. You can see the 2x12 beams that our house is built with. I'm happy to be working with a large space between two floors rather than with an attic space. This way I can work easily from a ladder, and our AC doesn't escape into the attic. |
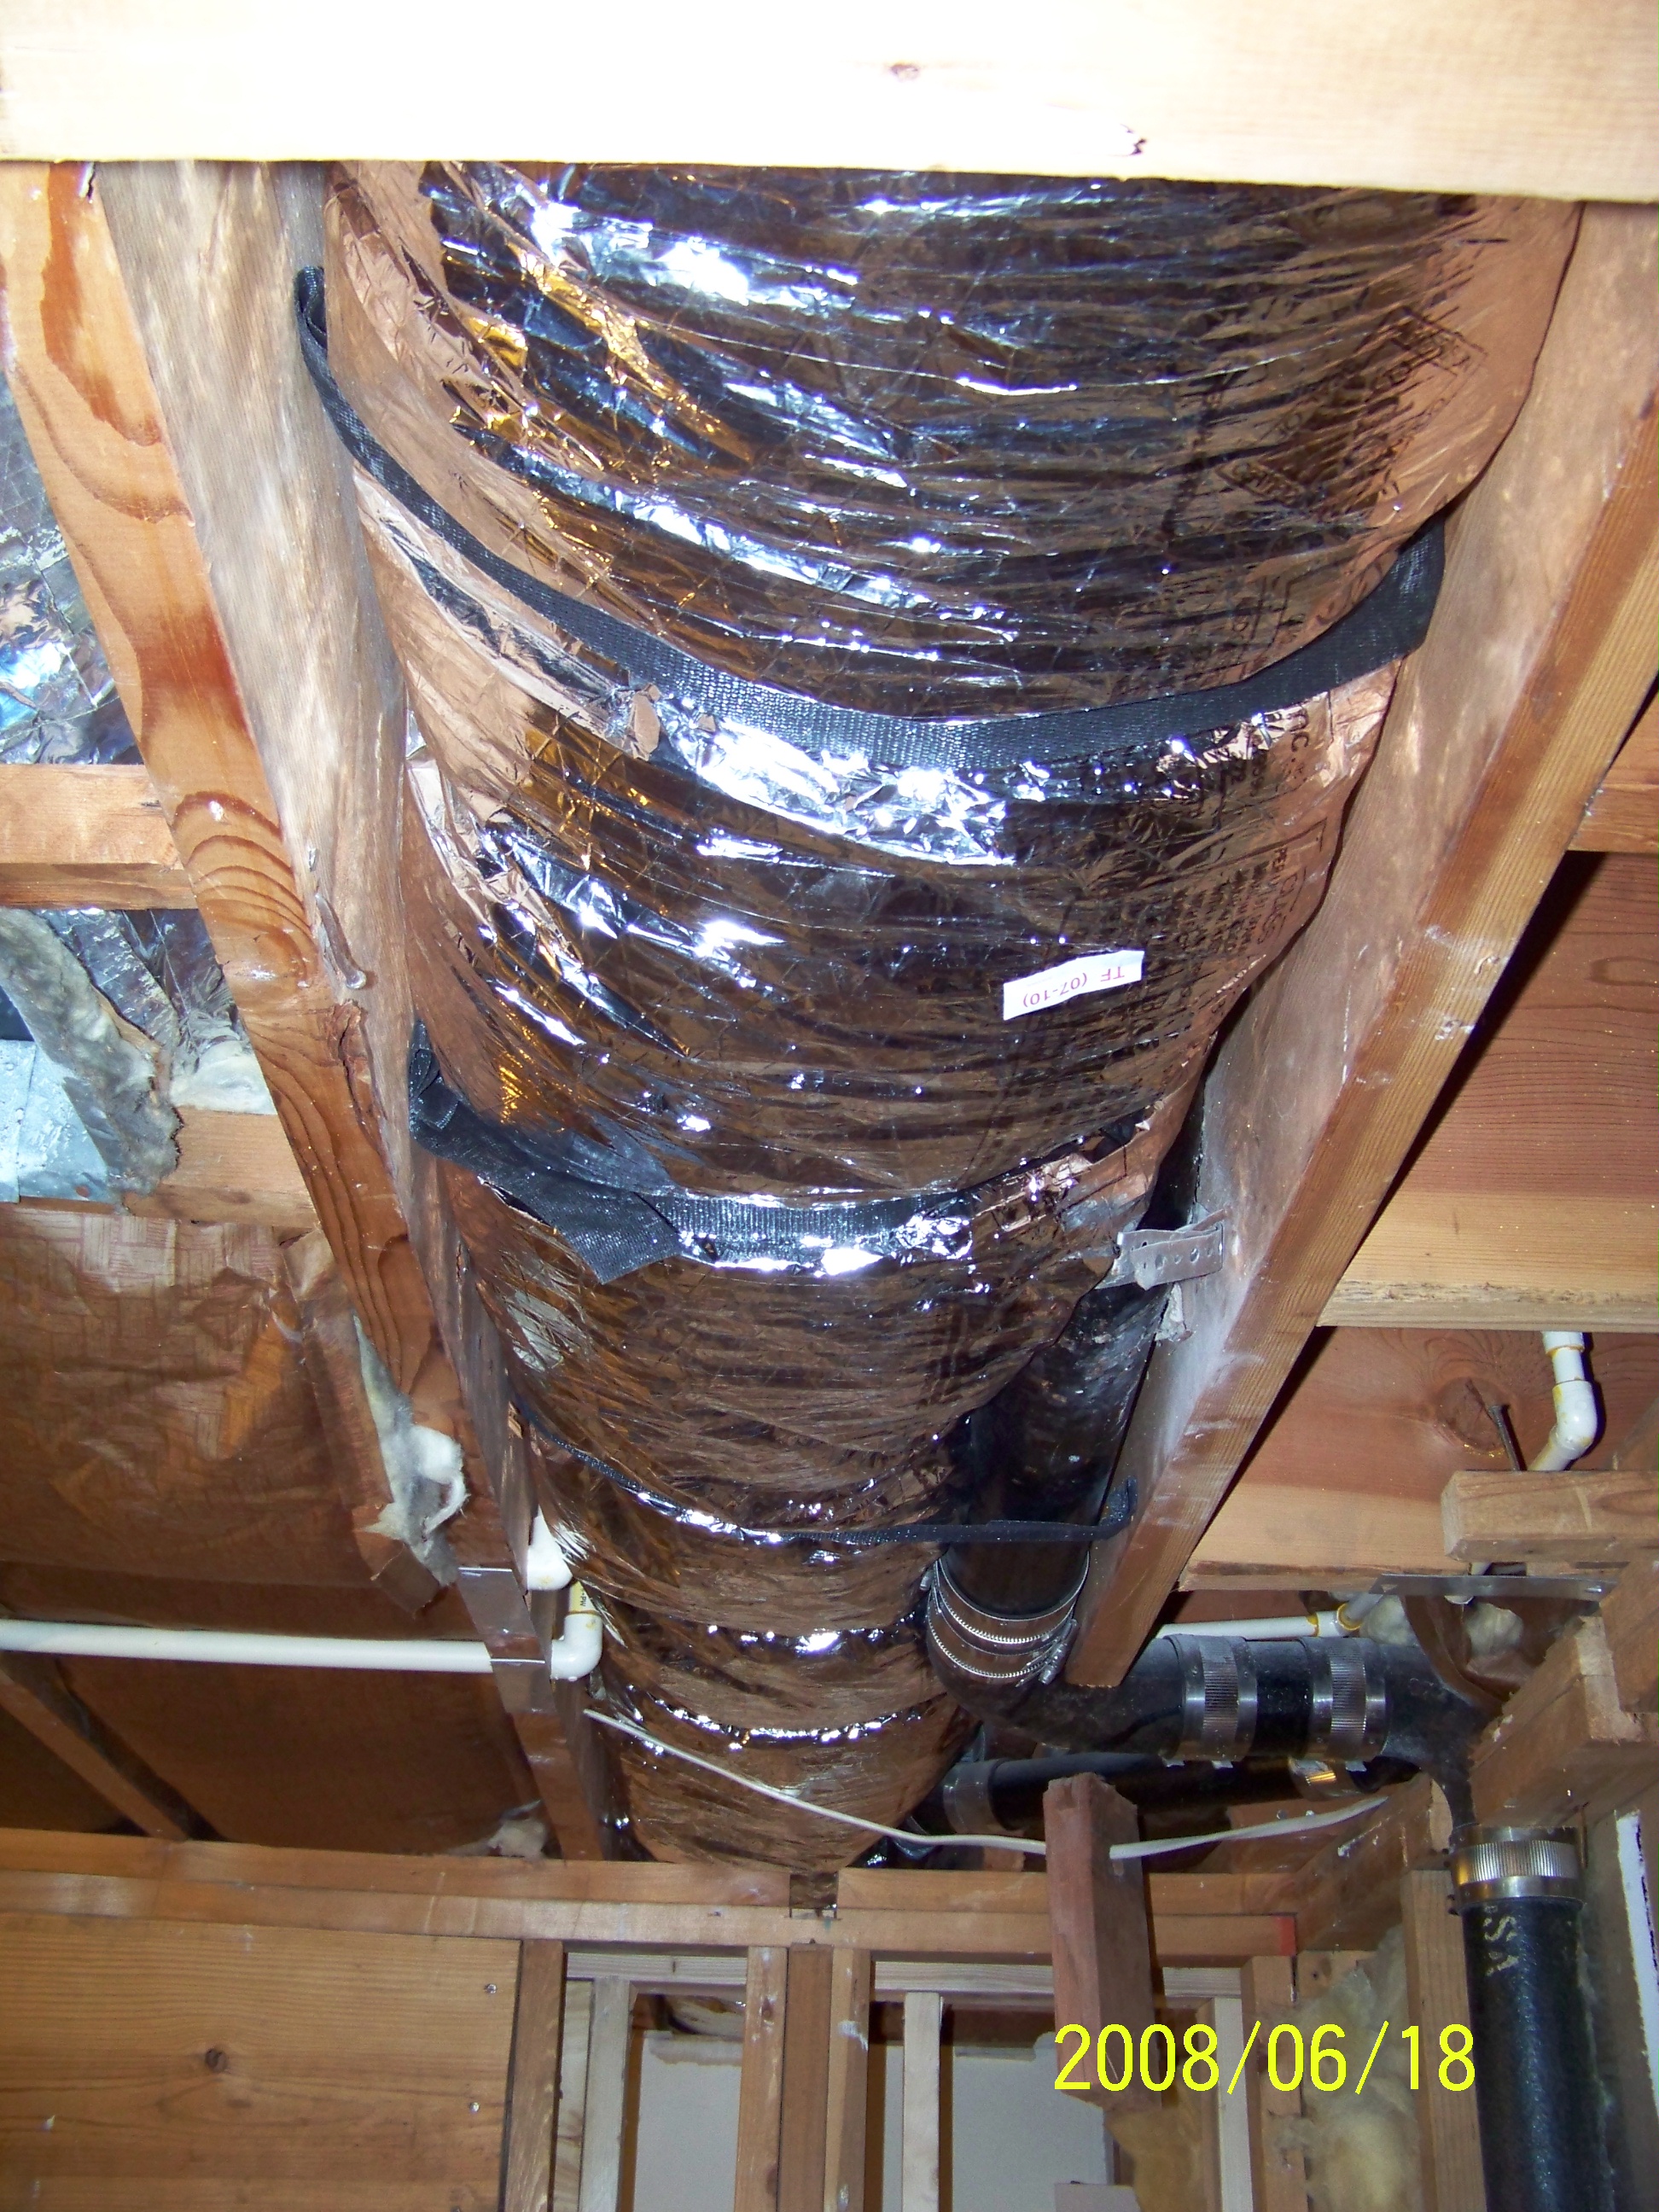 | New flexible AC tubing. Much easier to install than I imagined. The hard part was keeping it in place while I installed the support webbing. Never knew that my head could double as a duct support. |
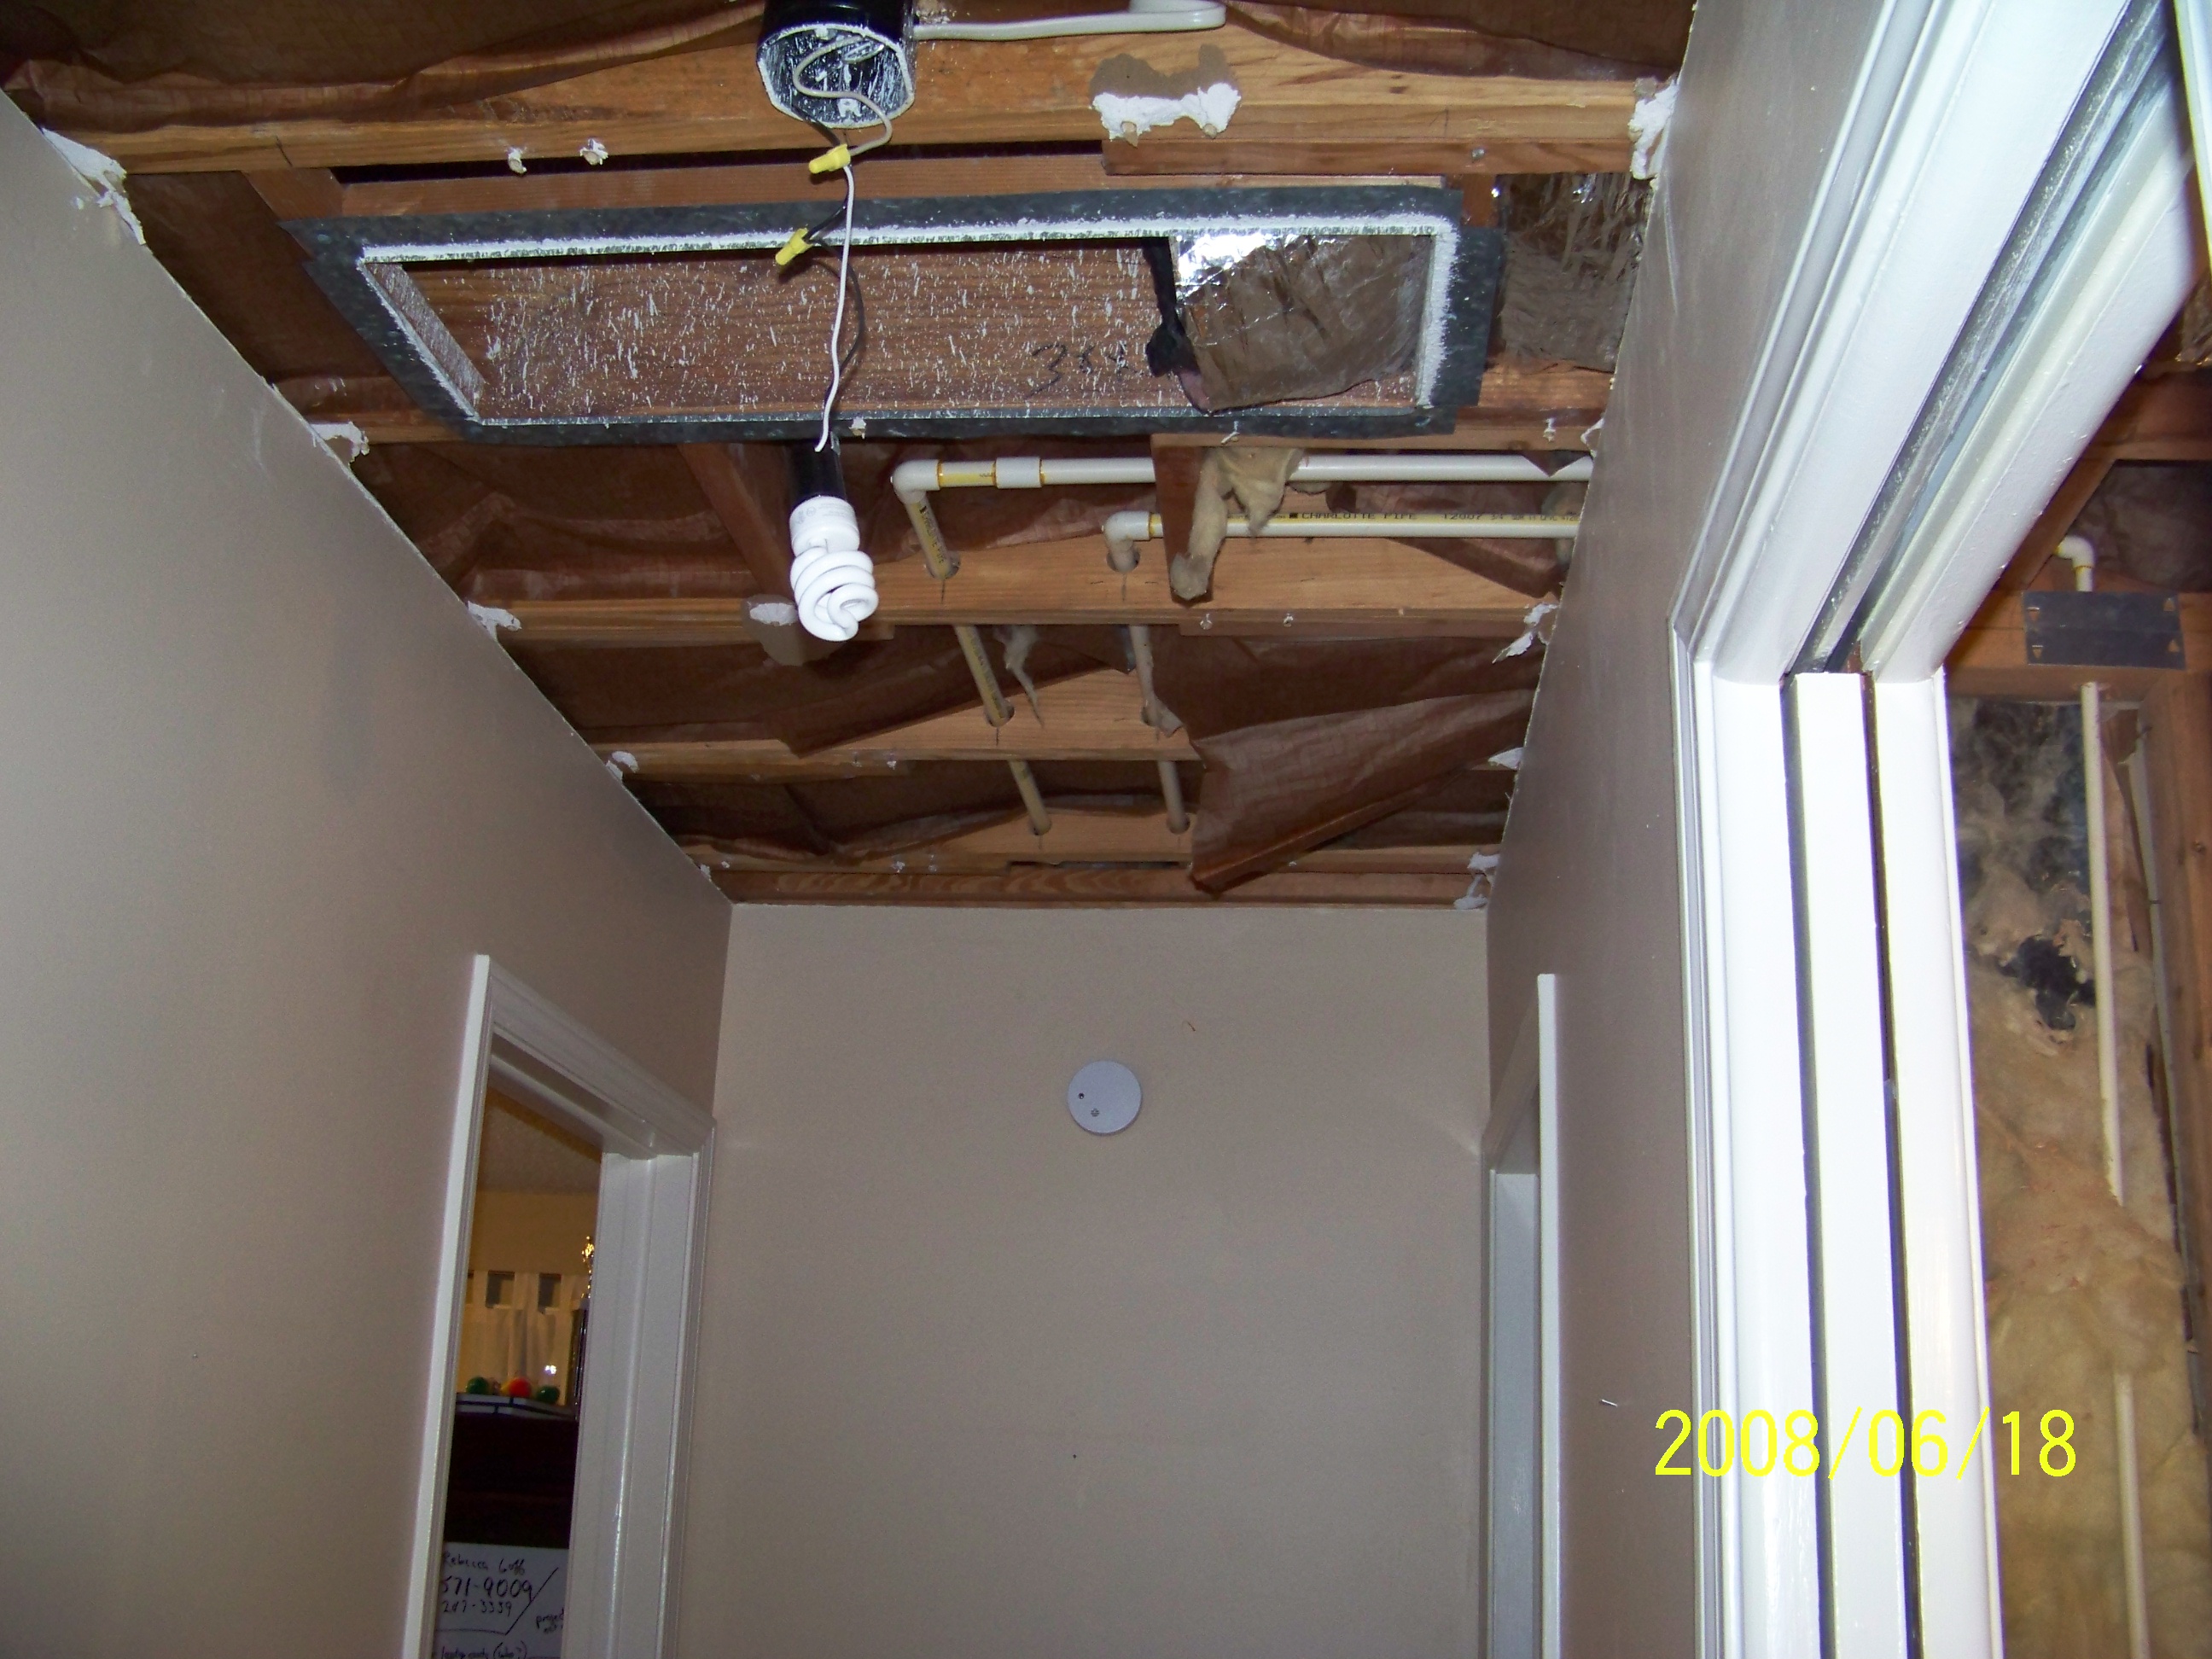 | The hallway with ceiling removed for the plumbers. I installed a temporary light fixture too so we'd still have light in the hall. |
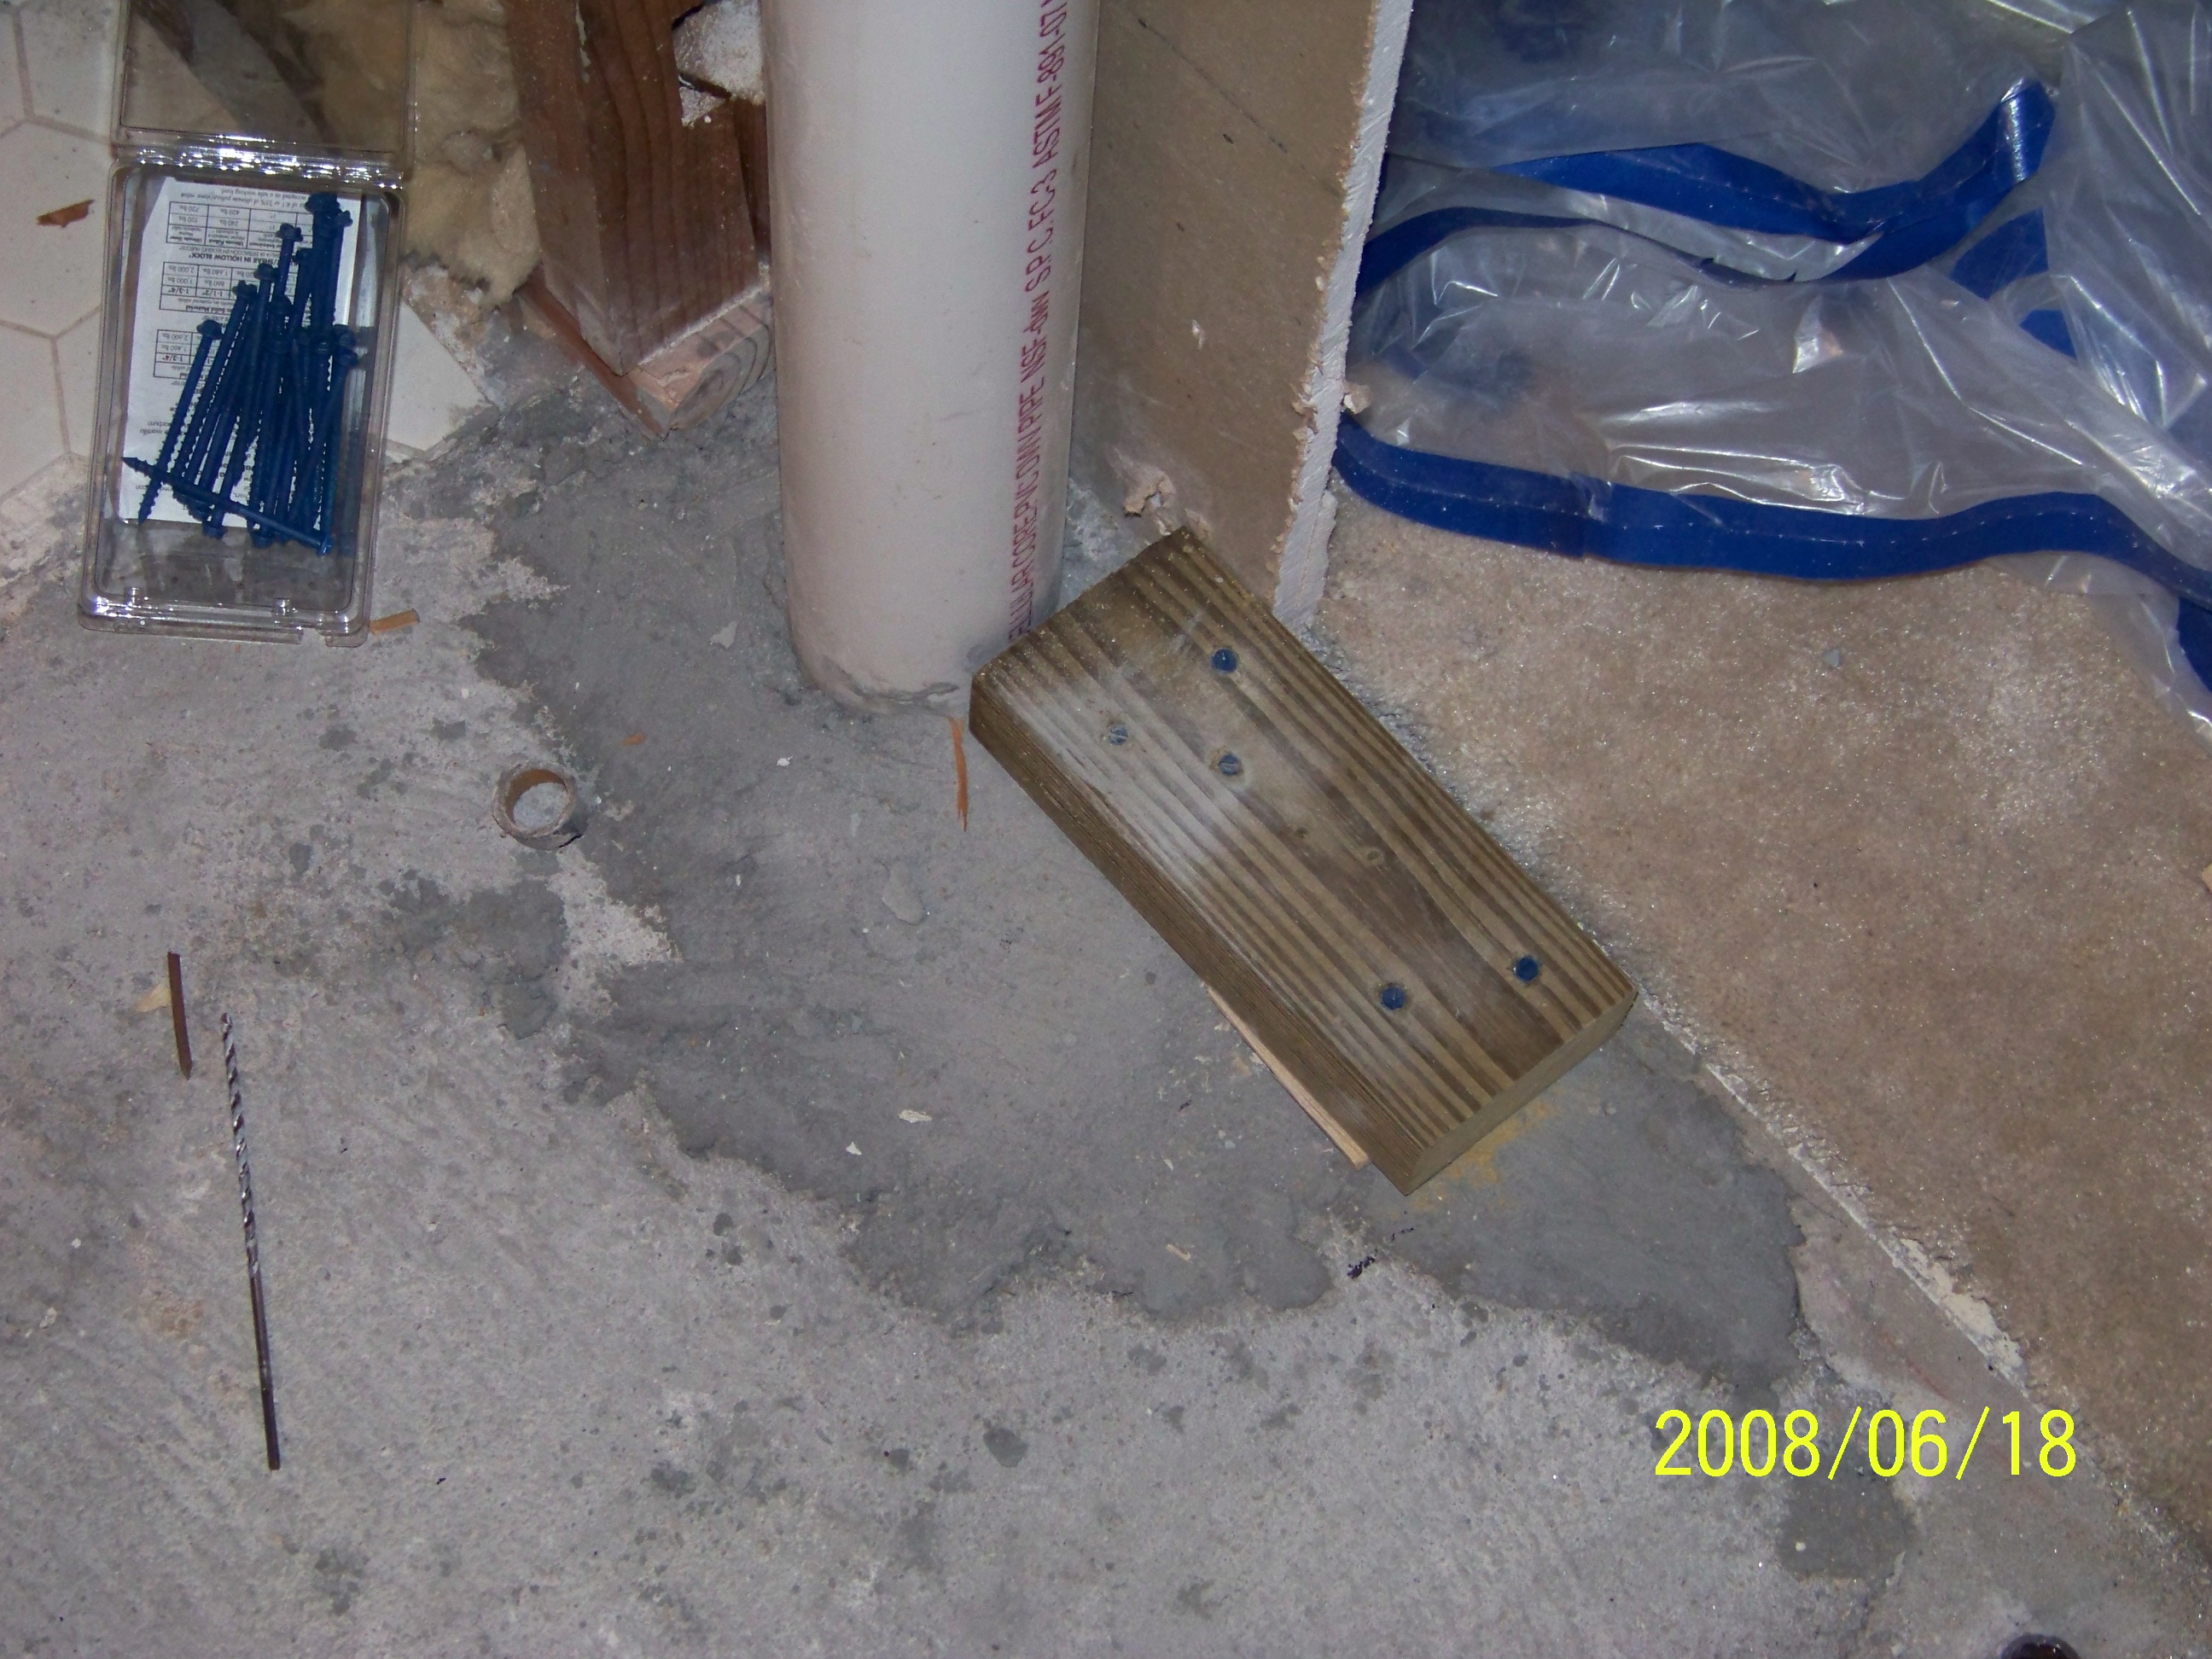 | Ah, the cornerstone of the entire project. Doesn't look like much, but we're moving the bedroom door by a foot or so. There will only be six inches between the drain pipe to the left and our bedroom door. So this little piece of lumber plays a critical role. You can see the concrete underneath it has been patched. I was worried that the new concrete wouldn't be strong enough to hold the Tapcon screws in place. And if that doesn't work, then the stability of our our future bedroom door would be in question. But luckily there was old concrete underneath the patch. I got 5 screws solidly embedded in the concrete. Soon I'll install four 2x4's on this lumber and progress can continue. |
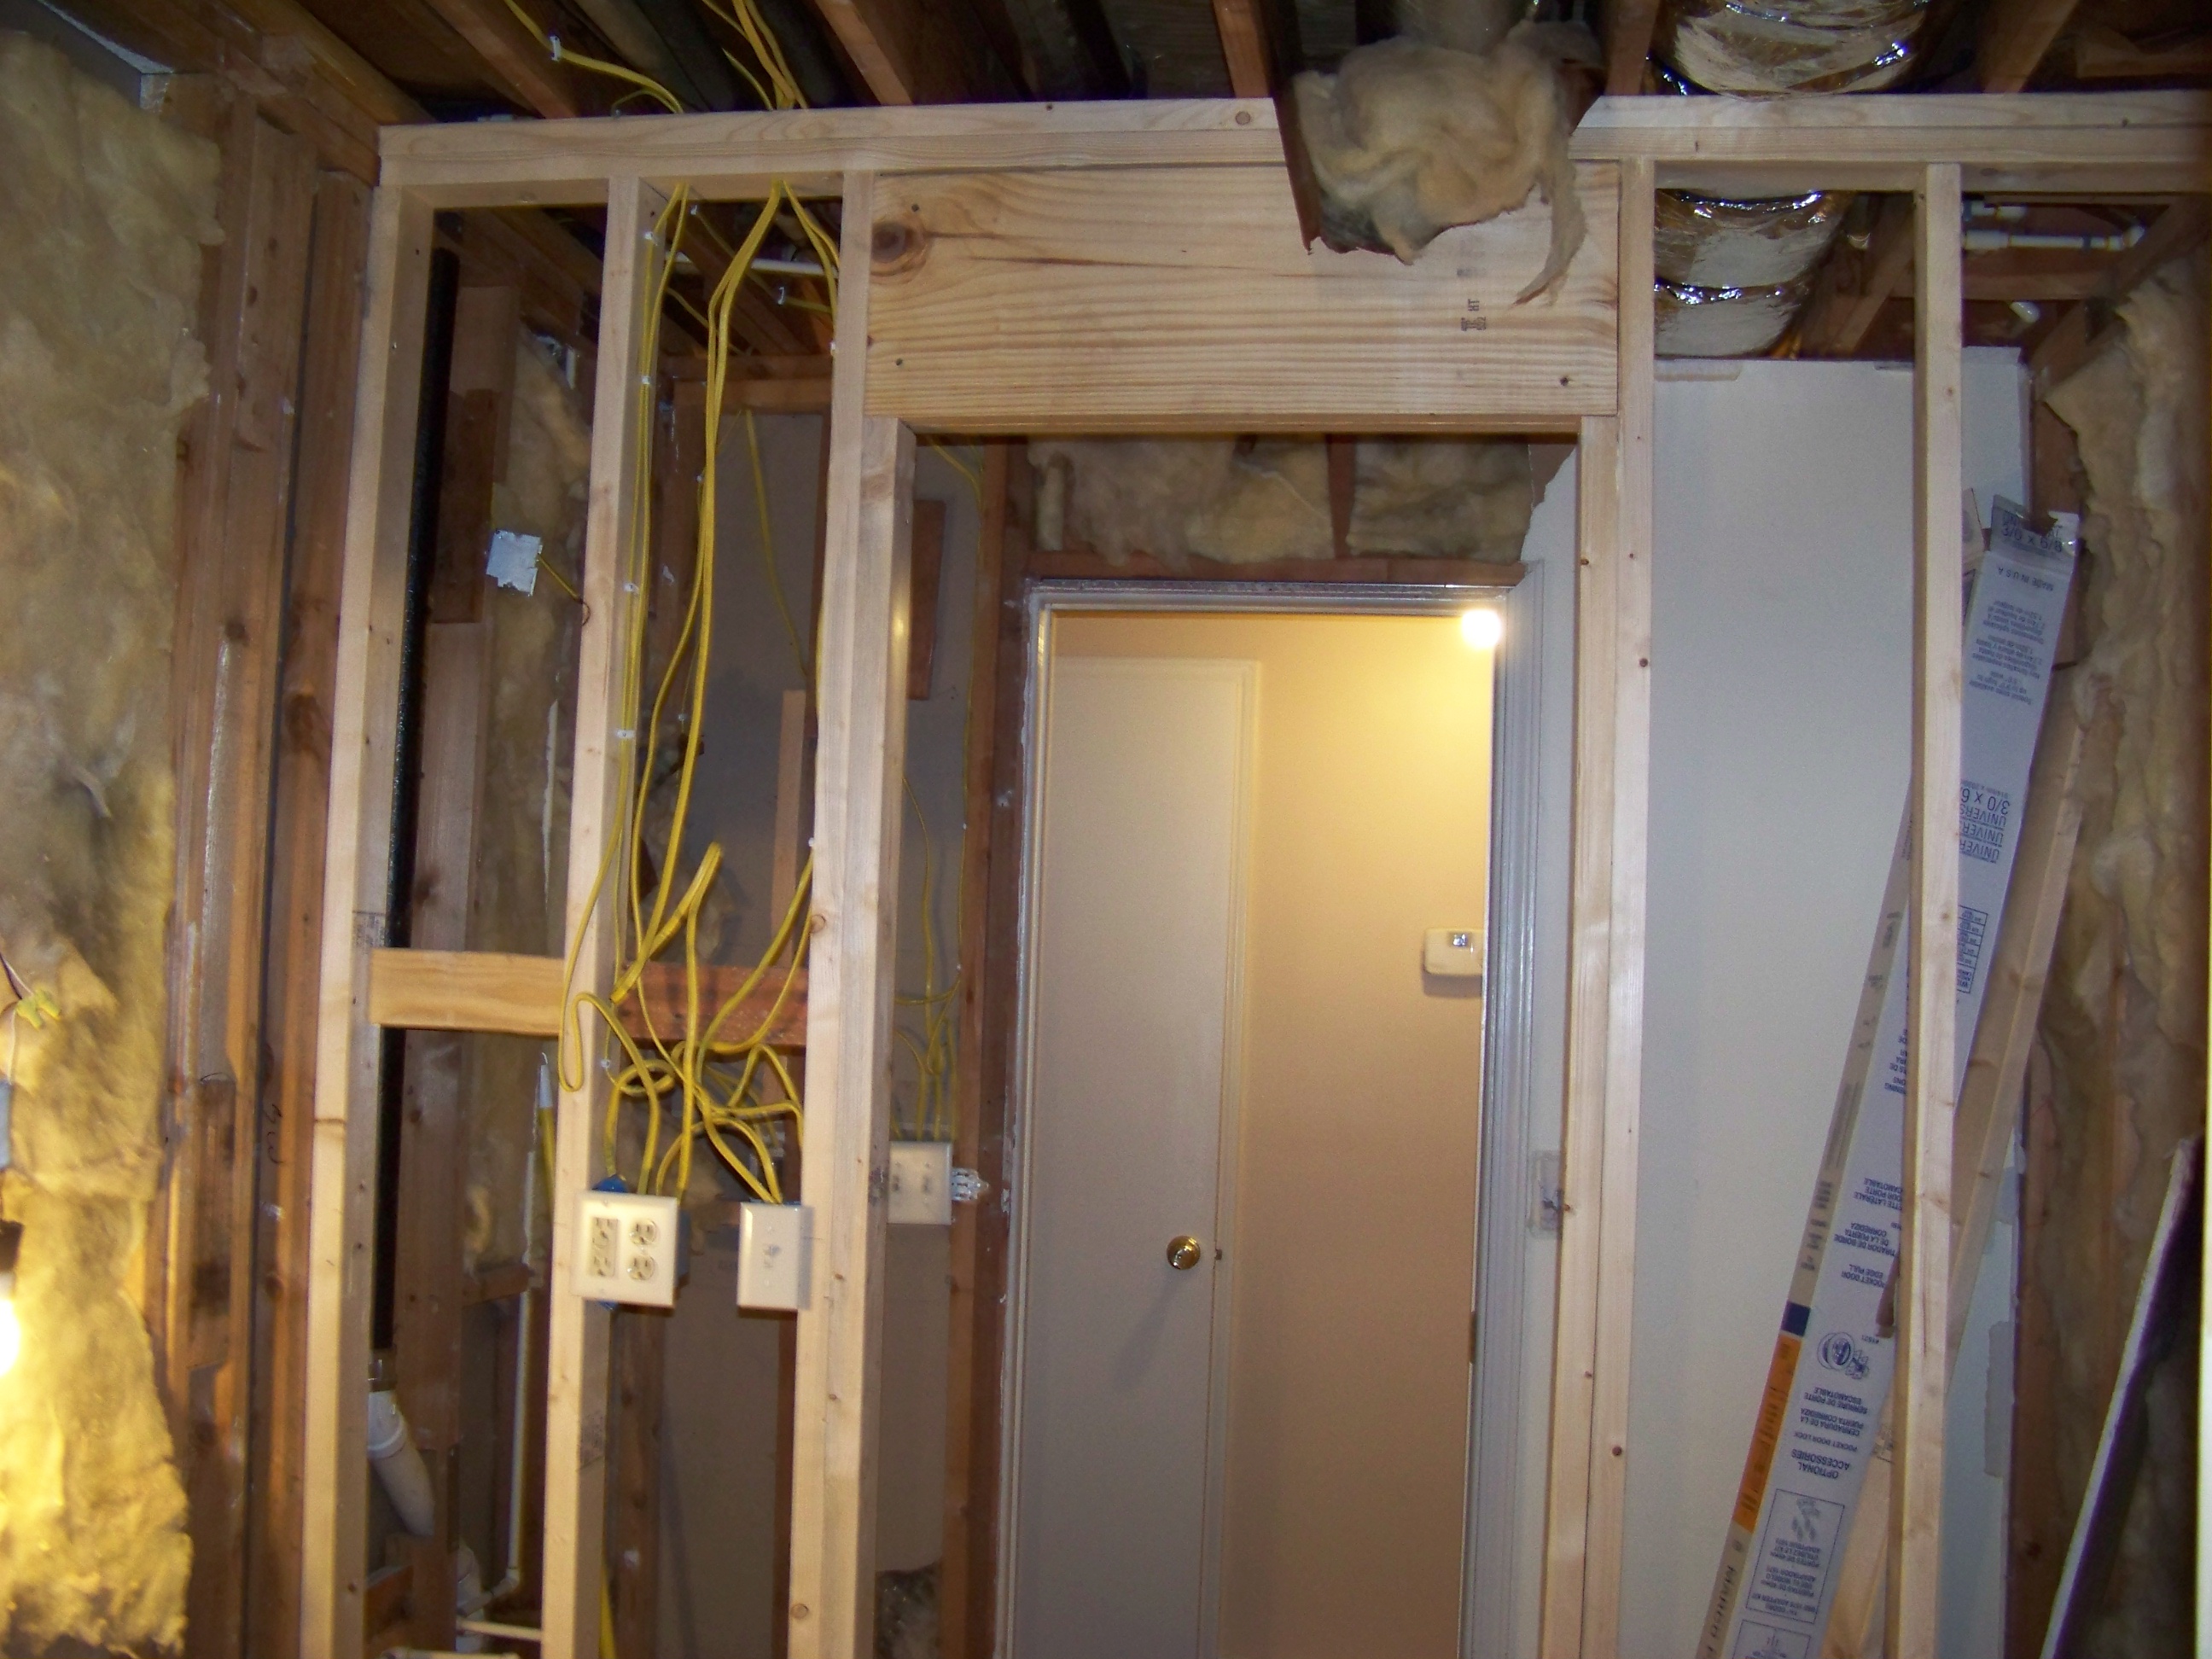 | The new load-bearing wall we built. This right side of this wall is directly underneath the tub upstairs, so the 'load' in load-bearing was especially important here. We attached a piece of pressure treated lumber to the floor with tapcon screws, then installed a ceiling beam, making sure it was plumb with the floor beam. (its amazing what you can do with fishing line and lead weights :-) ). Then I cut all the supporting studs about 1/8 inch too long and tapped them into place with a hammer. This helped them gradually take the weight of the ceiling while letting me see if my measurements were accurate. By the time I finished, I knew this wall was holding the weight because of the sound the studs make when I hit them with my hand. The higher the pitch, the more weight they carry. The old wall (not shown here) wasn't holding any weight so I took it out easily. |
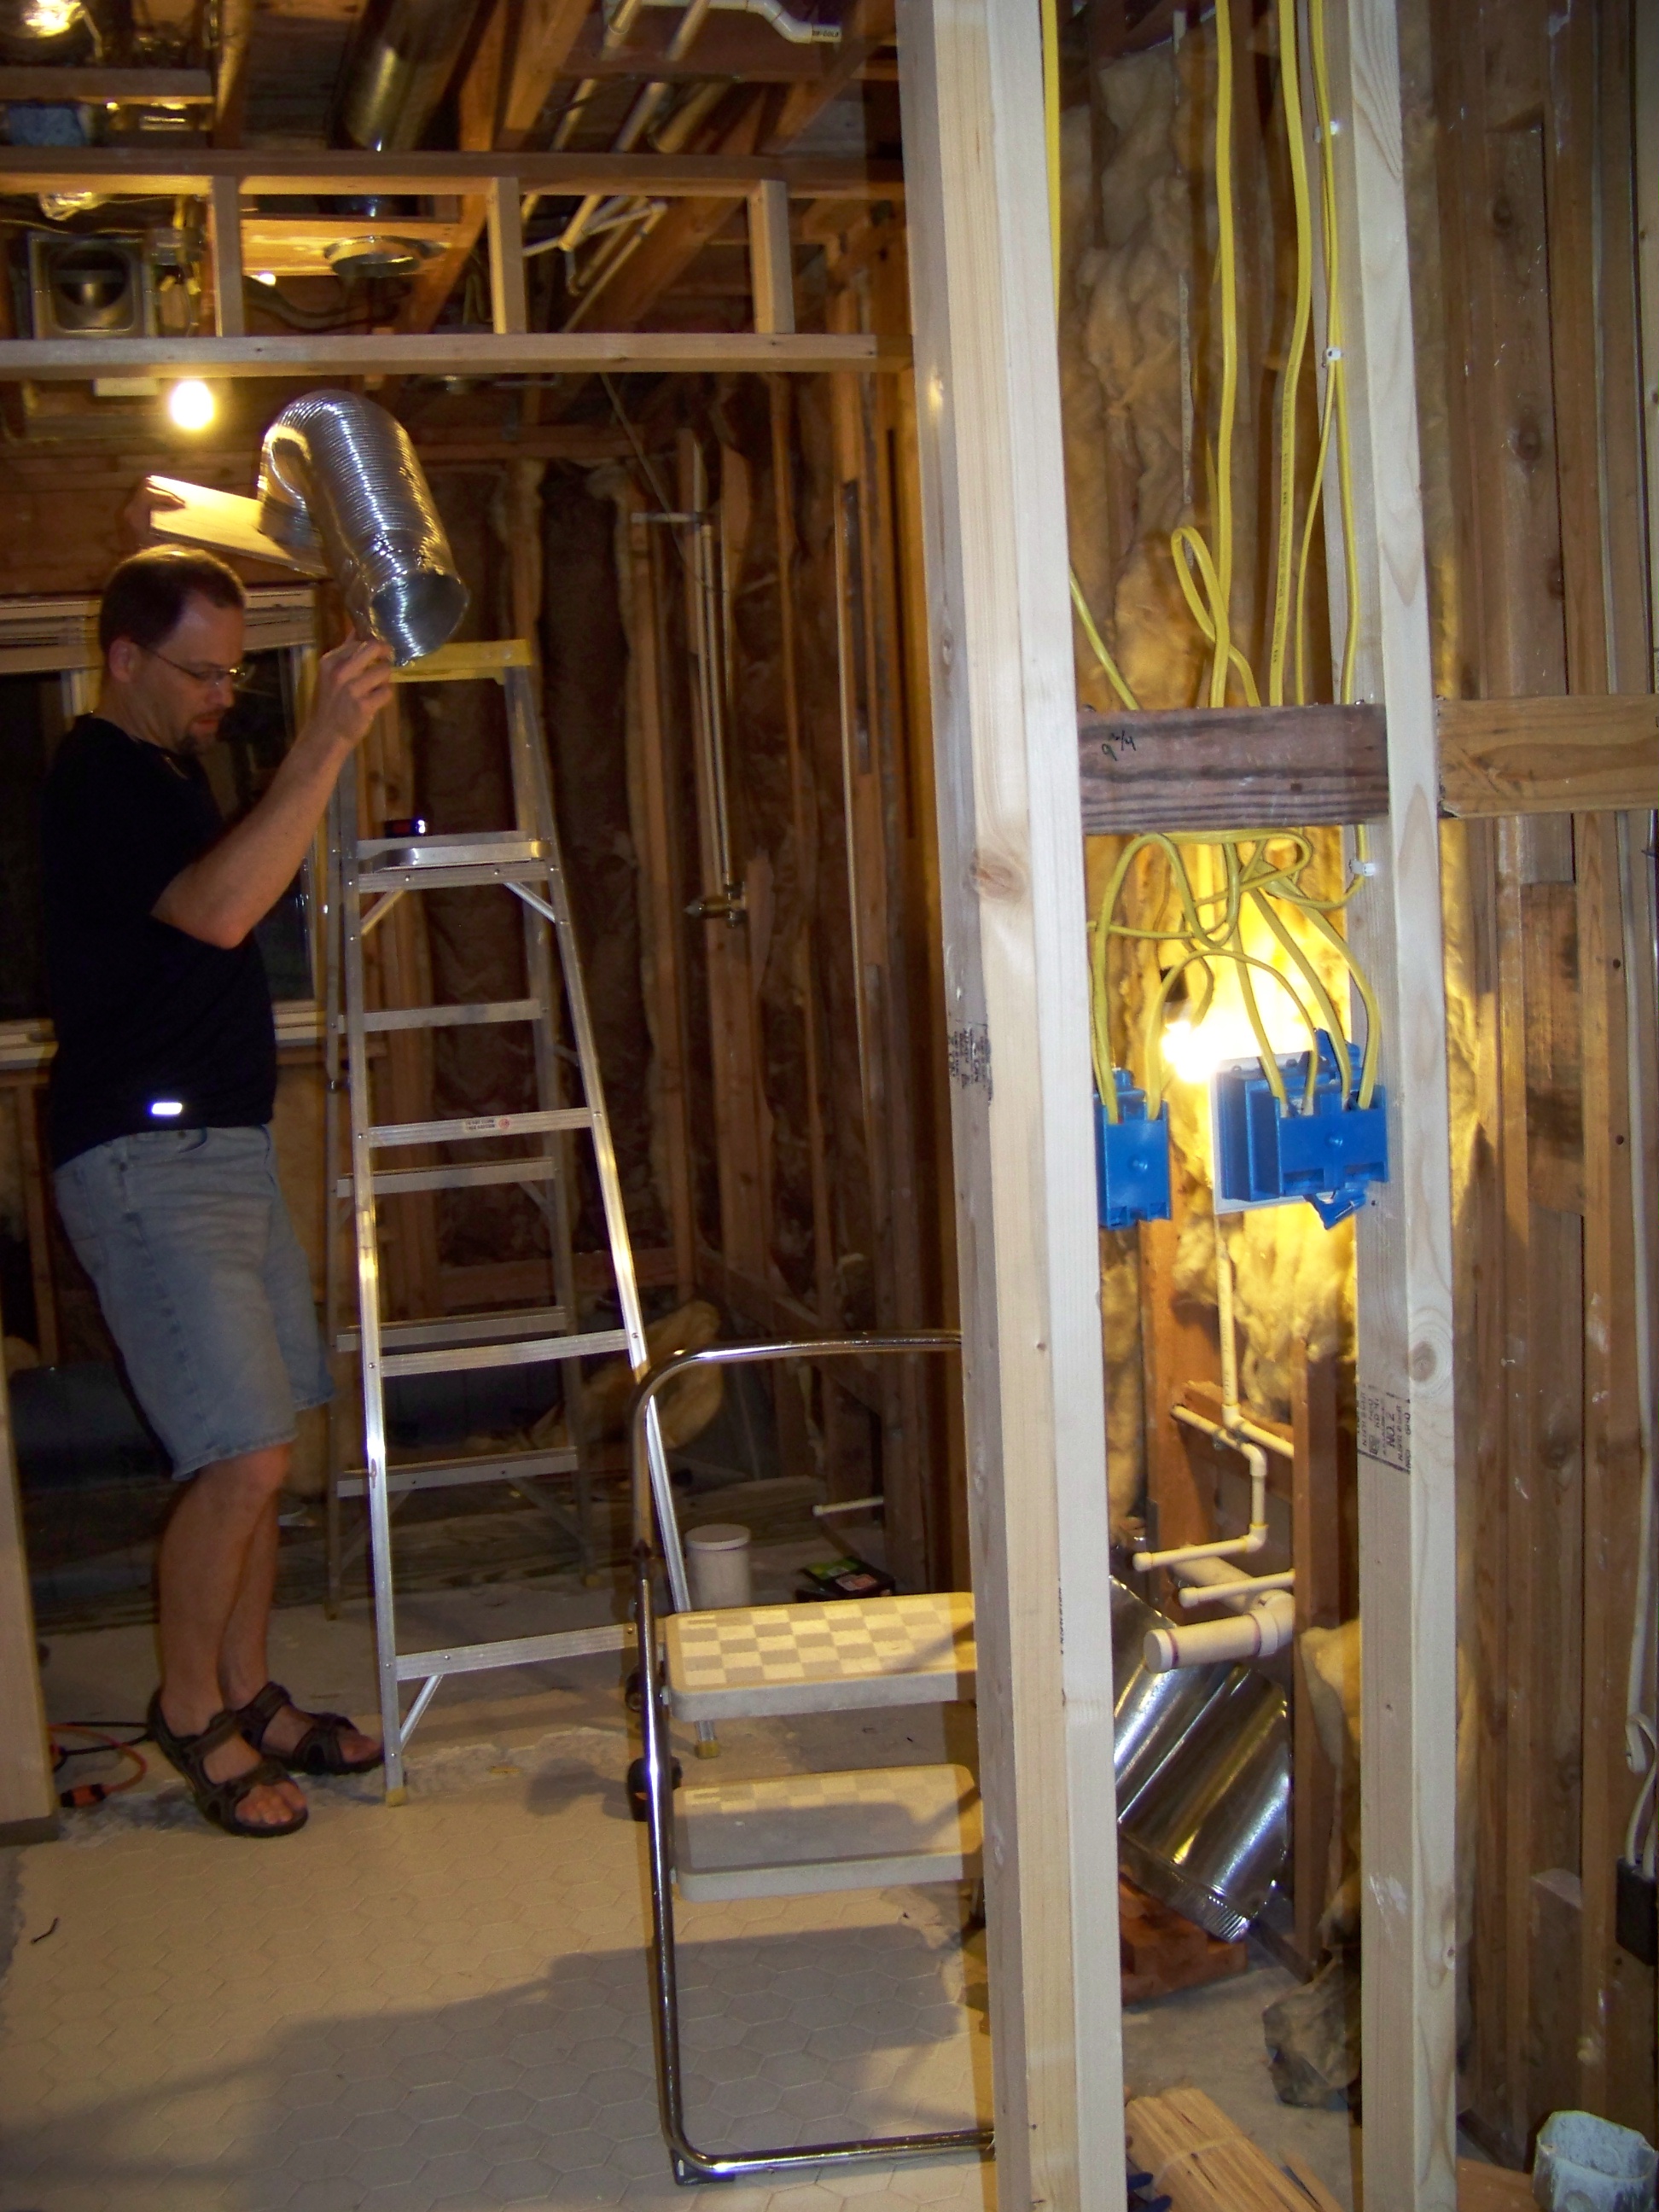 | Yours truly working on the exhaust ventilation system. We bought a Panasonic Inline Exhaust Fan that draws 240 CFM. That's the right size for our shower and two toilet areas. We plan to use adjustable vent covers so we control the airflow after installation. |
 | Anita wearing her astronaut helmet. Its actually a 10" air conditioning elbow. :-) |
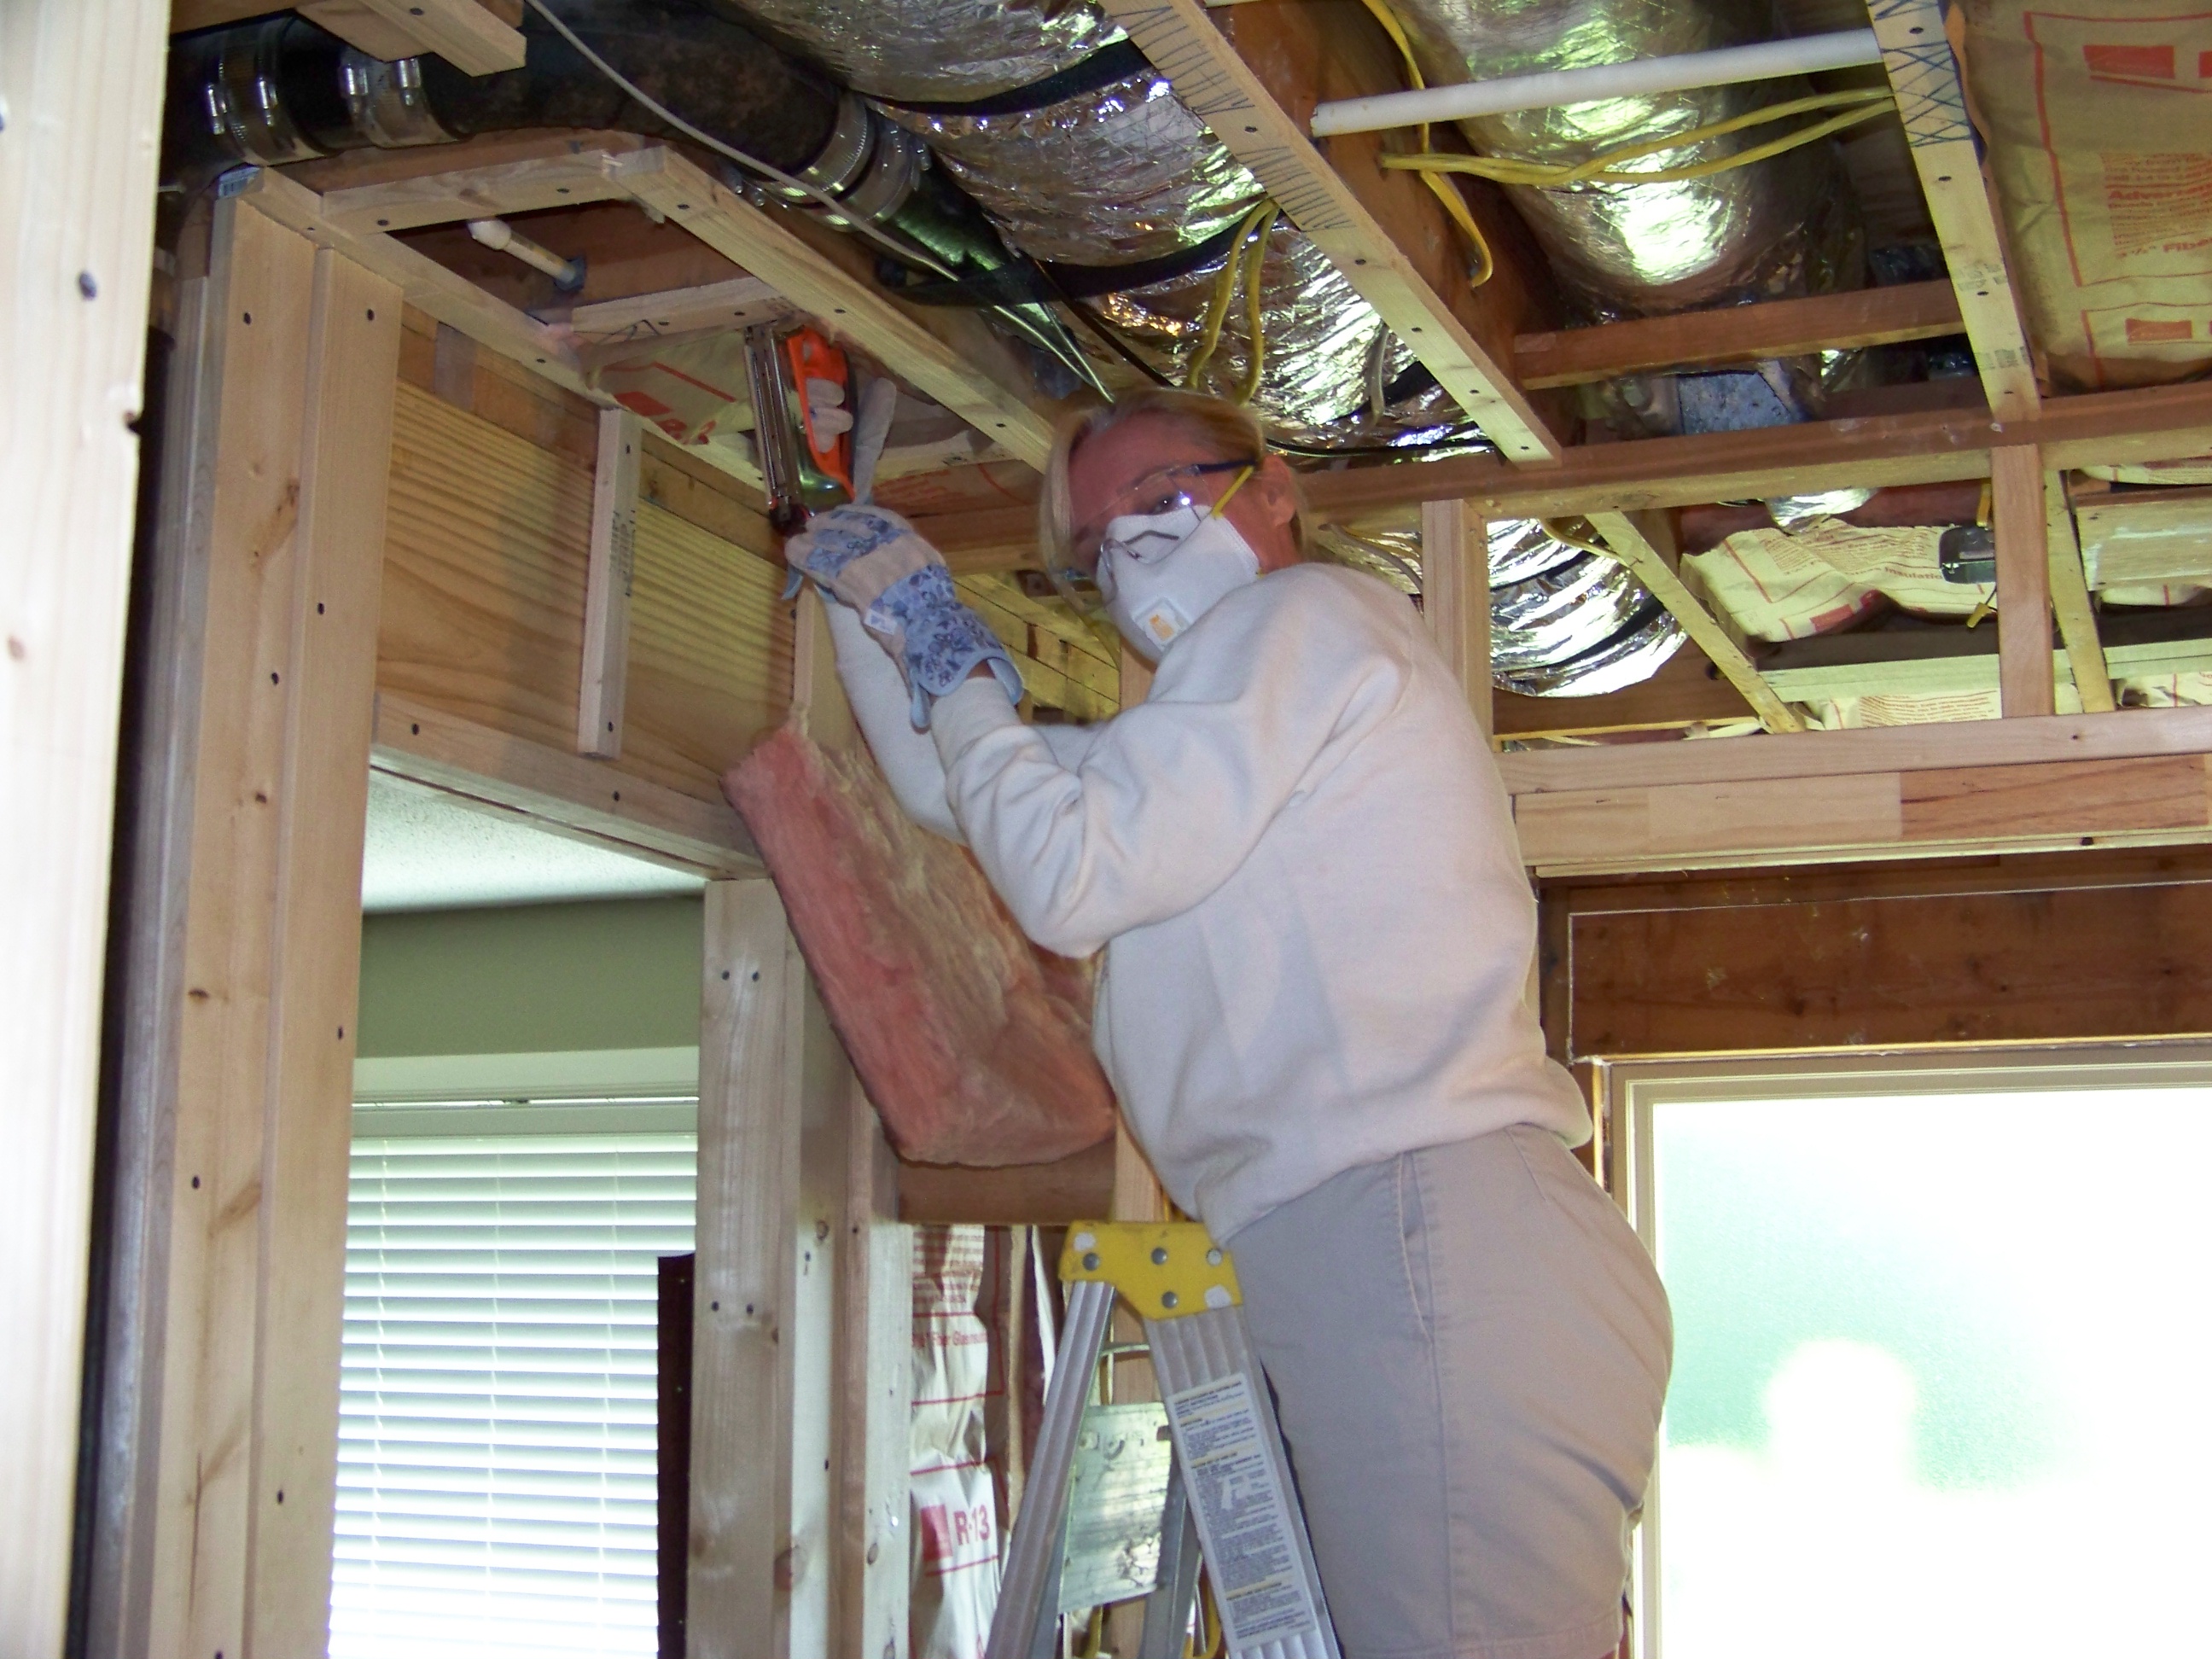 | Anita did all the insulation herself. We bought the batted variety so we could staple it to the walls. Fortunately it was easy to cut with regular scissors. The safety goggles, mask, gloves, and long clothes are good precautions when working with insulation. |
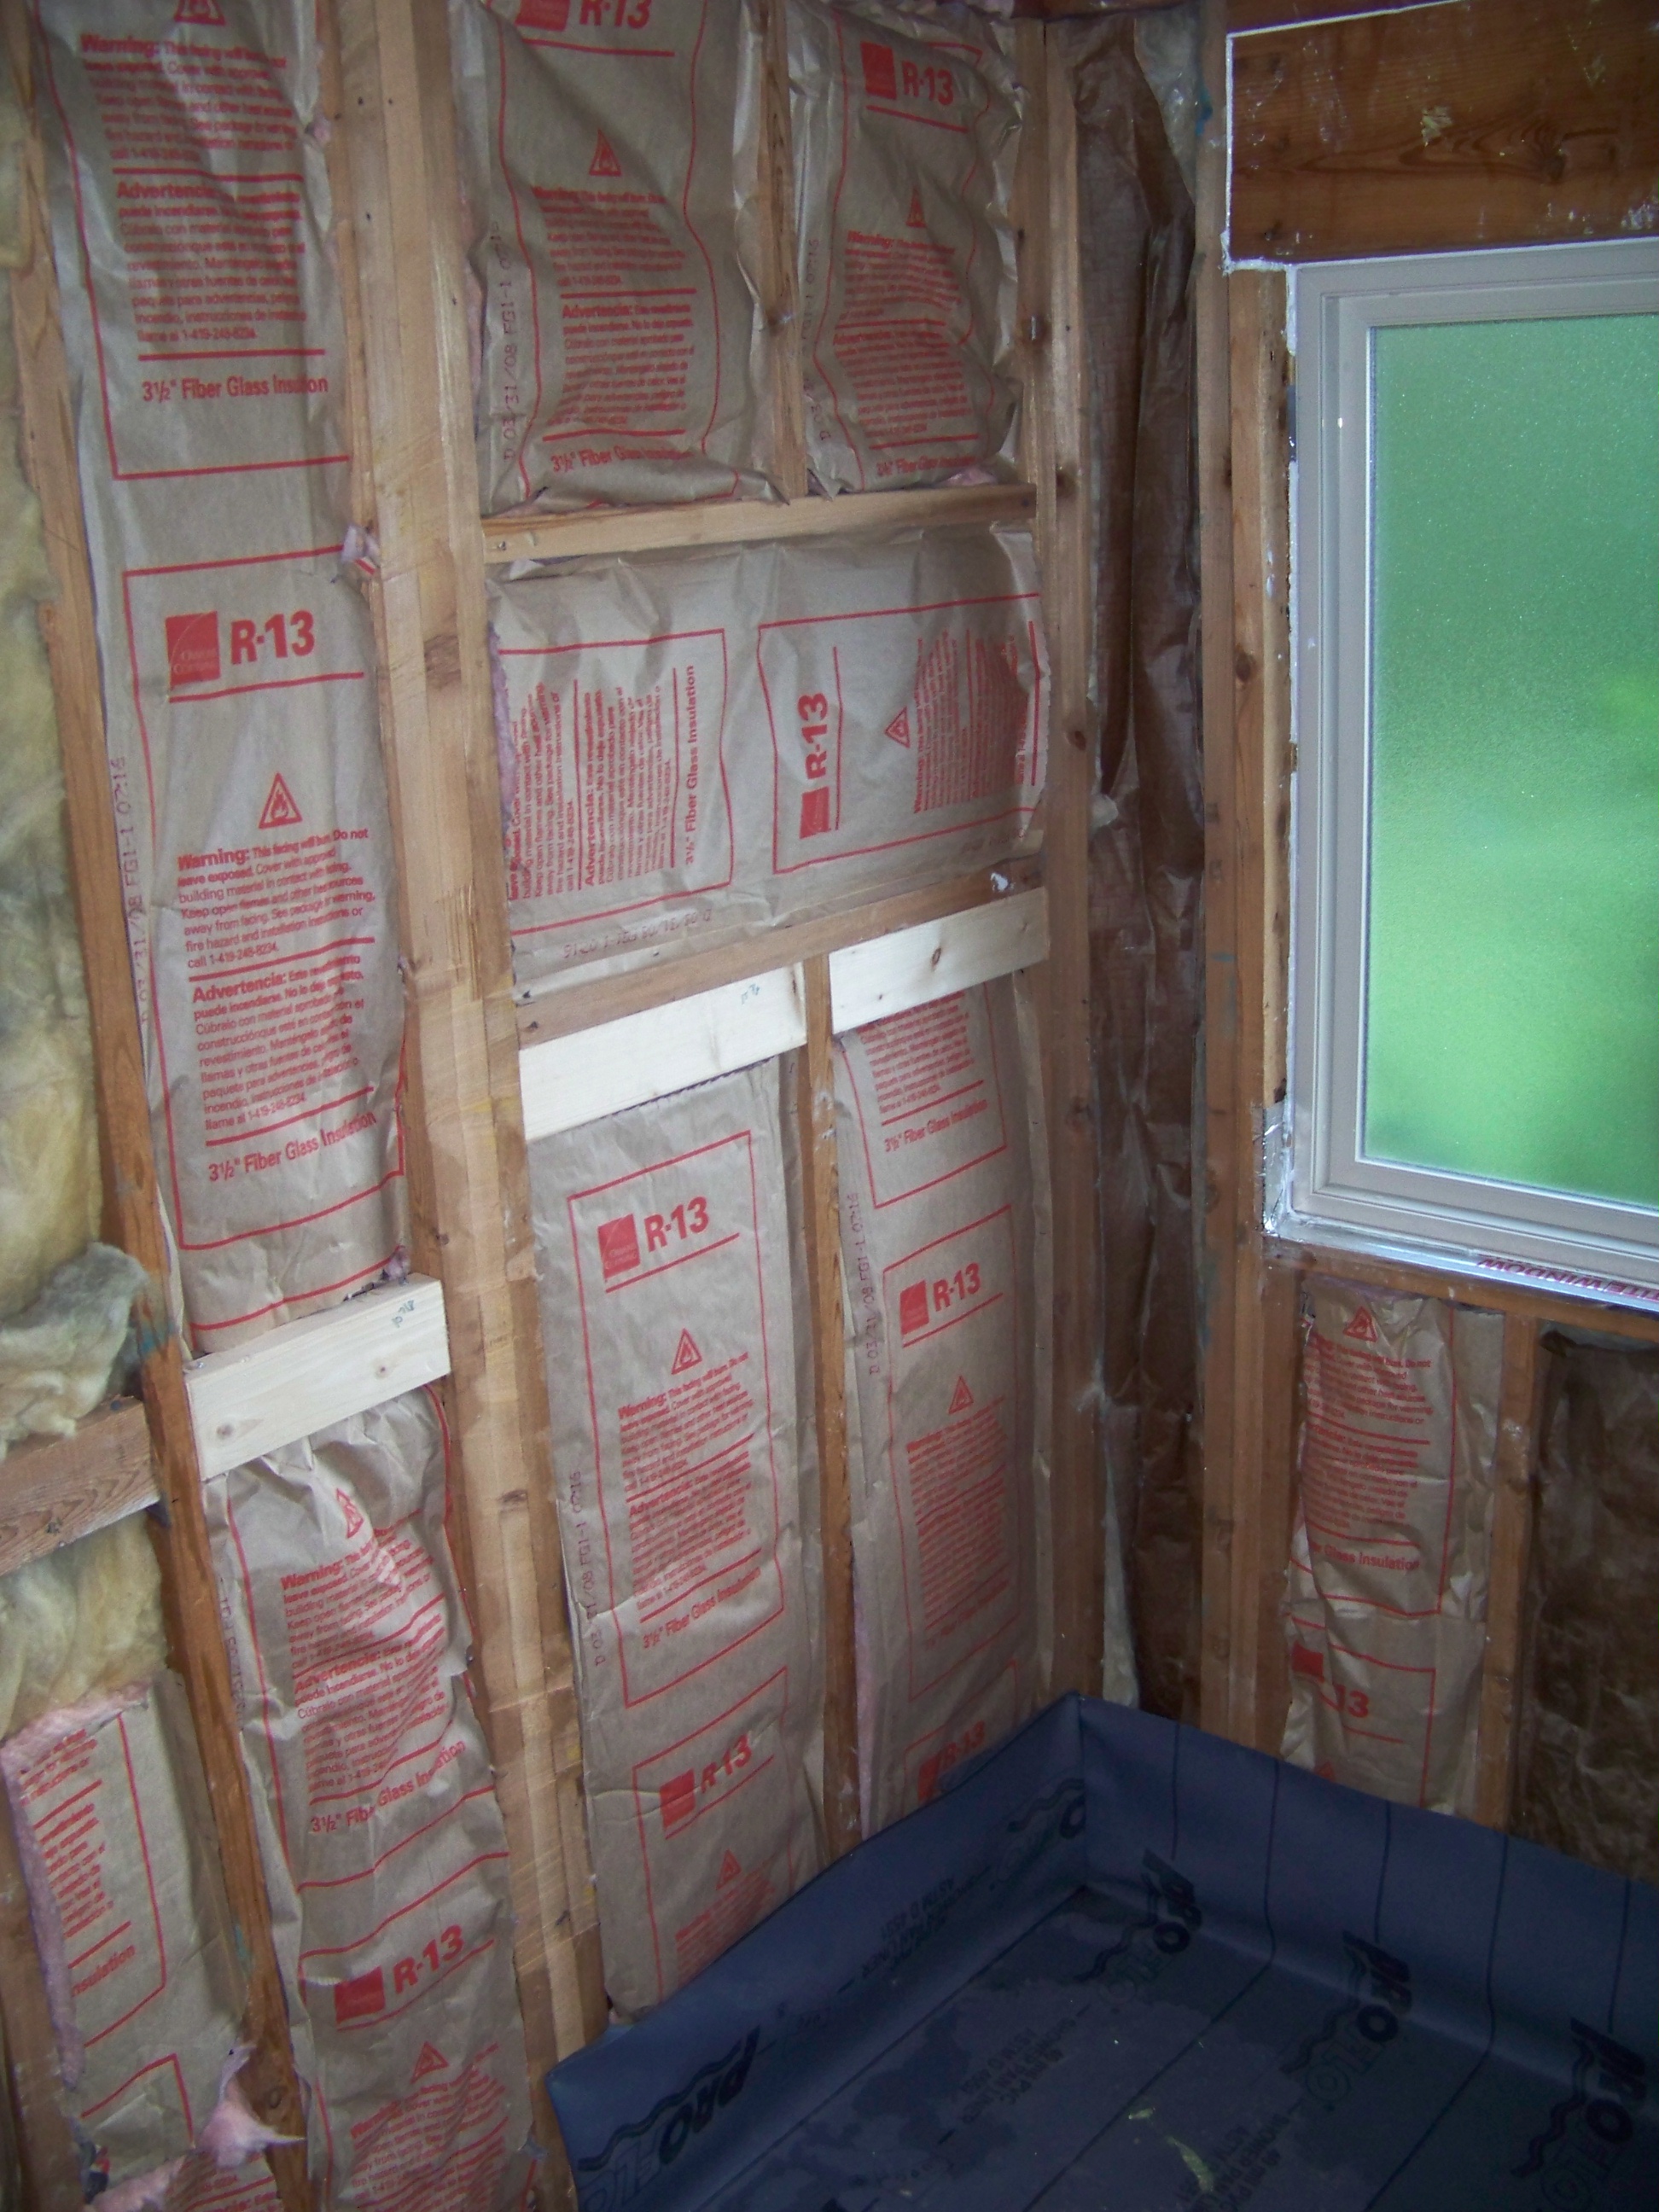 | The room really took on a finished look after the insulation went up (relatively speaking). The insulation was originally installed from the other side of these walls, so we saw the non-batted sides of the insulation during the entire project (you can still see traces of the old yellow insulation in the picture). Of course that was all damaged during construction, so new insulation was necessary. |
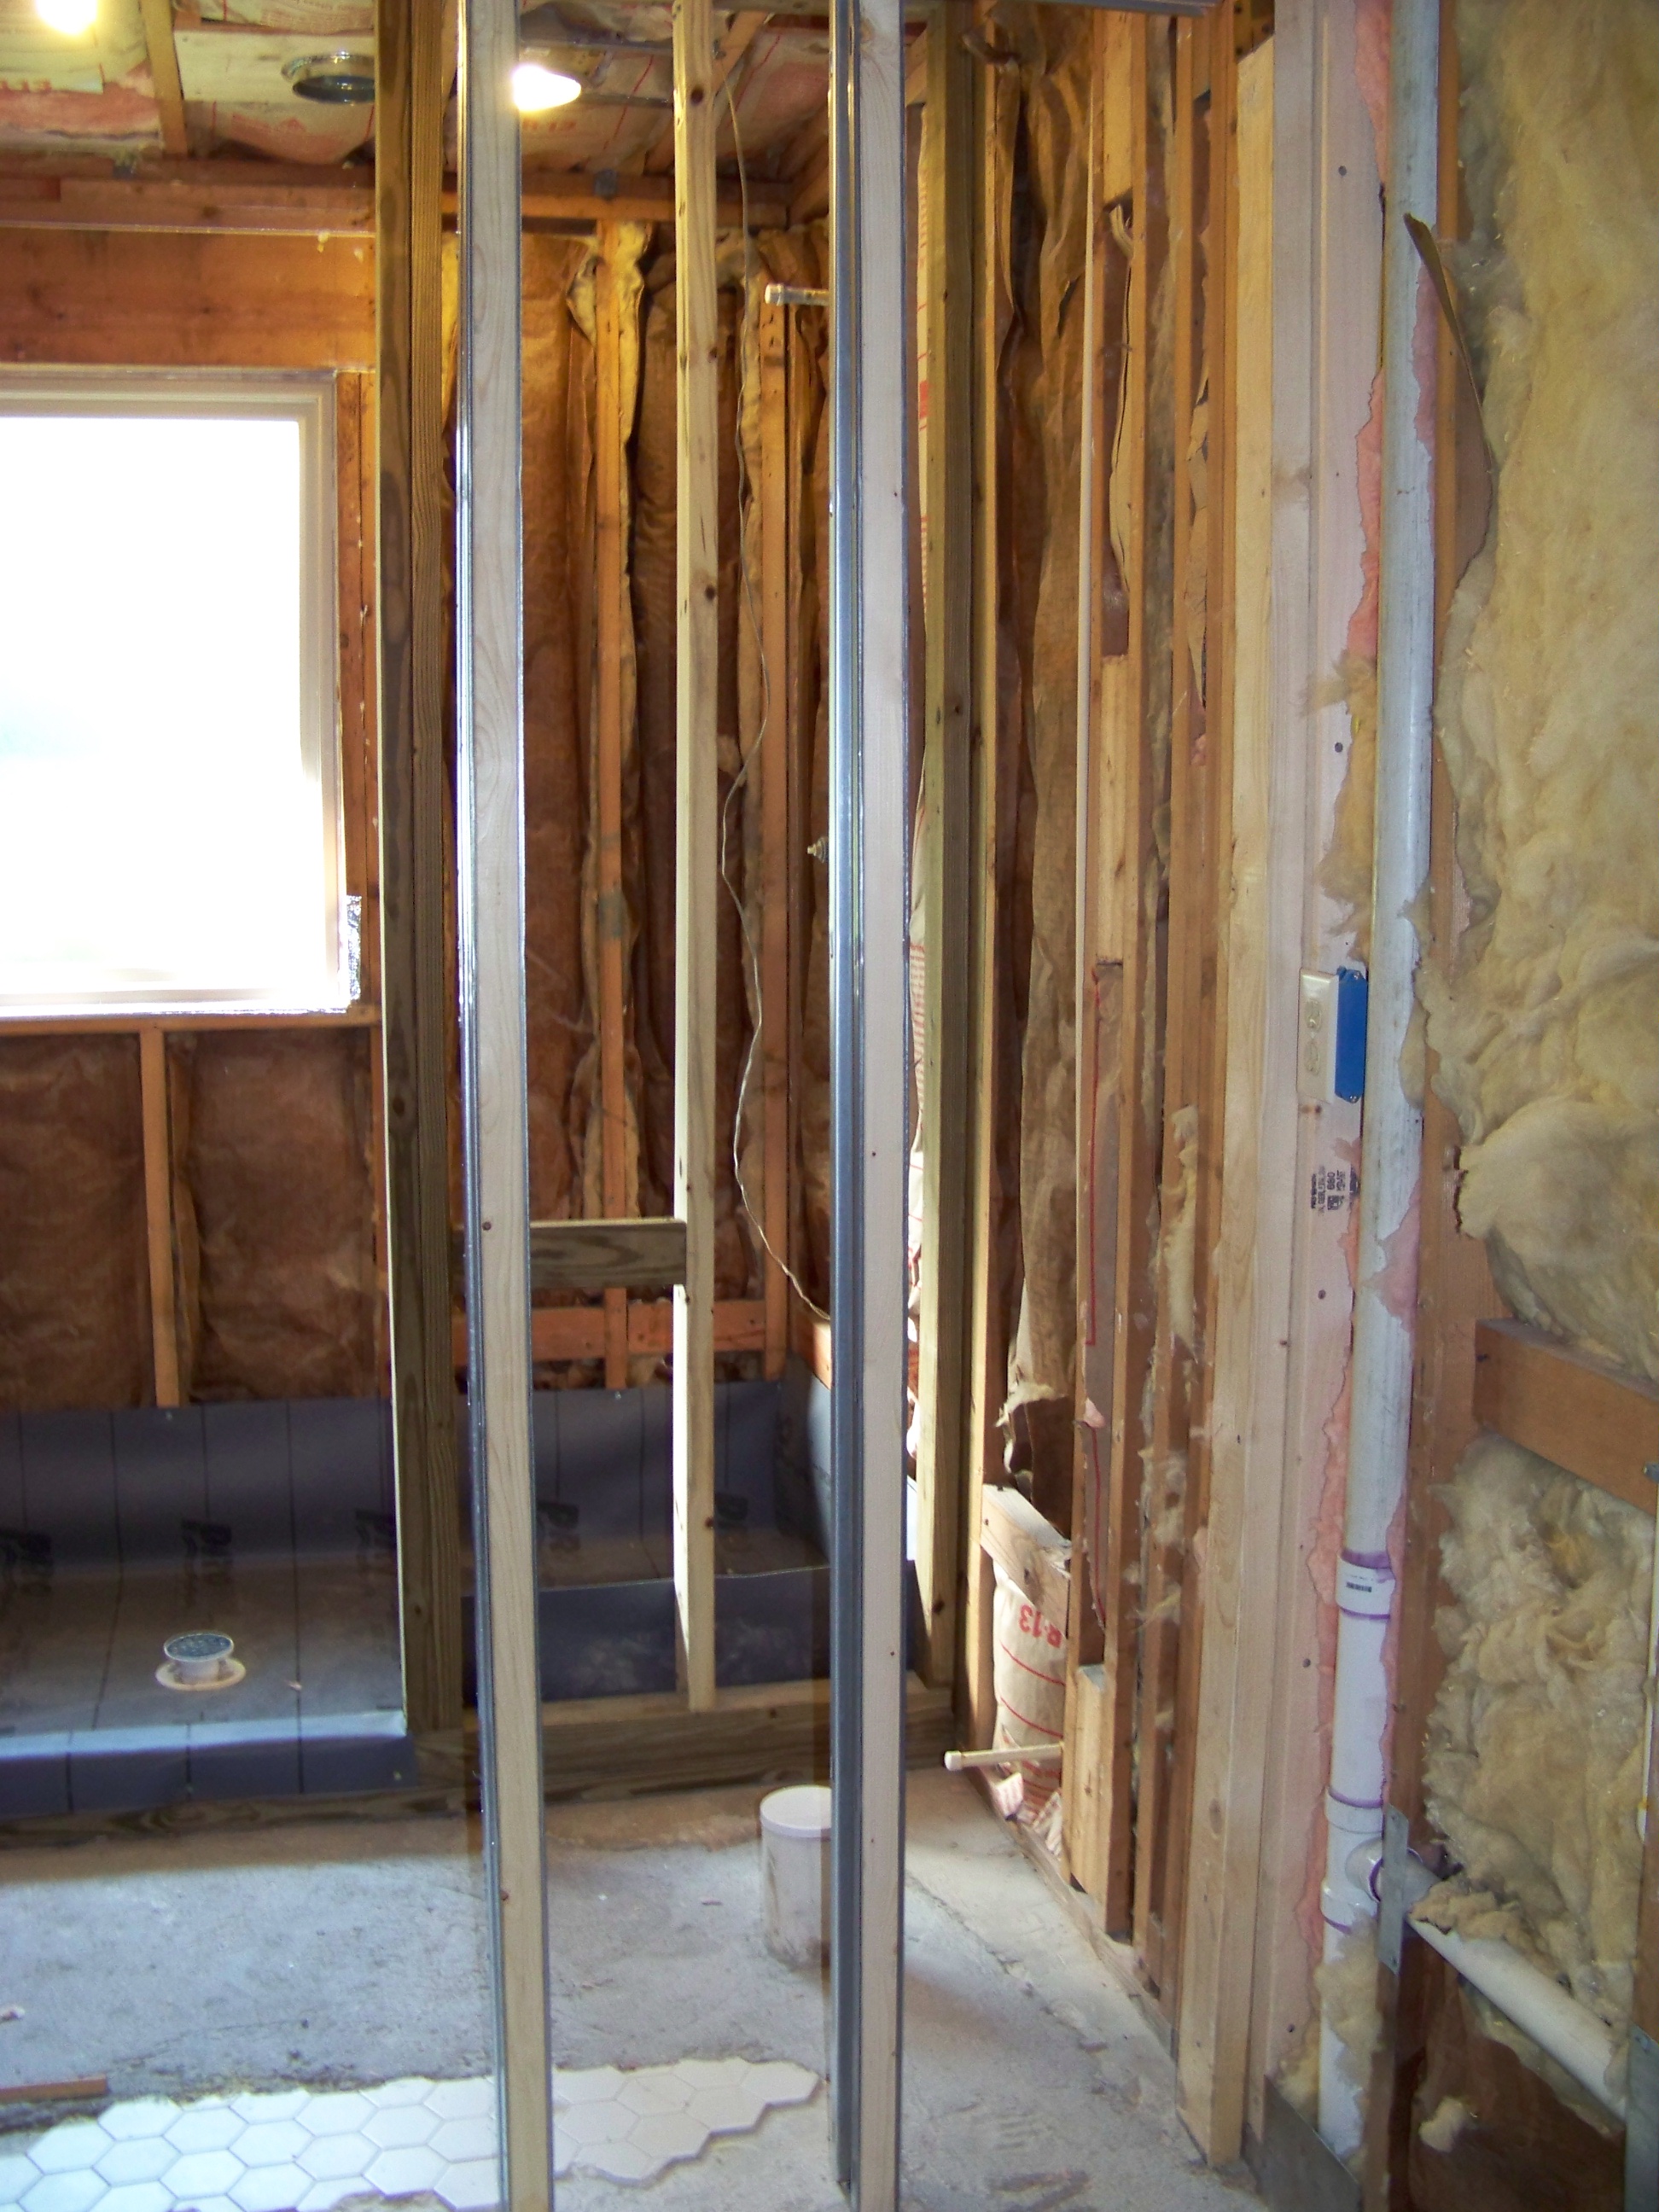 | We installed a pocket door. First steps is installing a header making sure it is horizontal (our laser level helped here). Second steps is installing the aluminum roller track. Final step is installing the metal-clad support beams that the drywall attaches to. You see those in the foreground here, along with our shower area in the background. |
We finished with this phase of construction on a Tuesday night (August 5, 2008), knowing the drywall guys were coming the next morning. It was really satisfying to know that we had finished so much, with absolutely no help from contractors (except for the plumbing).
Construction Phase 2
The second phase of our project is where we become less involved. We thought about doing the drywall and tile ourselves, but we realized our limited experience in these areas could have big consequences if we did something wrong. So we decided to let experts in the field handle these tasks.
Drywall
We were lucky and found a good drywall crew. I've heard rumors that drywallers can be a rough-and-tumble bunch. They don't normally work indoors, and sometimes their language, appearance, and work habits can be a little hard to deal with. But we found Mr. Gerald Thompson and his crew. Polite, orderly, timely, and quick. Solid work, good price. I'd definitely use them again.
They did the job in 4 days: Wednesday though Friday, plus Monday. On Friday they put knock-down texture on the ceilings, and called me to ask us if we wanted them to put an orange peel finish on the walls. I understand their reasons--they had just finished putting mud on the walls and were going to have to wait until Monday to get paid. If we let them put orange peel finish on the walls, they could do that and be finished that day and get paid. Unfortunately, we didn't want the orange peel finish, so we asked them to come back on Monday and finish the job as planned.
Here are some pictures:
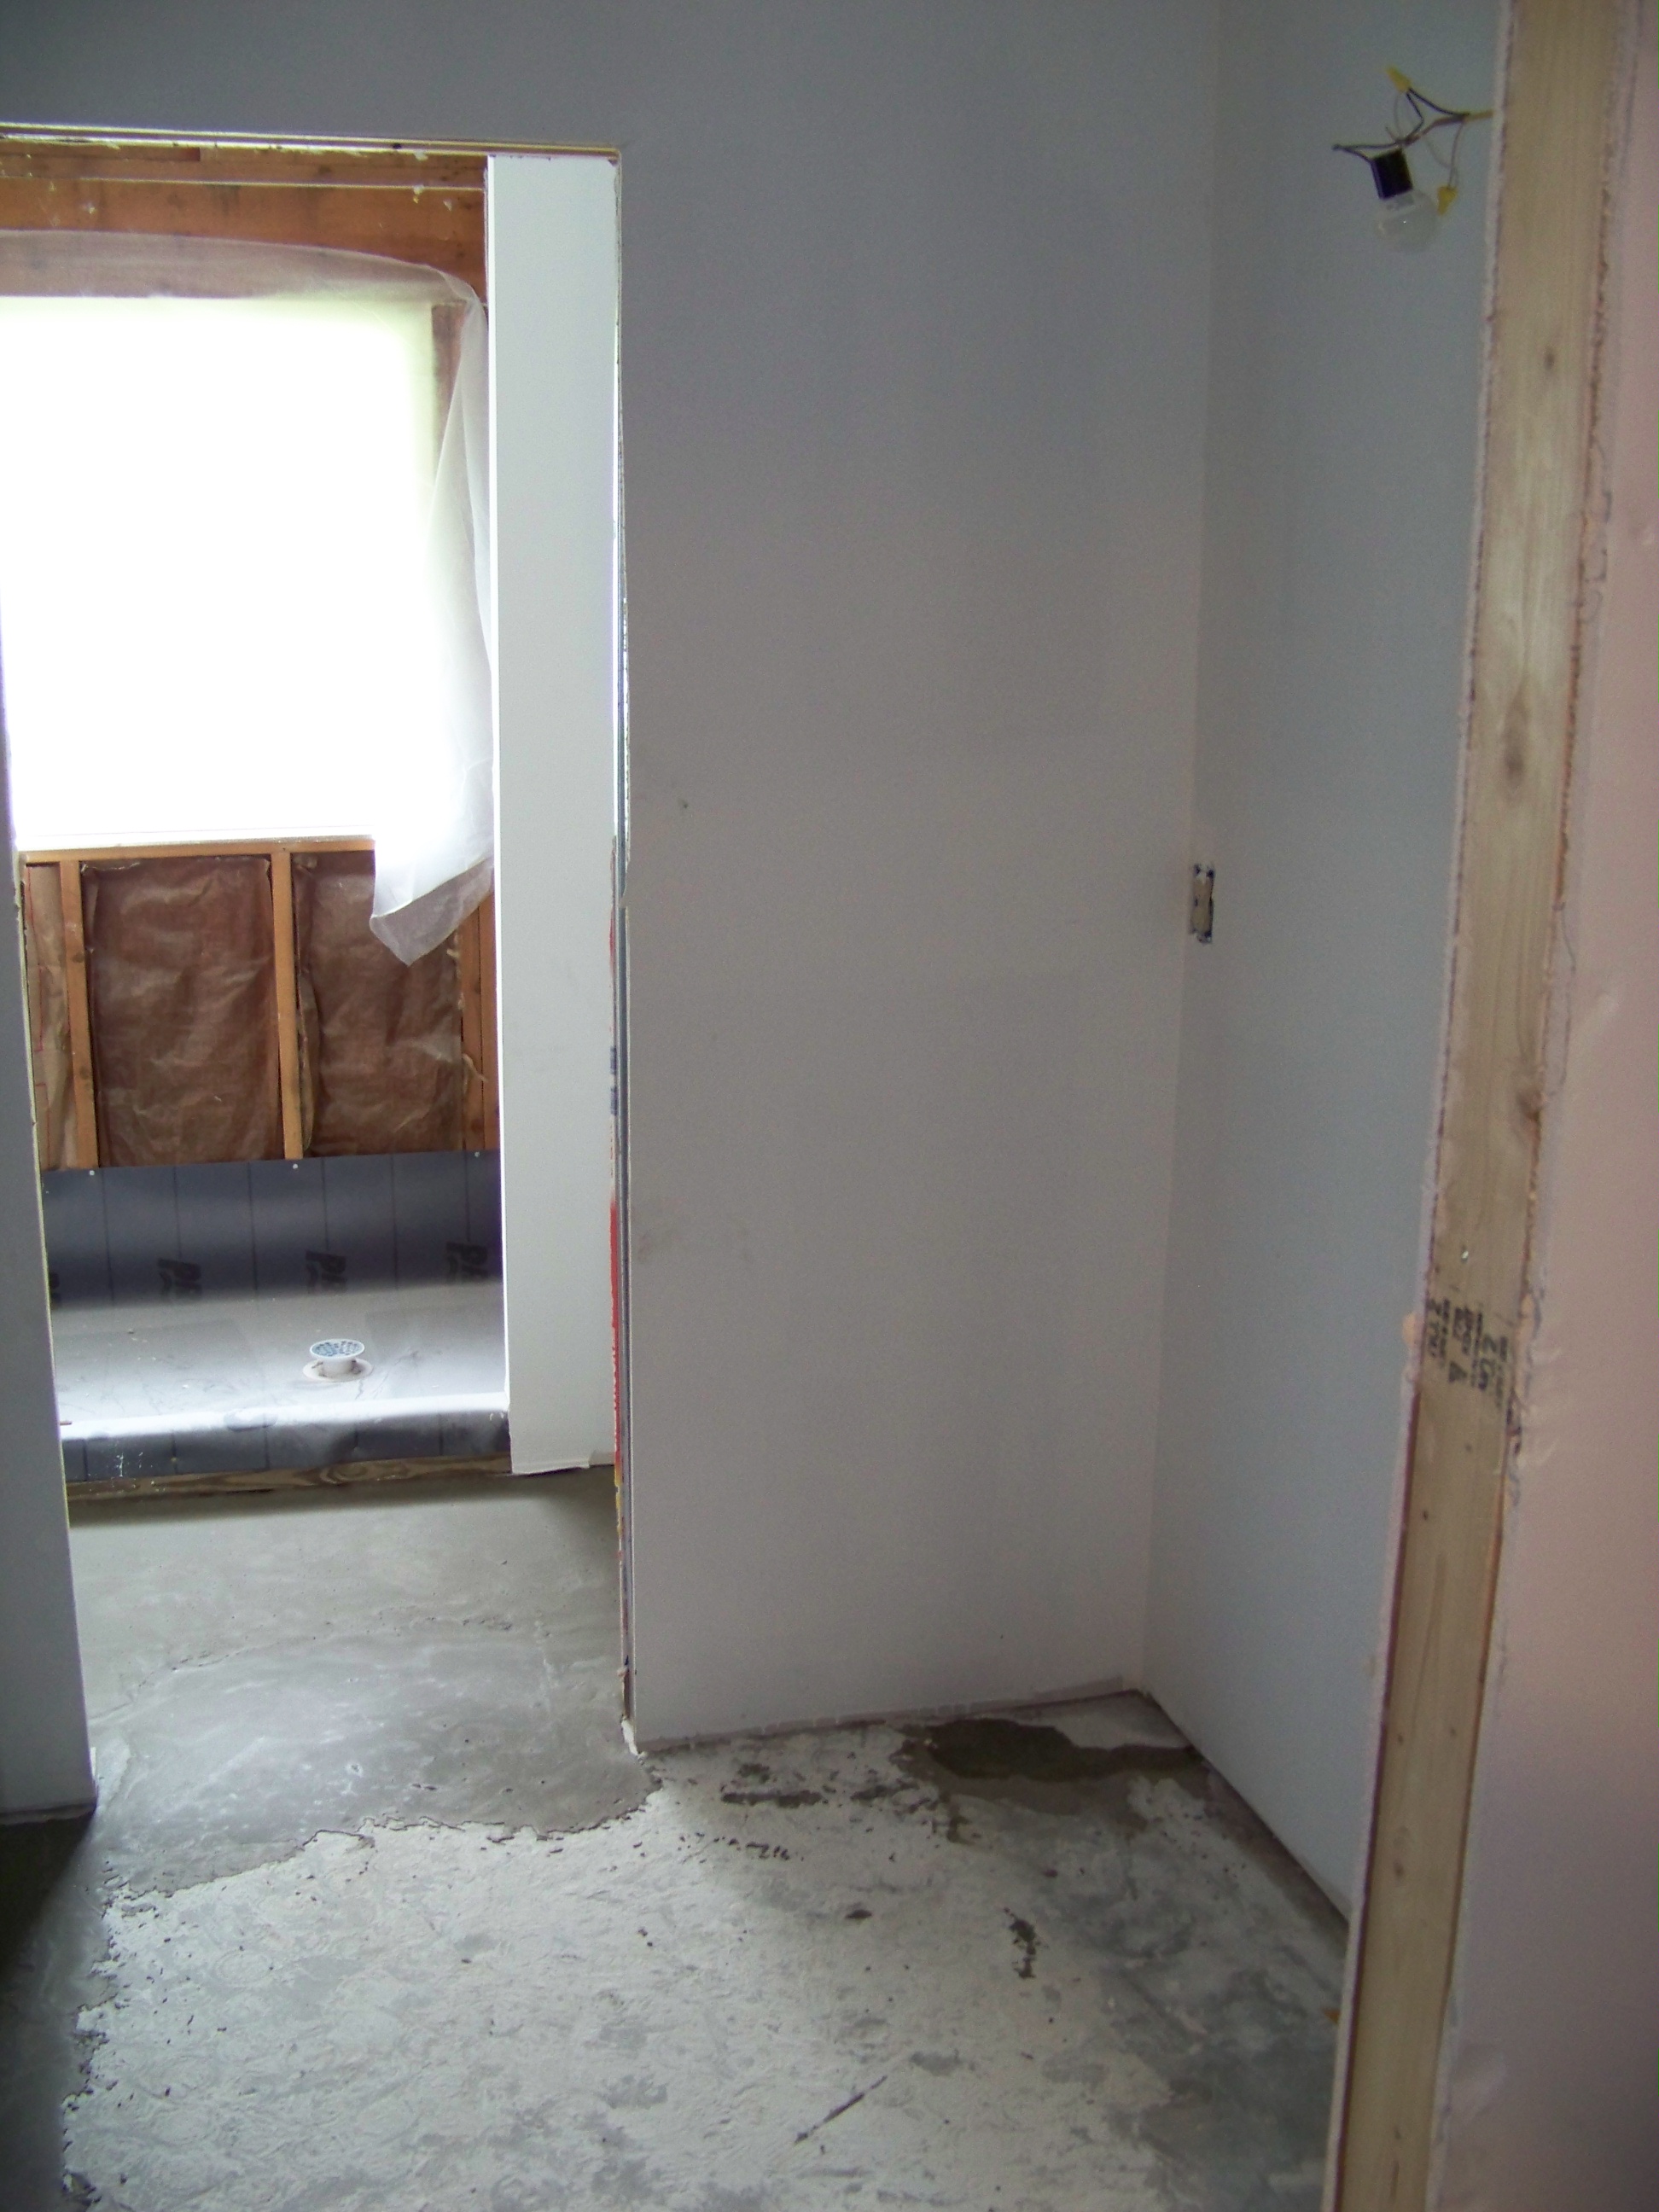
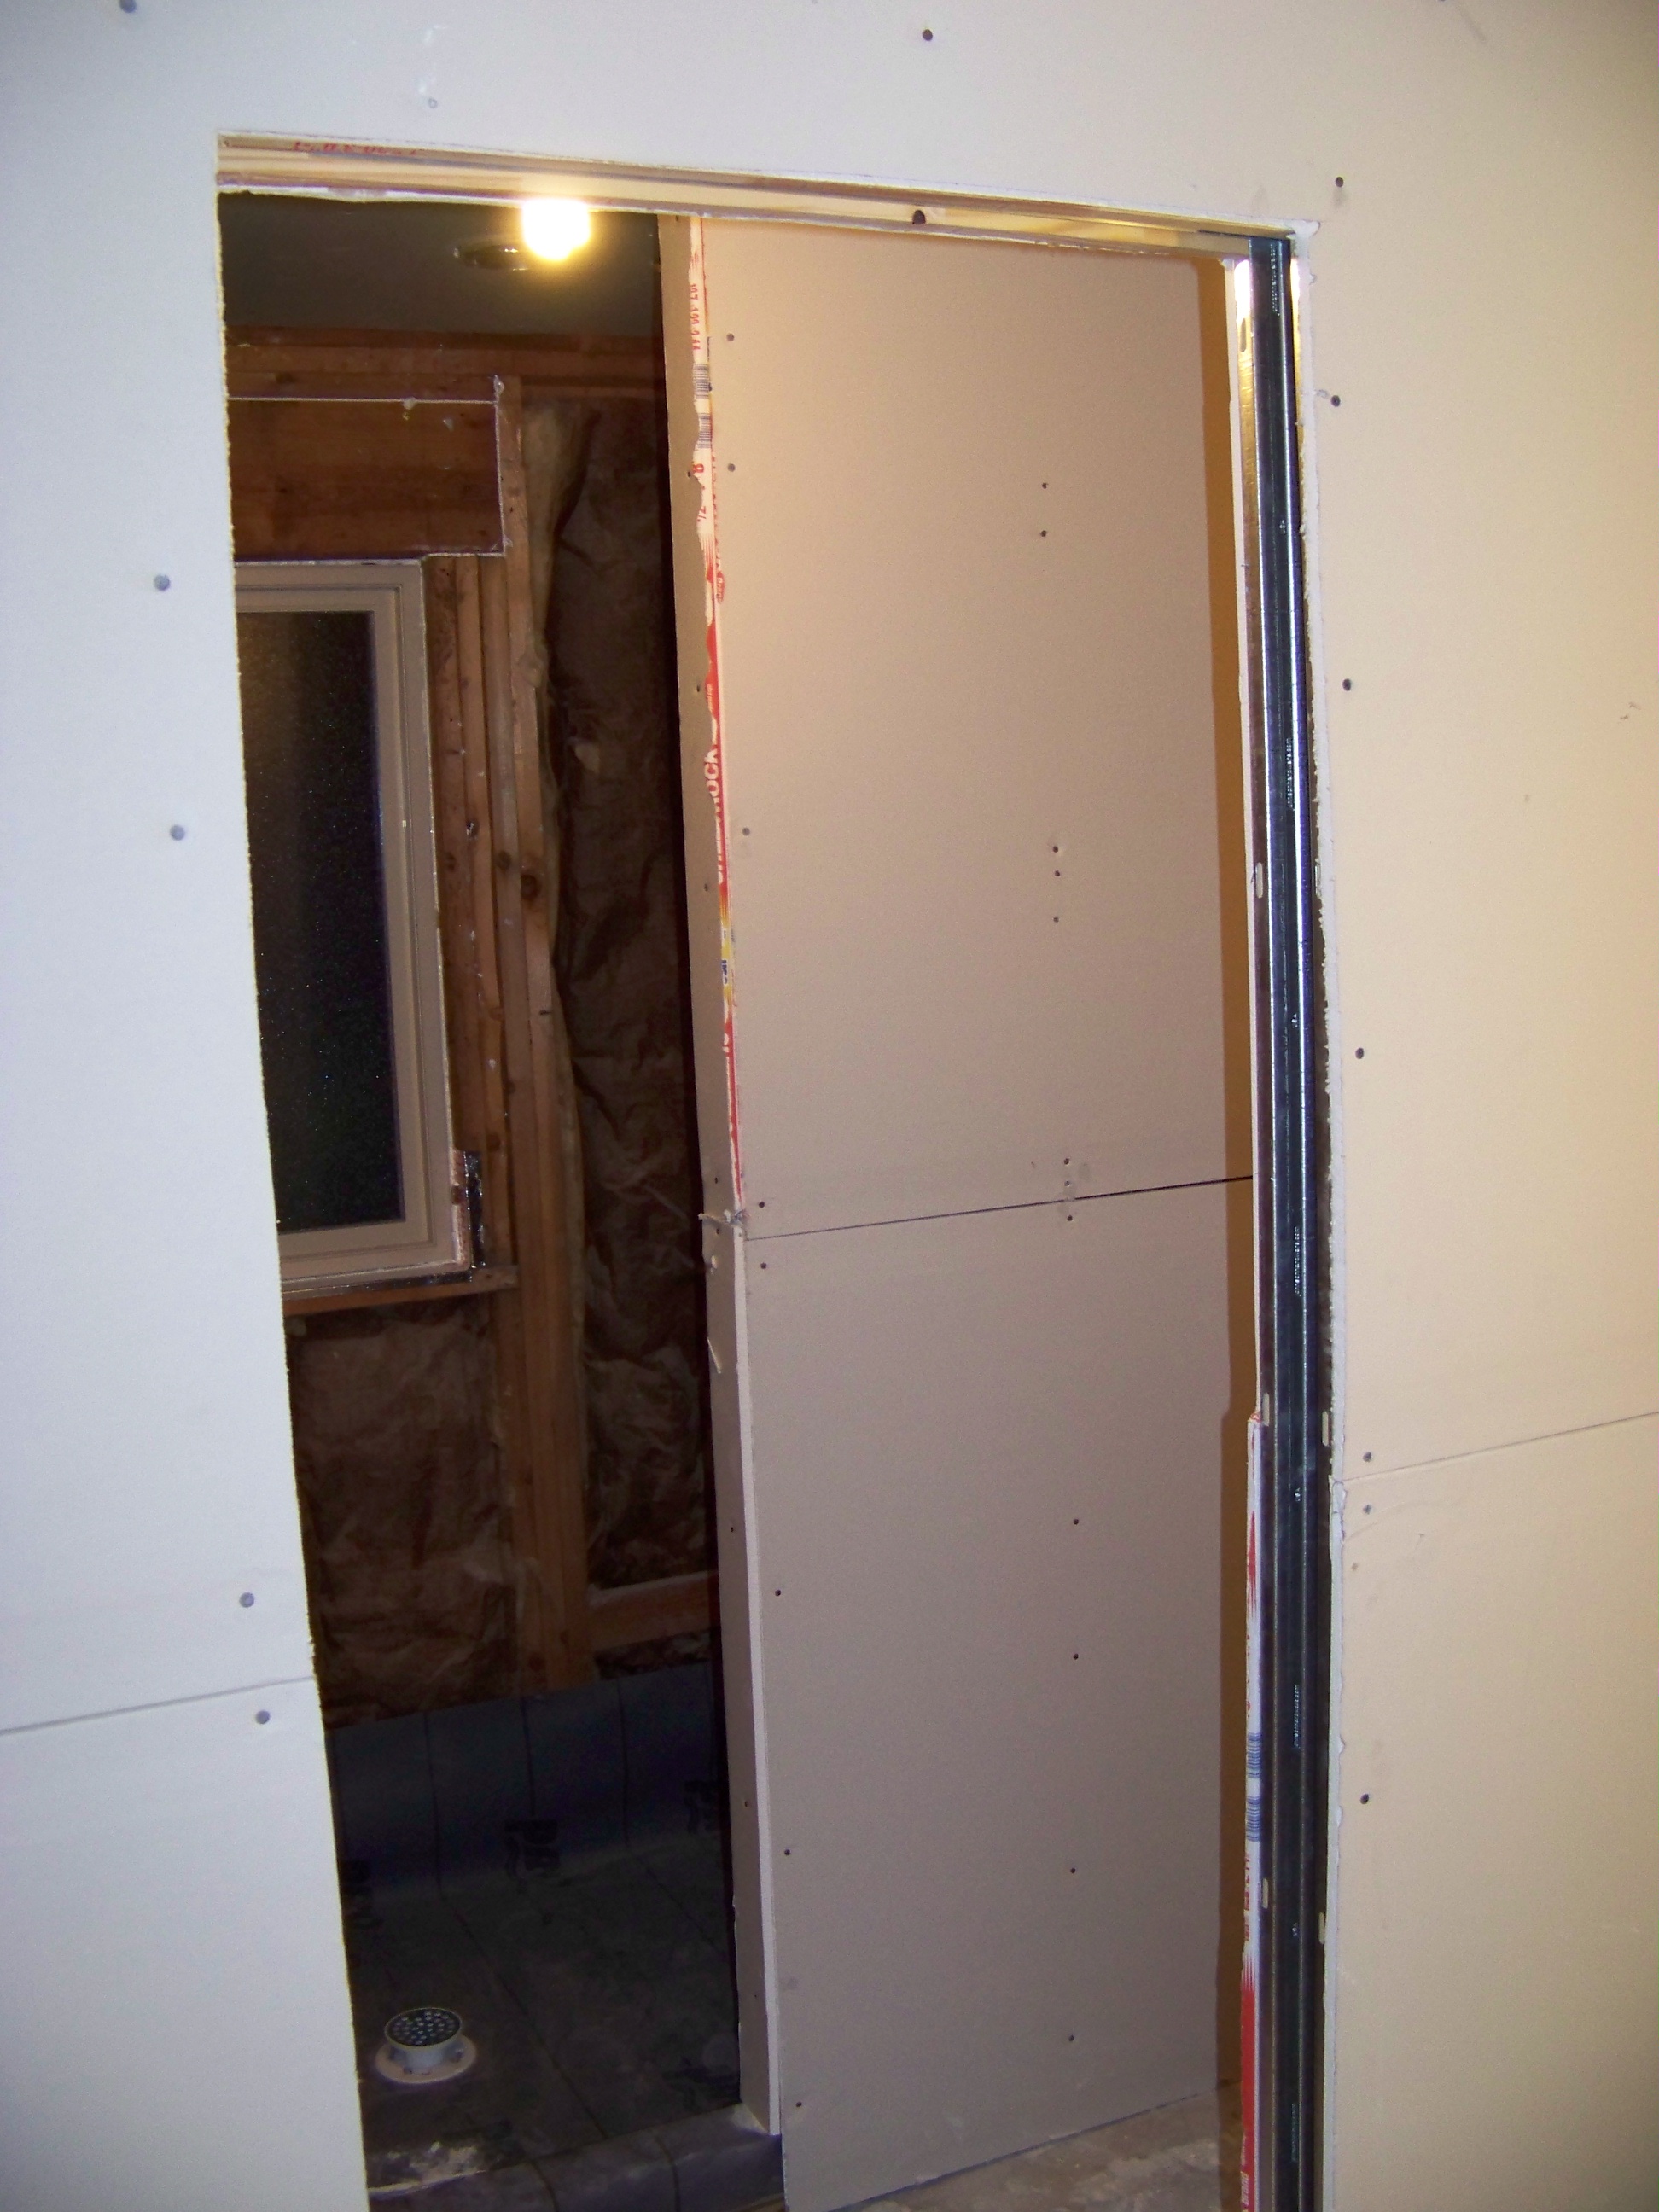 | Picture of our drywalled pocket door opening. Its amazing how "finished" the bathroom looks with the drywall installed. |
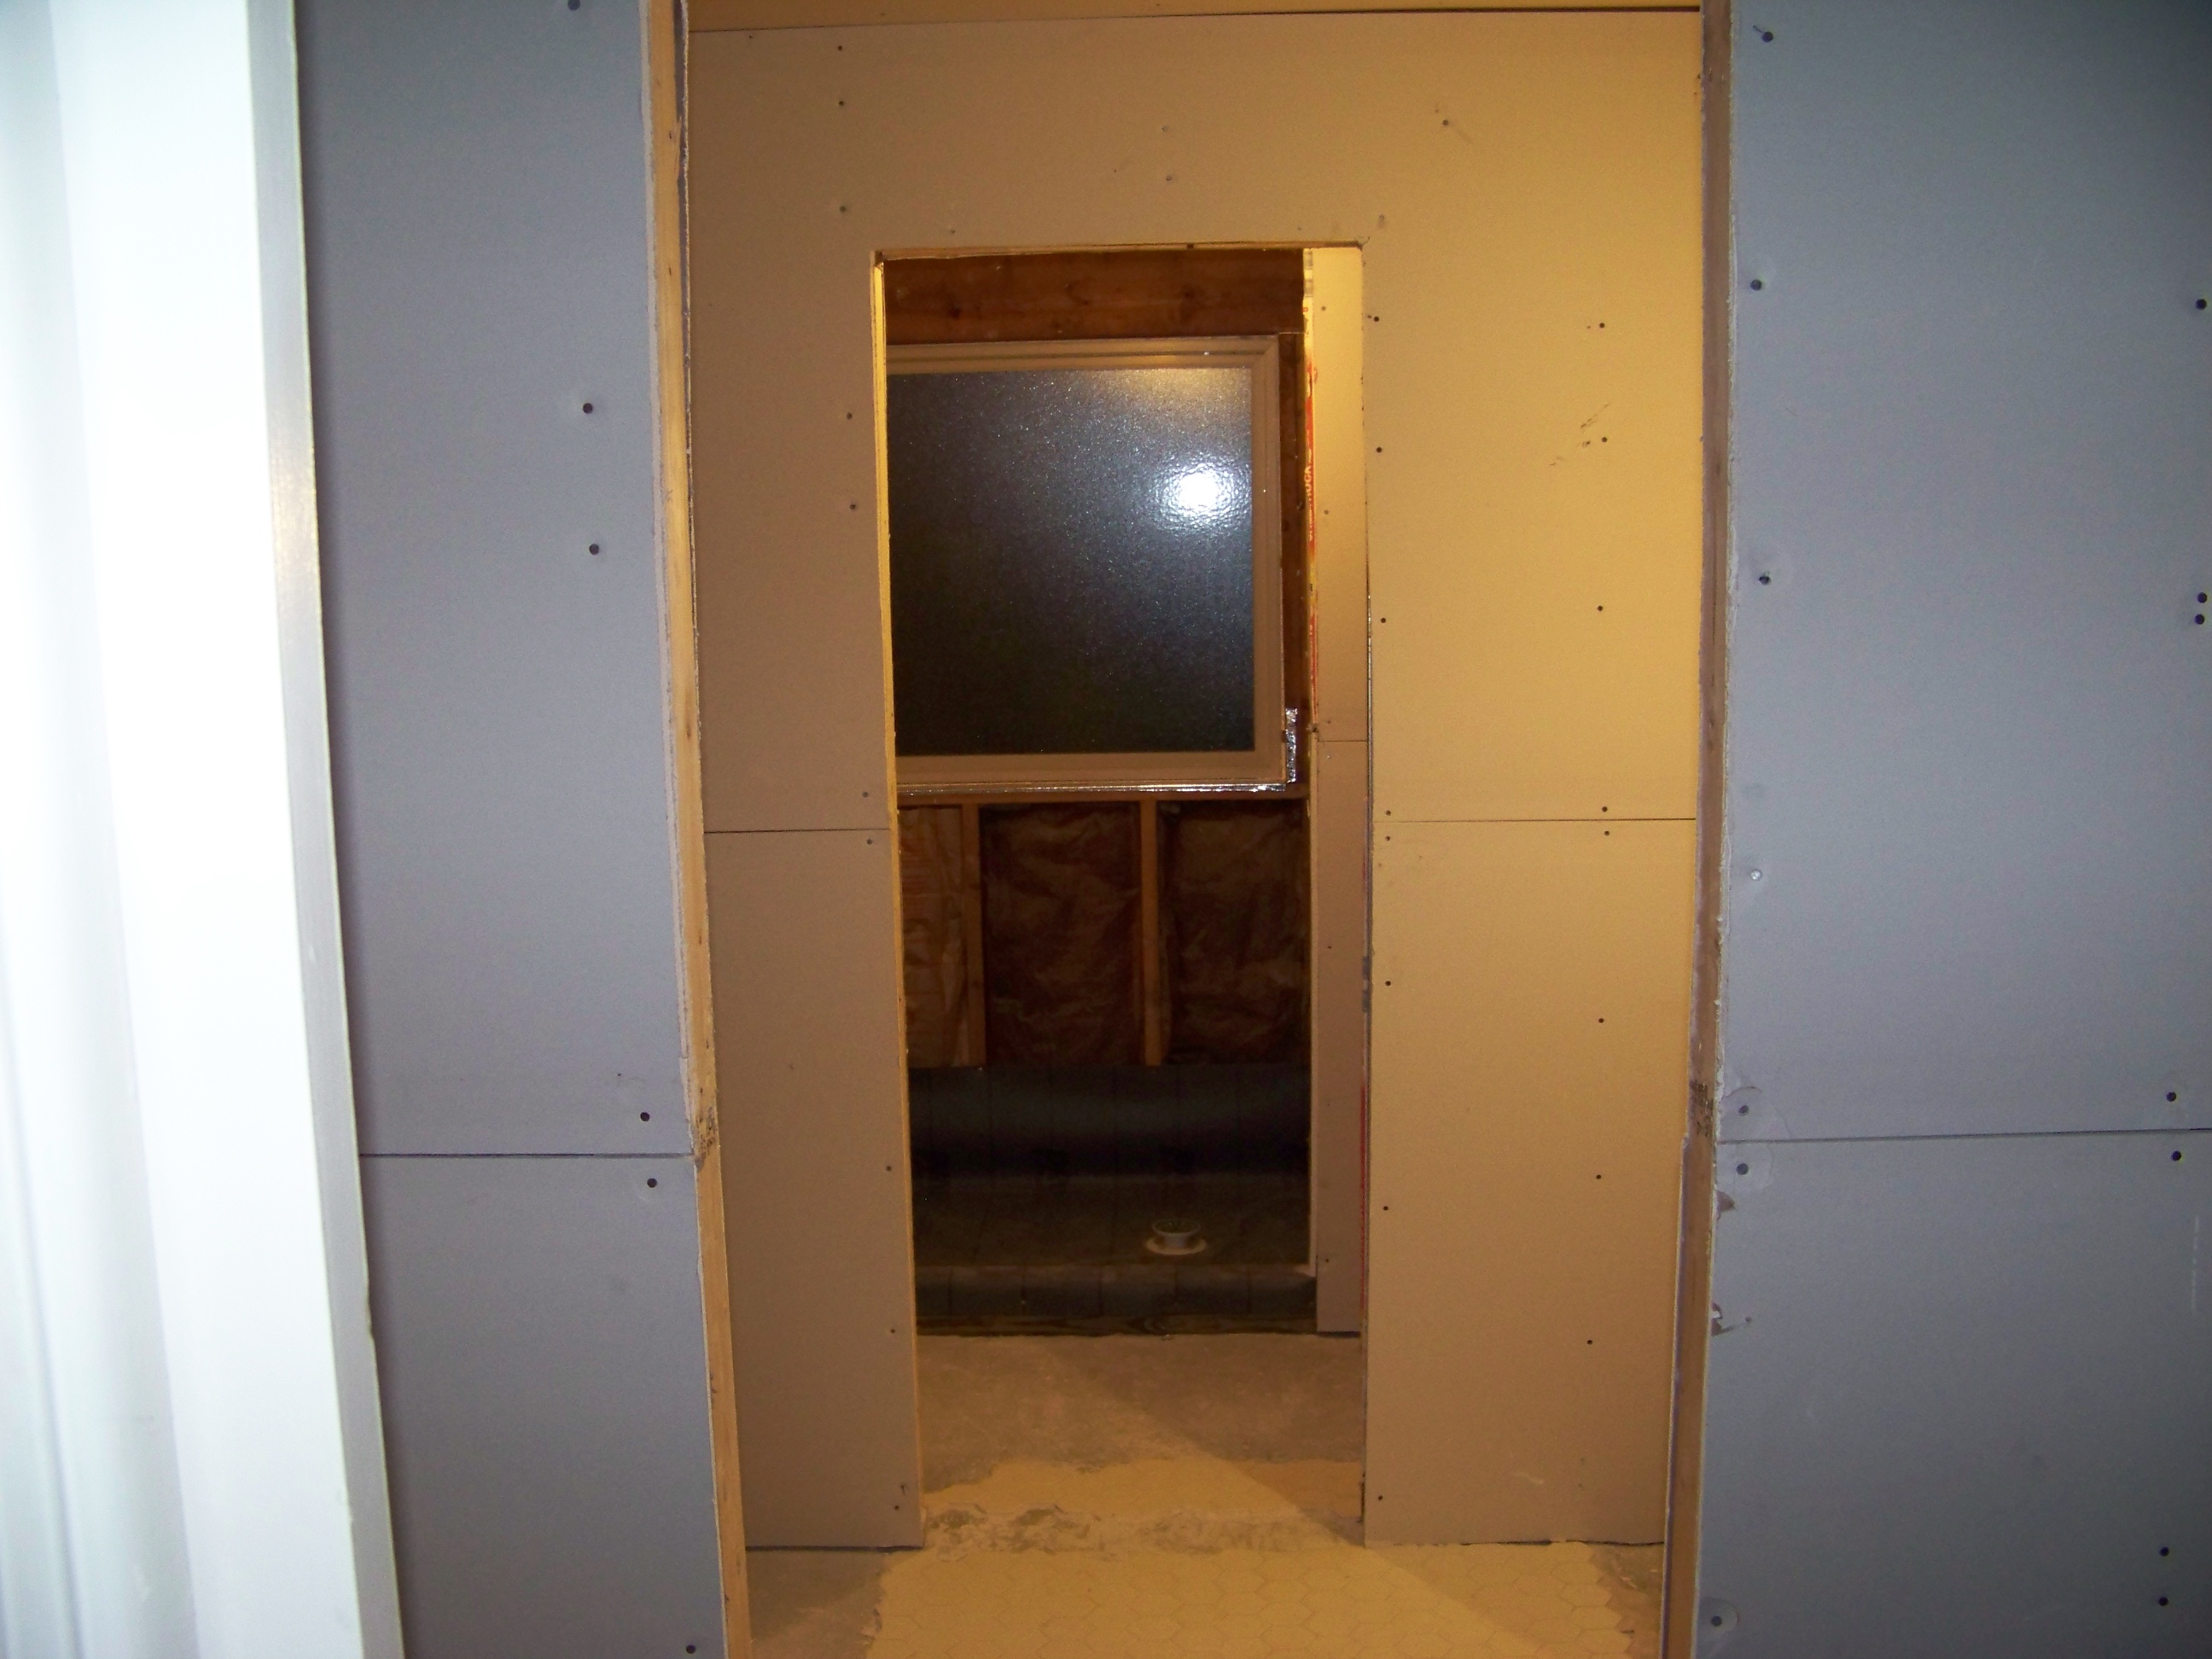 | This shows the complete view through the bathroom--the half bath, the main wash area, and the toilet and shower areas beyond. You can see how the window and door arrangement will let plenty of light to pass through. |
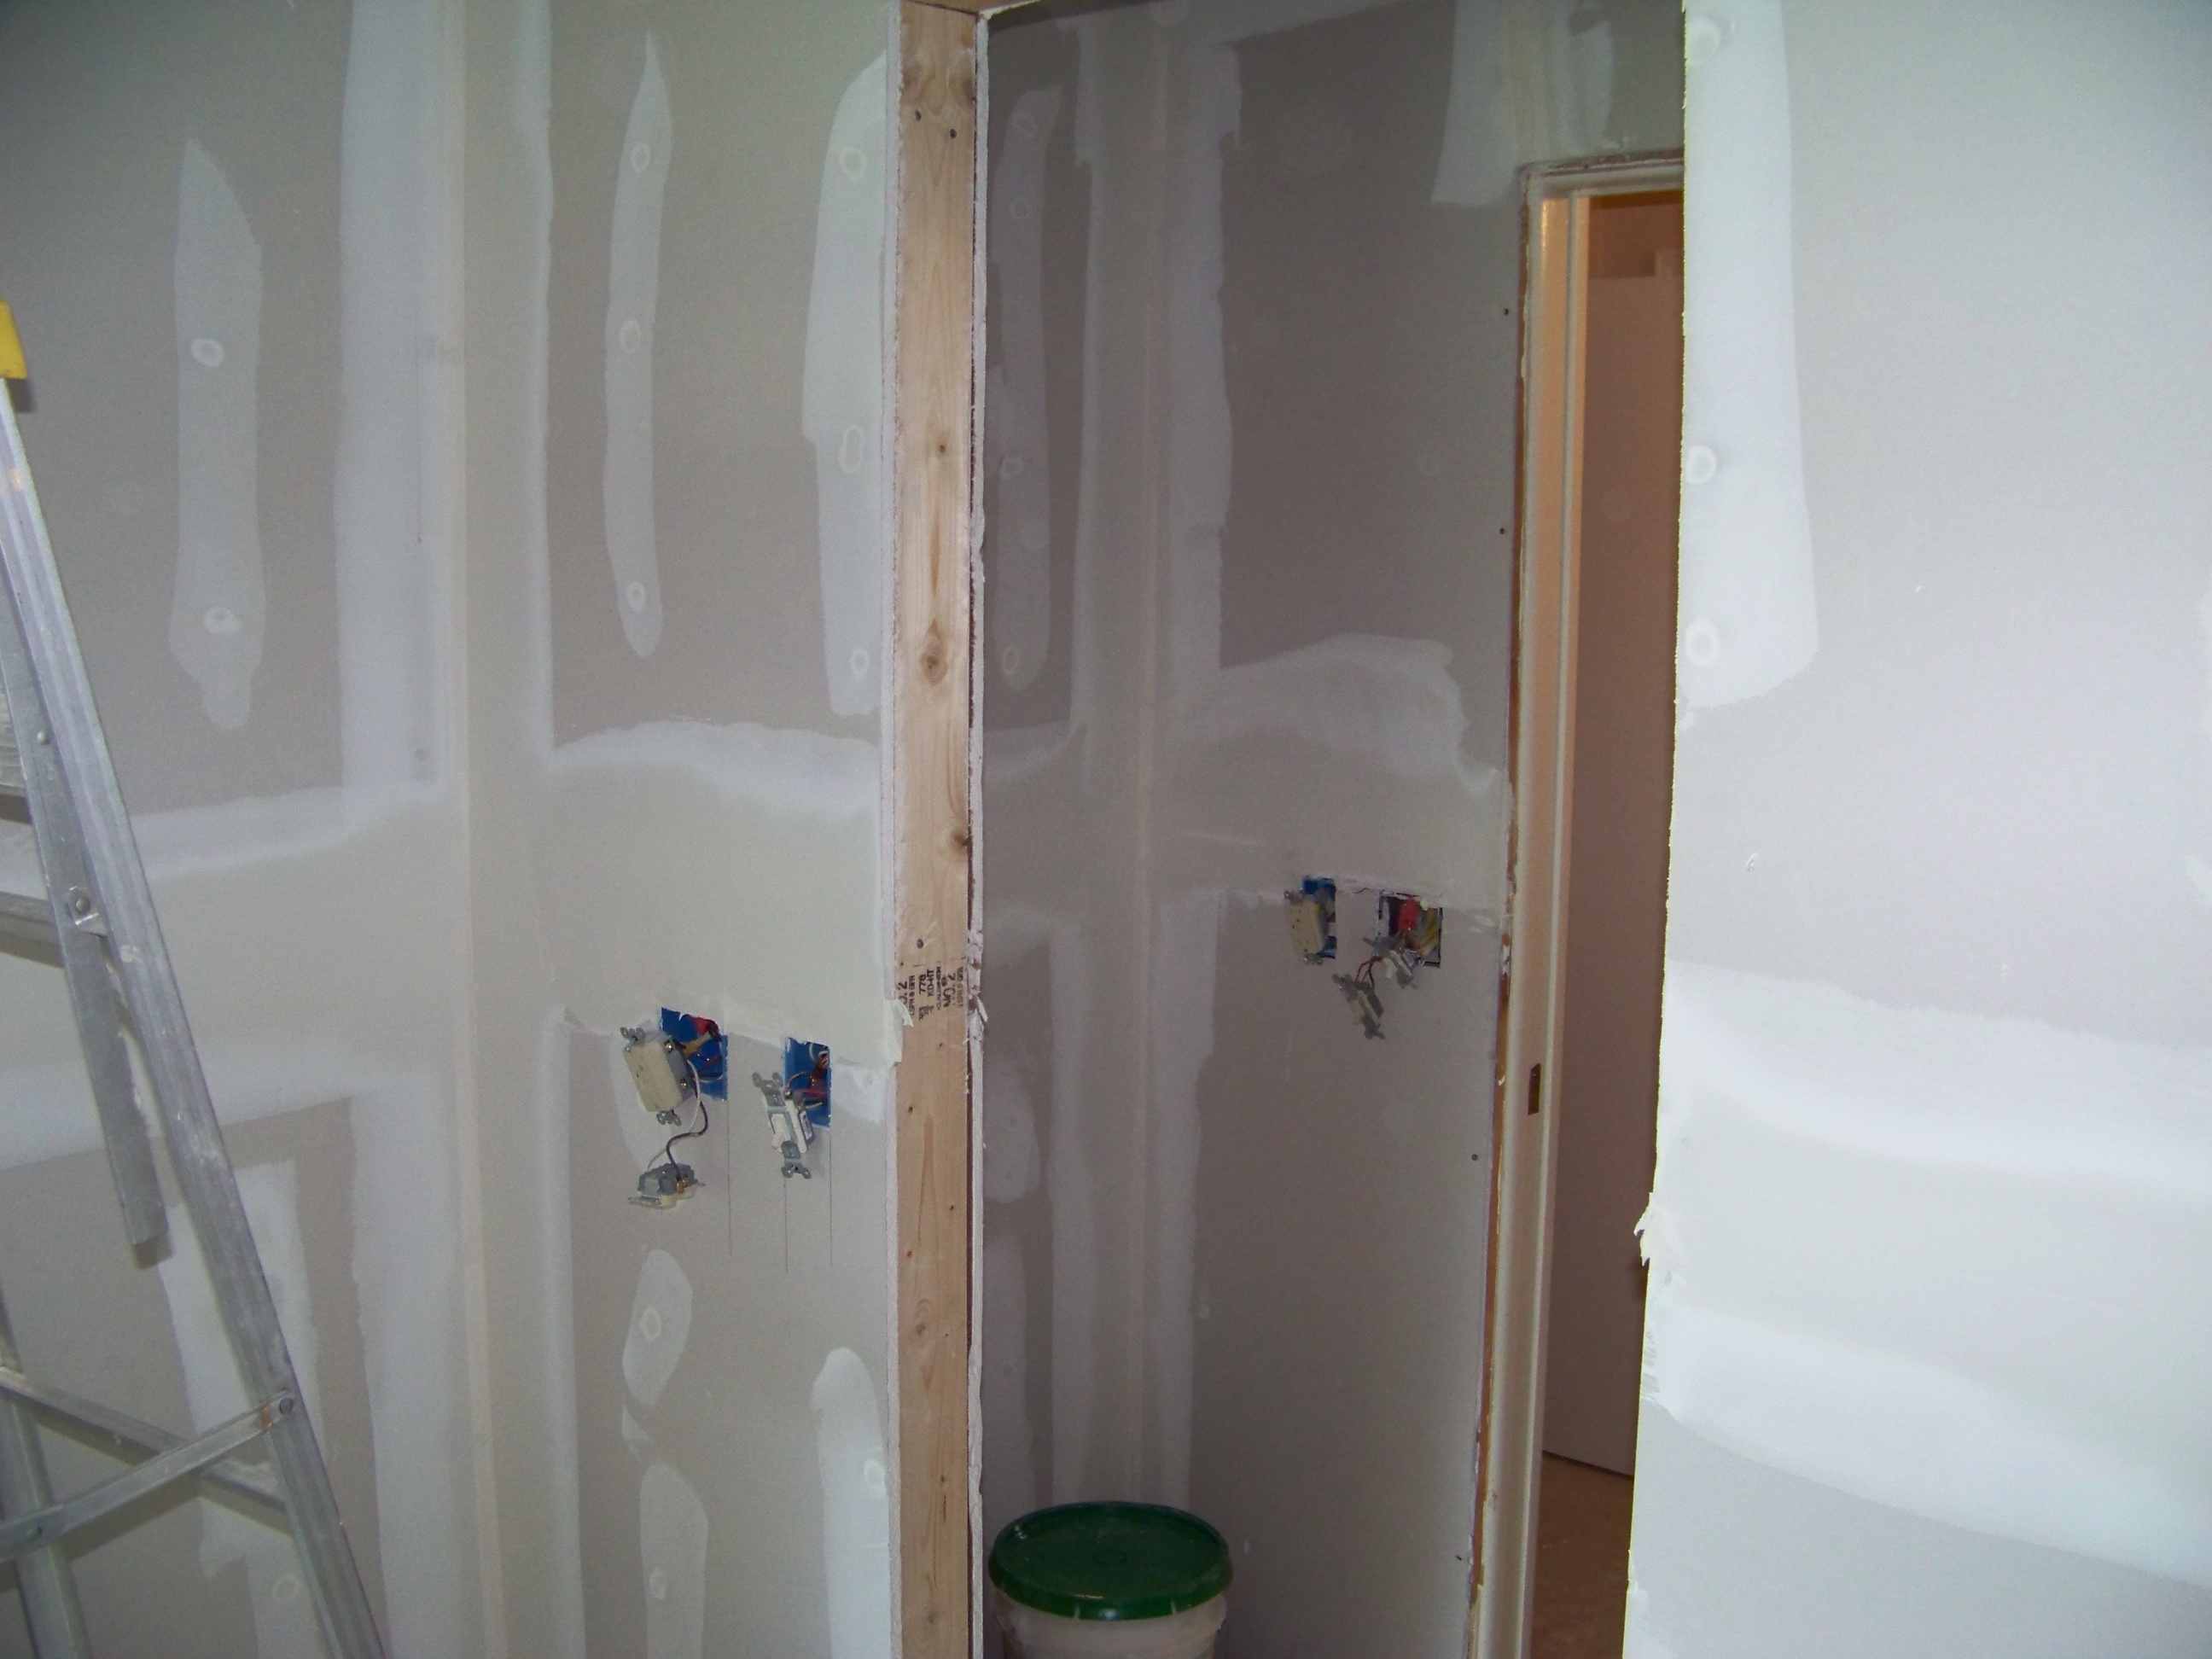 | Our main vanity area and half-bath vanity area. Not sure why I'm so proud of this picture, other than because I did the electrical. LOL |
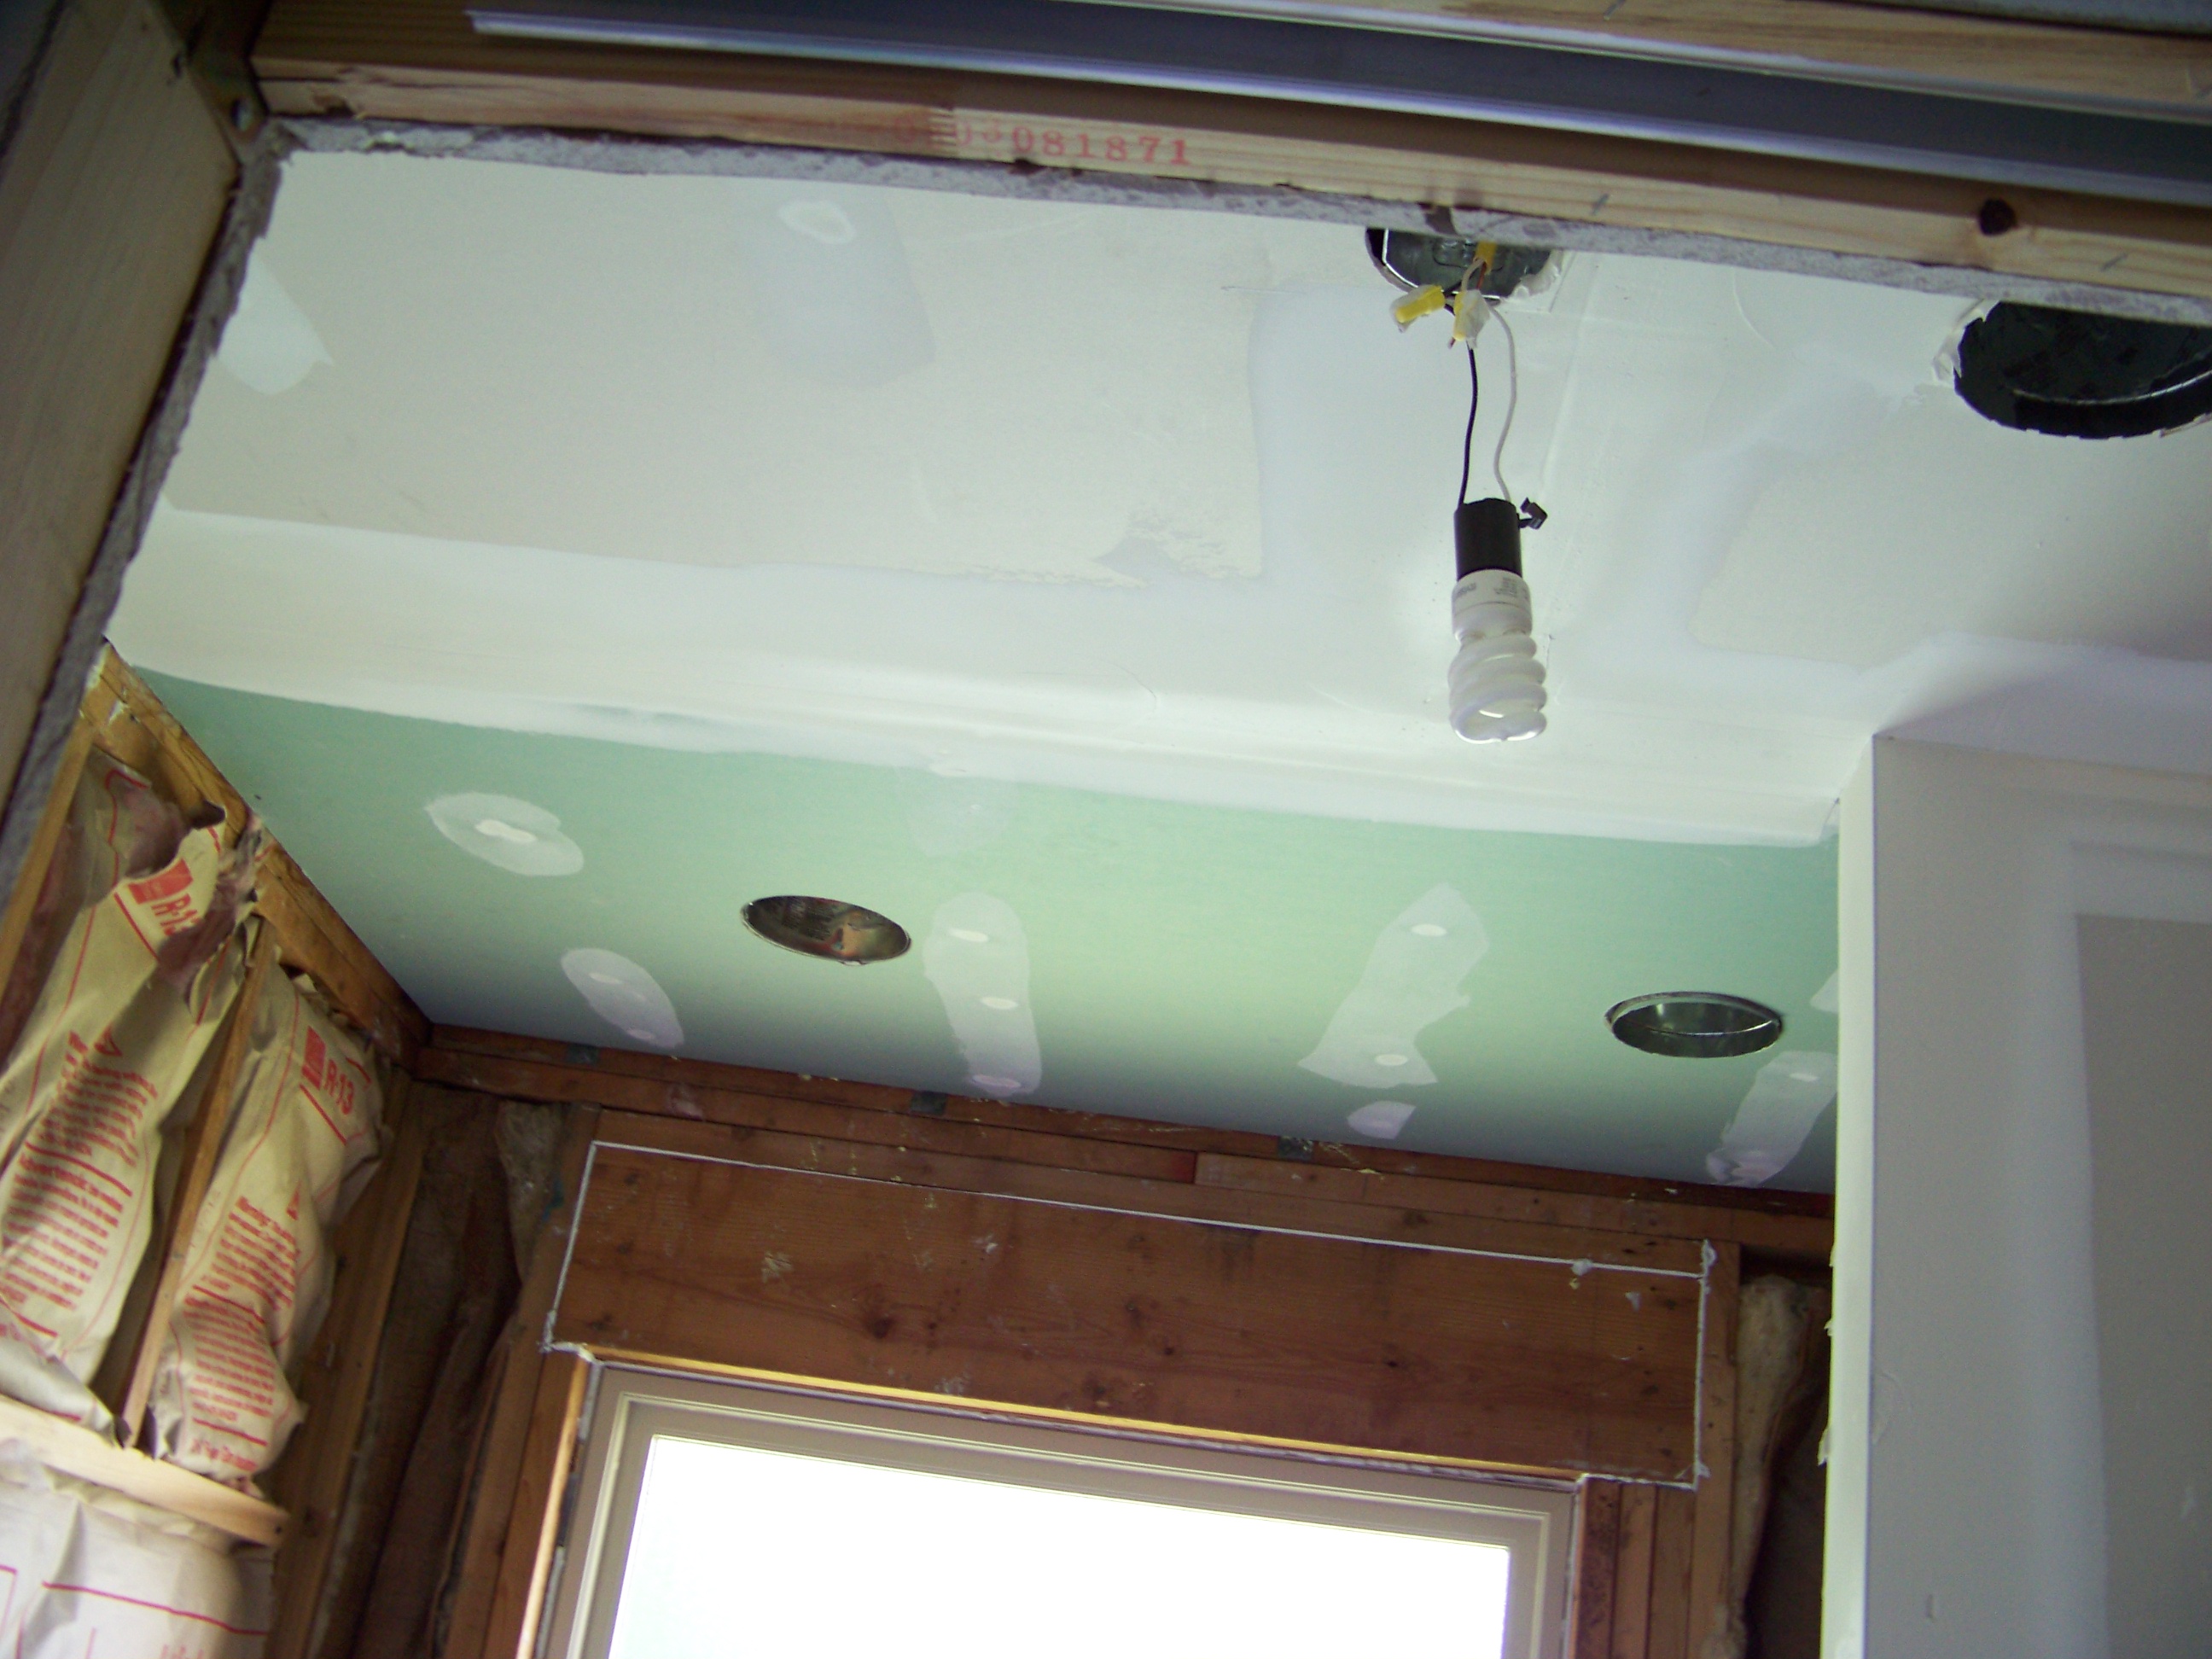 | The ceiling in the shower uses green drywall. It has a special coating that helps it resist water. Its mildew resistant. We'll use hardybacker on the walls. |
Monday night(Aug 11), Nathan and I did some painting. We put primer on the ceiling in the shower, and on all the walls. I also painted the ceilings with a flat ceiling paint.
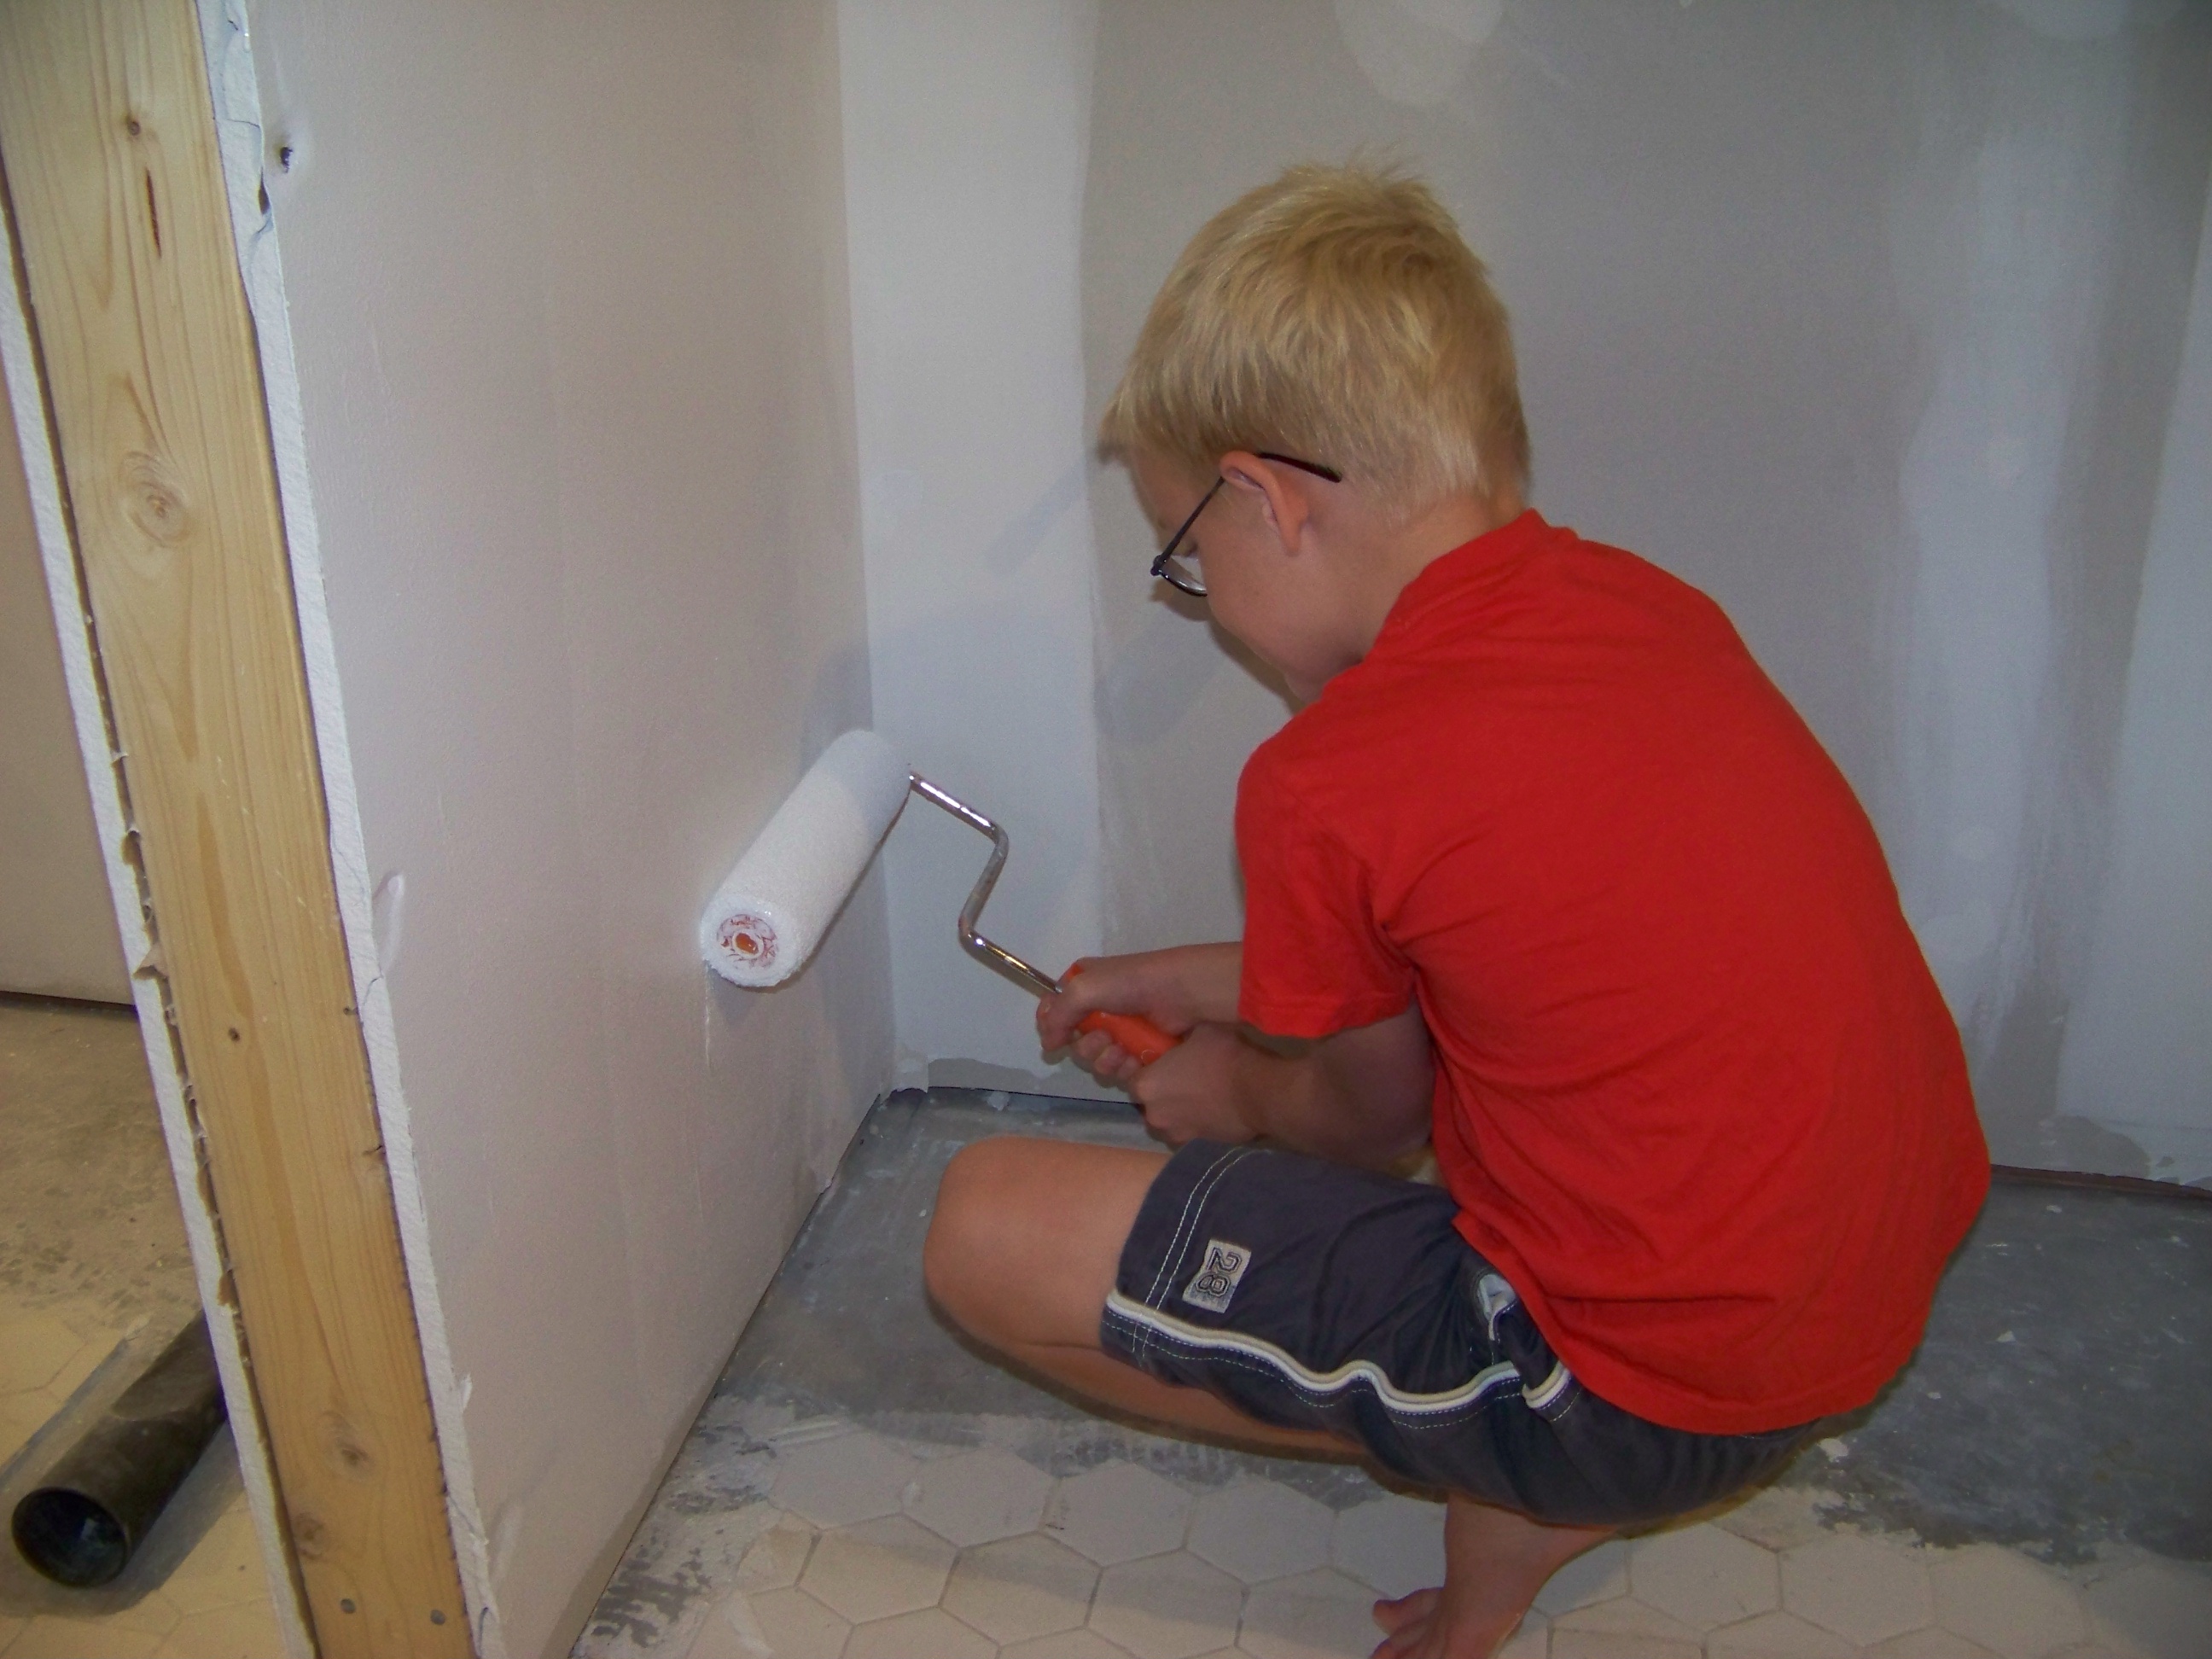 | Here's Nathan putting some primer on the bottom of a wall. He did a lot and then realized the paint roller is heavy. :-) |
Tile
Anita spent plenty of time looking at tile and finding the perfect surface. We learned a lot during the process:
- Ceramic tile is the least expensive kind. Pretty thin (1/4" or less) and breakable. Surface coating can be different color than the tile itself. (What if it chips?)
- Porcelain tile is a big step up from ceramic in quality, but not in price. Thicker and far more sturdy. Some porcelain is non-glazed, making the tile one color throughout.
- Travertine tile comes from a naturally occurring rock. Has a natural pitted look; available in many colors. One of the most desirable stones on the market.
- Tumbled marble is similar to travertine in appearance, but has the venation that is characteristic in marble. Not polished smooth. Very durable.
We had planned to use porcelain tile because of the economics. That is, until Anita found the Floor and Decor Outlet in town. They enabled us to buy tumbled marble at the same price we would have paid for porcelain. Its like getting a free upgrade!! Unfortunately I had to make a half-day trip to the Floor and Decor in Orlando because the store near us didn't have enough of what we needed. Their prices are so much lower that its well worth the drive.
Our tile guy (Mr. Wayne McLean) arrived on Tuesday morning and got right to work. He poured some floor |levelizer on Tuesday and had to let it dry before doing anything else. Wednesday he built a corner seat, poured the bathtub slab and installed hardy backer in the shower. On Thursday, he started tiling.
 | Here you see the newly-primed walls and 50 pounds of self-leveler drying on the floor. What you don't see is the tile that Wayne removed. It was bonded to the floor with a super-hard form of grout that hails from the '70s. Wayne said it took much more work than usual to get the tile off the floor, even with his Bosch hammer drill. |
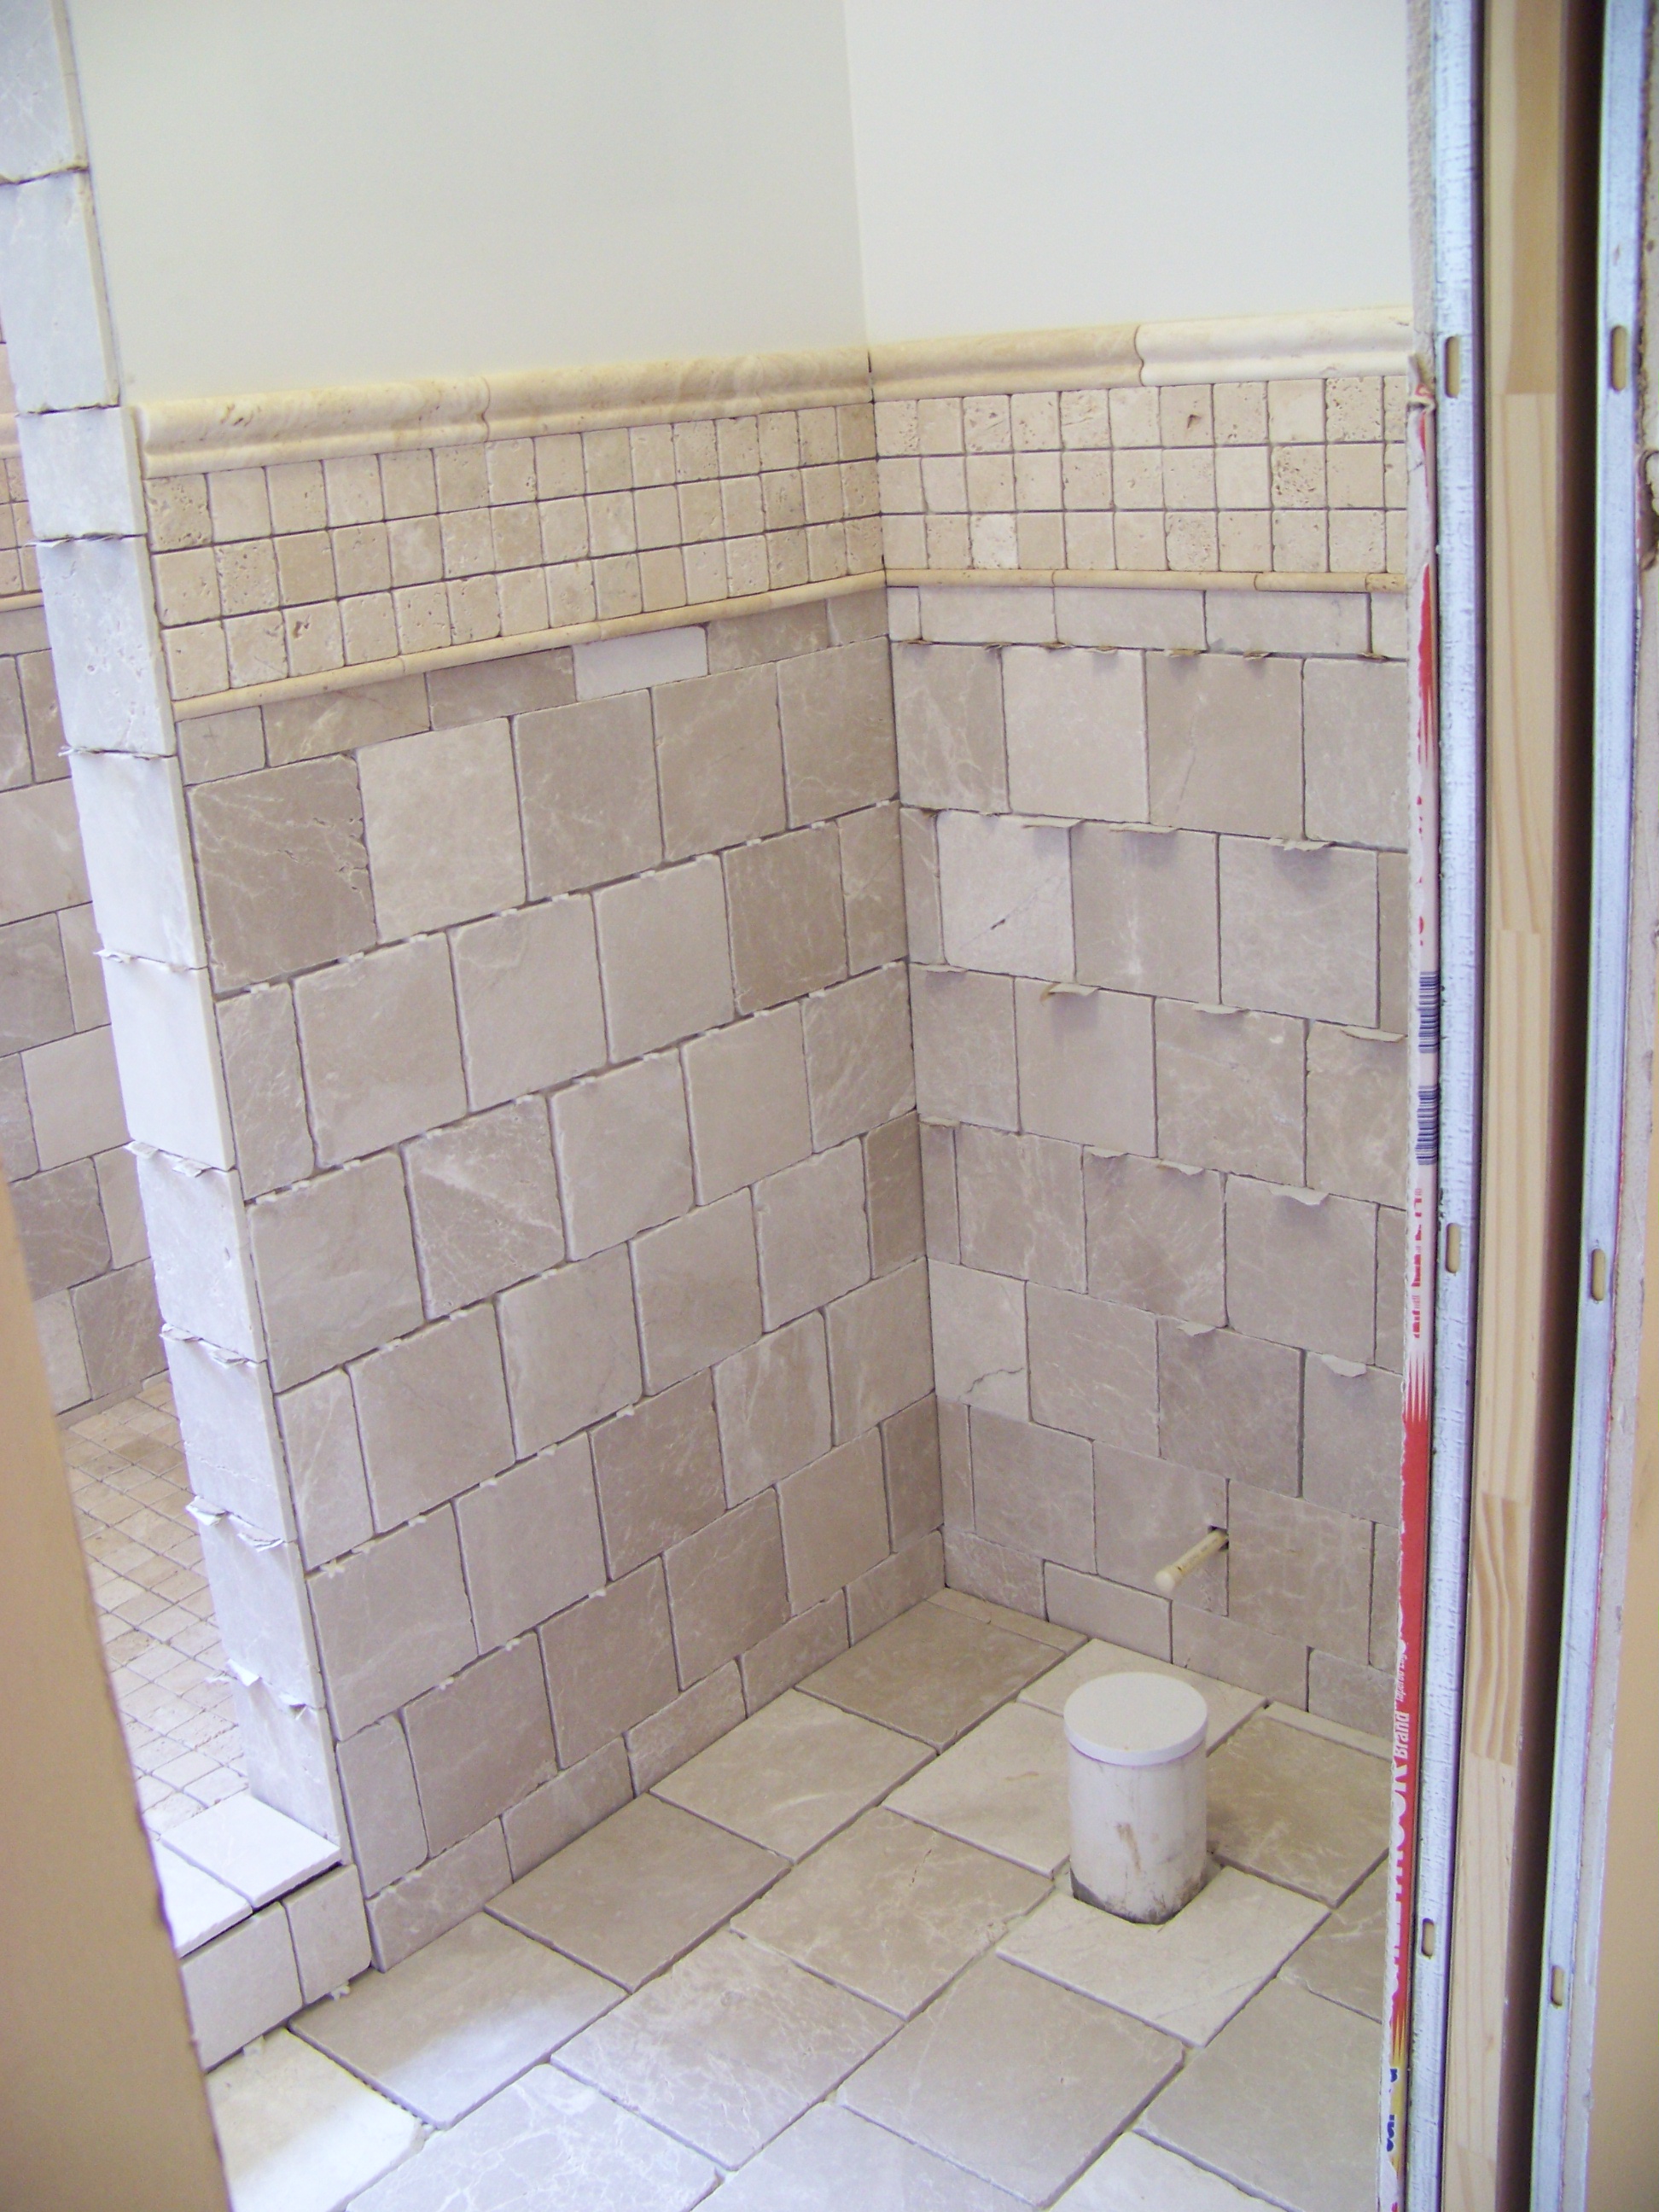
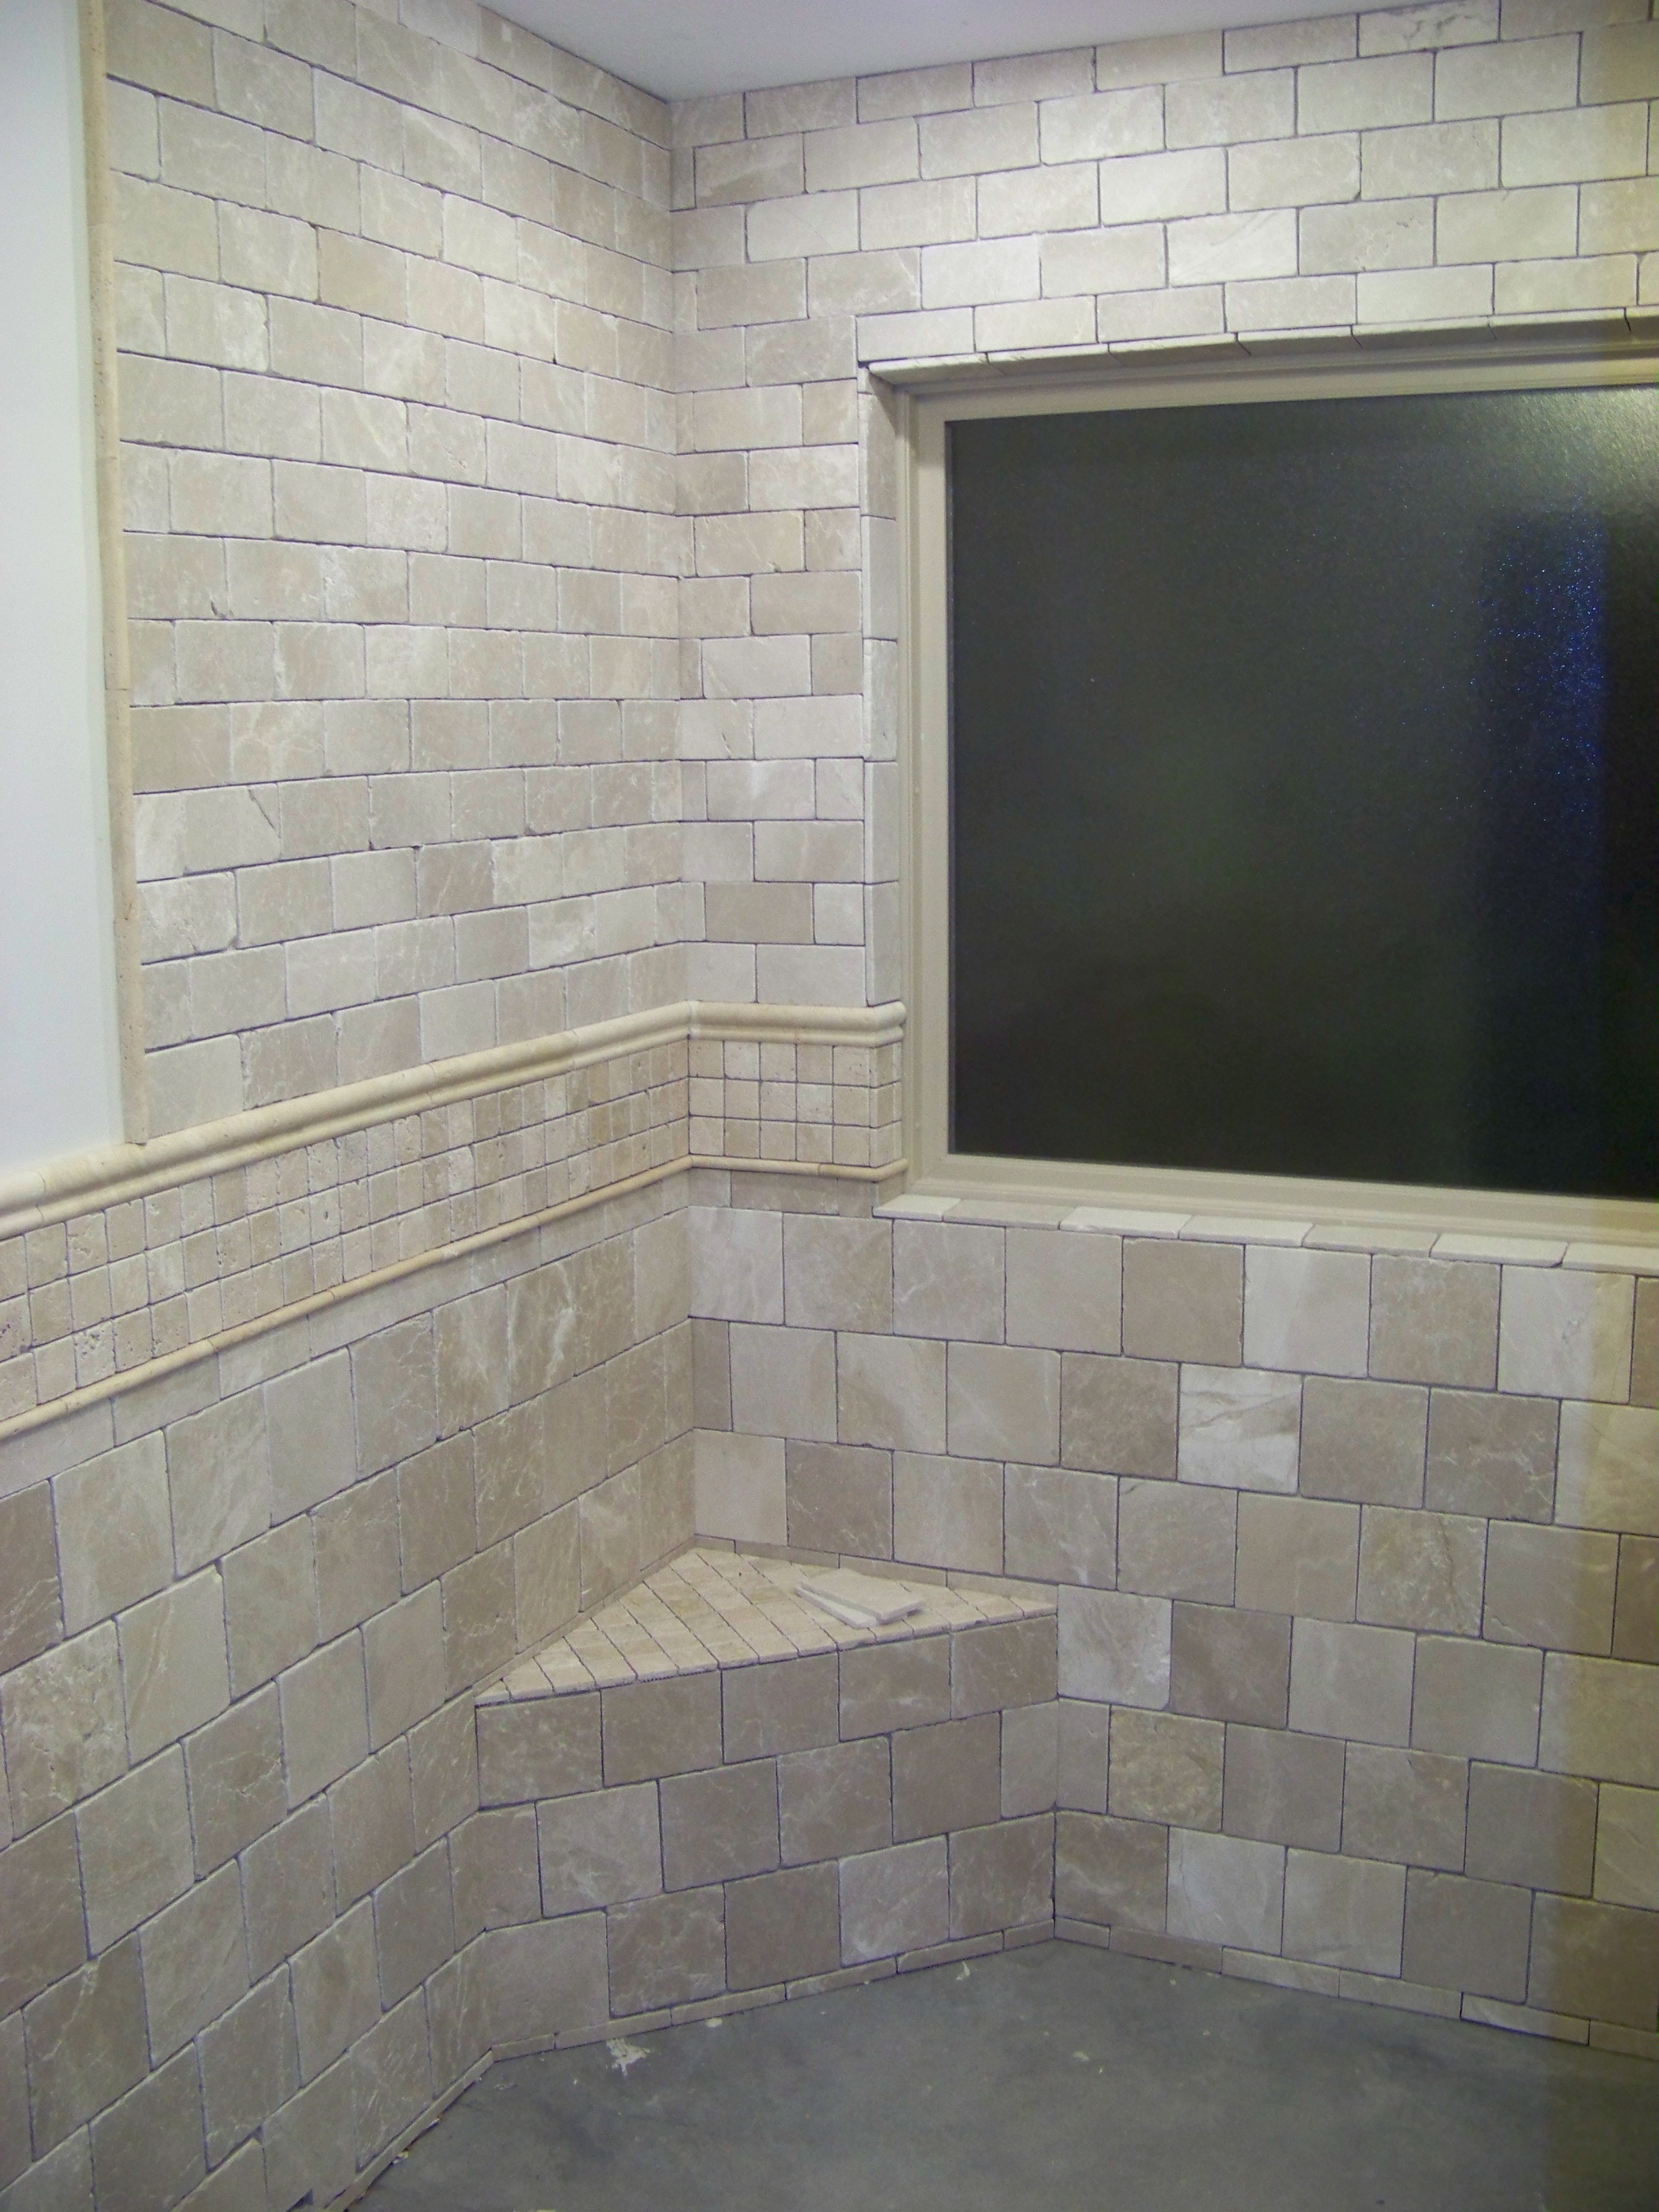 | This is the first corner that was finished. Check out the variety of colors in the tile. We have a wide chair rail in the center of the wall, small tiles (3x6) at the top, and larger tiles (6x6) at the bottom. The trim work around the window is fantastic. Its even more stunning in person. The floor tiles haven't been installed yet. They'll be the same as the ones on the corner seat. |
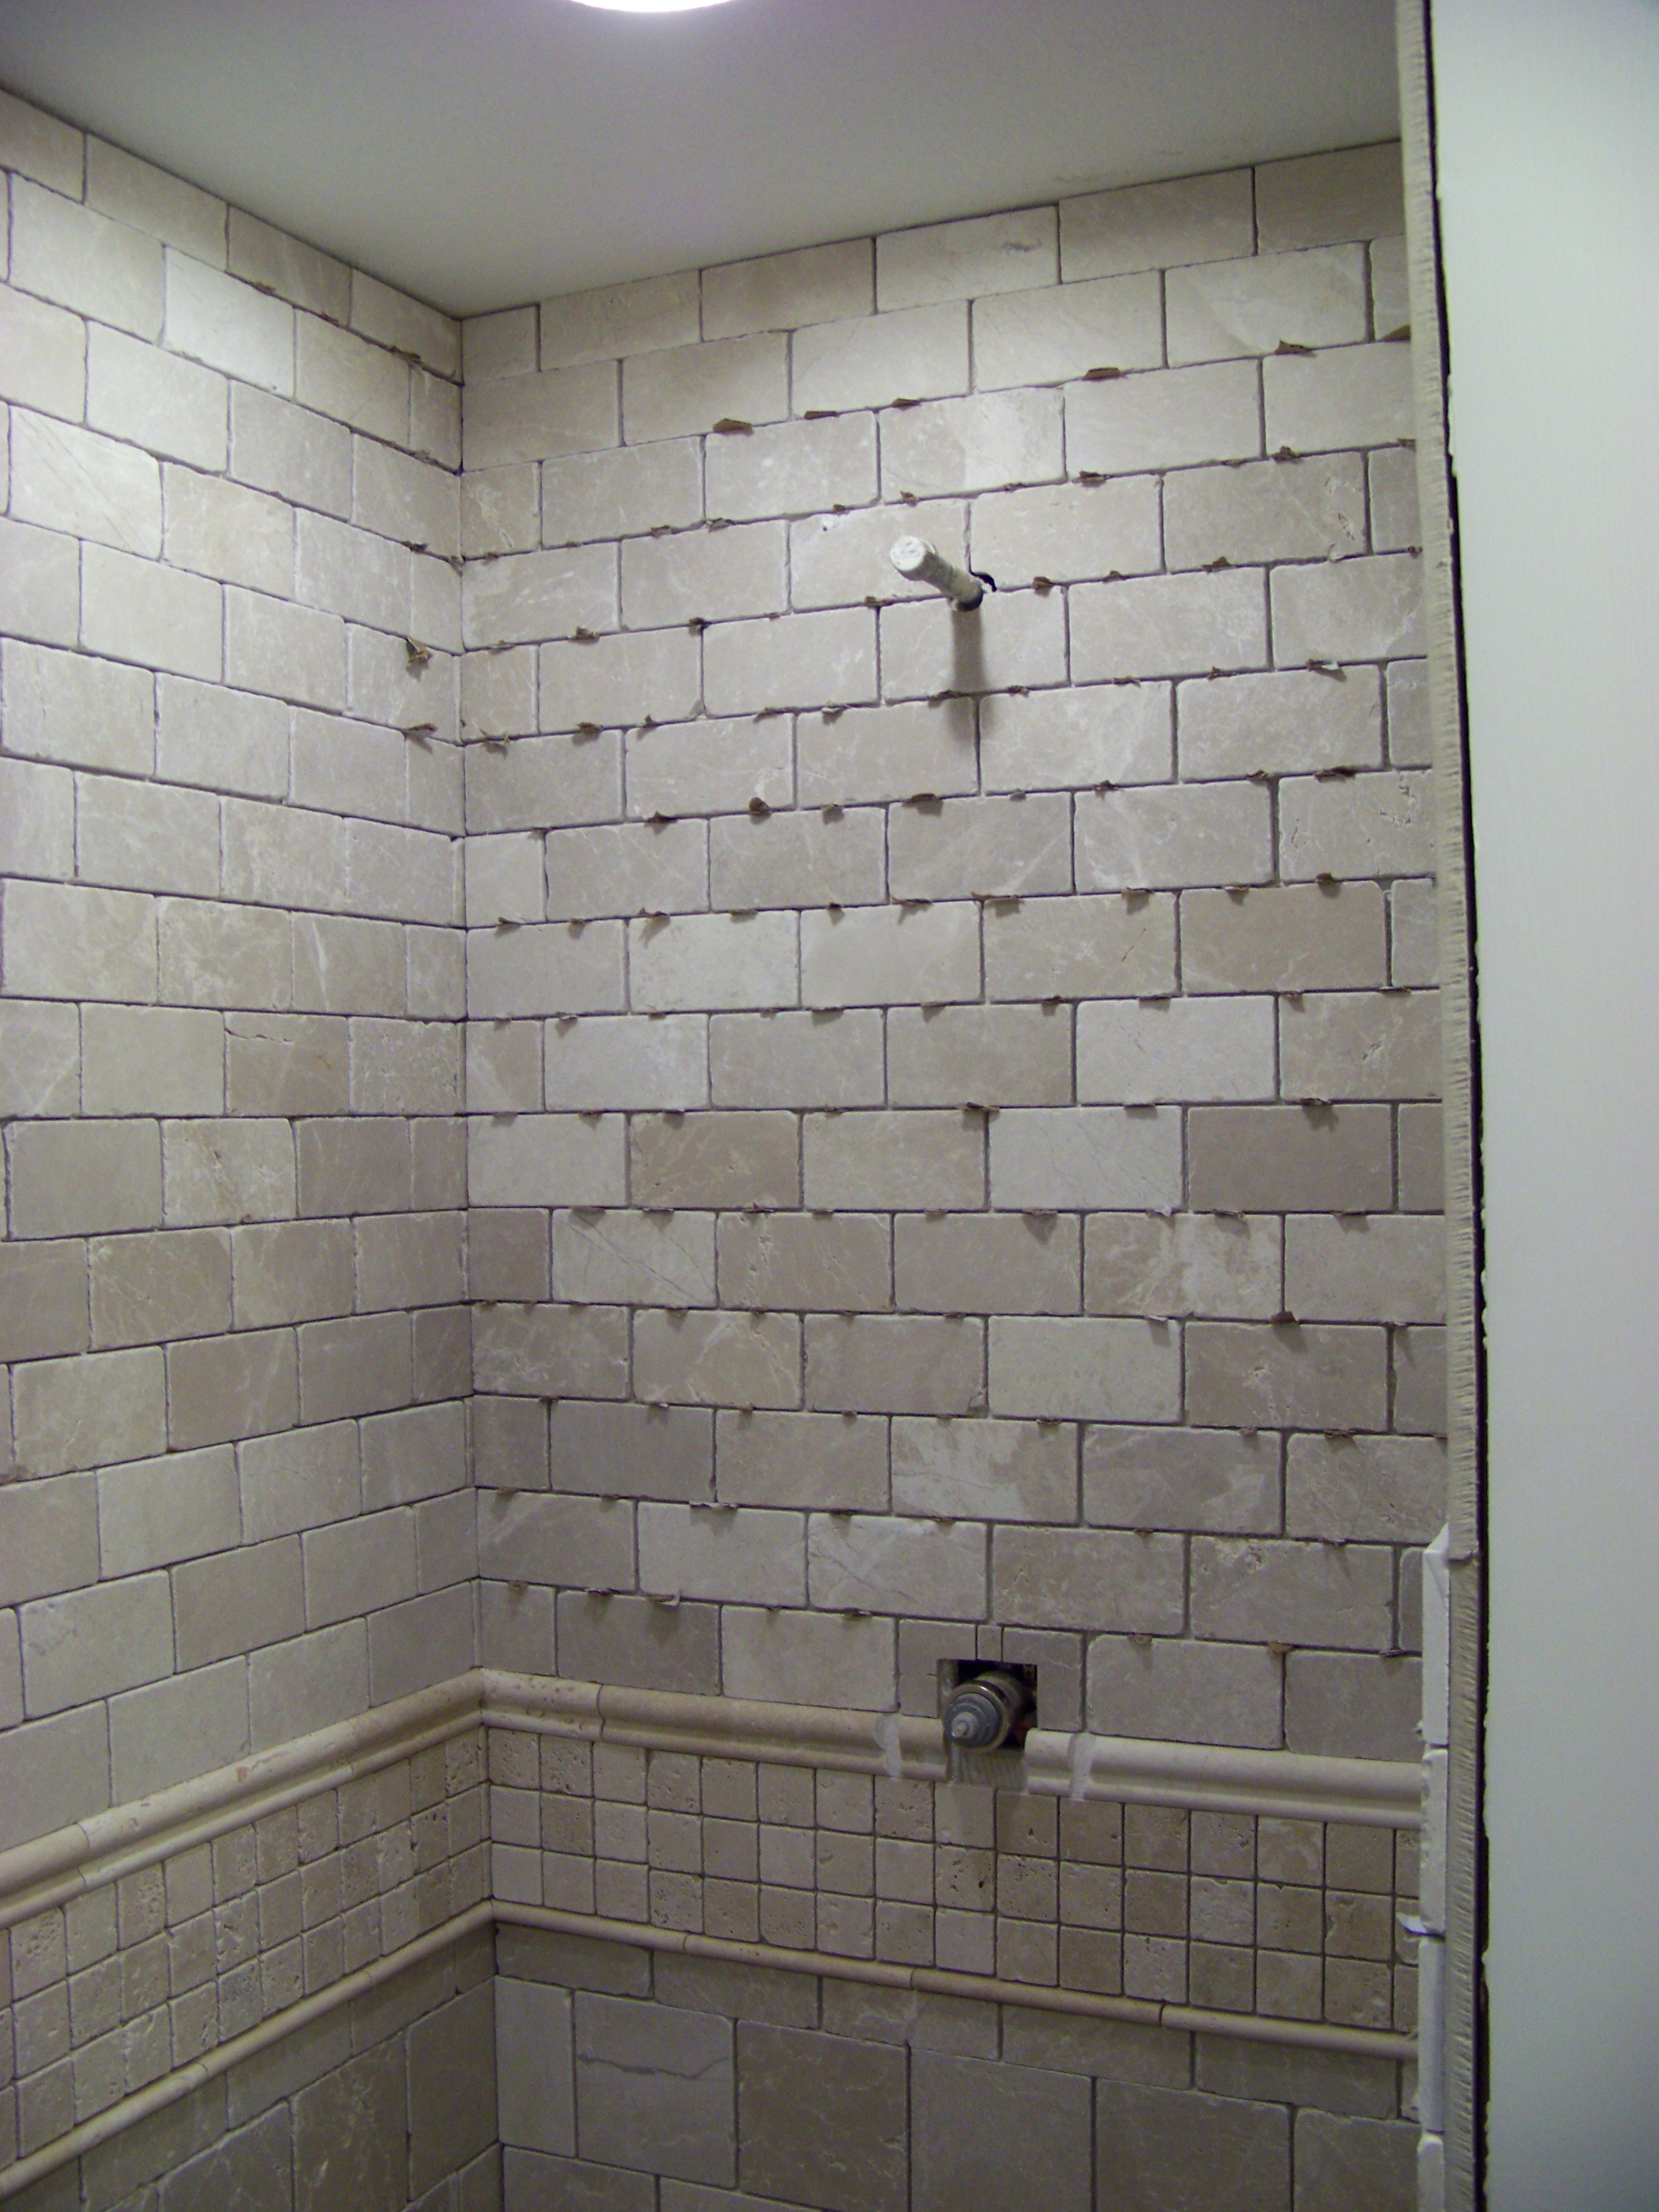 | Here is the other corner of the shower. The spacers are still in place...just little bits of cardboard. You can see the roughed-in plumbing. It will be really nice when its done. And Wayne cut grooves in the chair rail so our shower valve faceplate would fit flush with the tile. Very cool! |
 | Our newly-installed floor tiles. They've only been on the floor a few hours and haven't been grouted yet. But they look really nice already. You can see common colors and textures between the floor and shower wall. I installed the bathroom doors too, but they're all out of sight in this picture. |
 | Here's a close-up of the floor tiles. These are 6x6 squares. No grout yet, but what nice textures. Can't wait until we apply the sealant and the colors really liven up. |
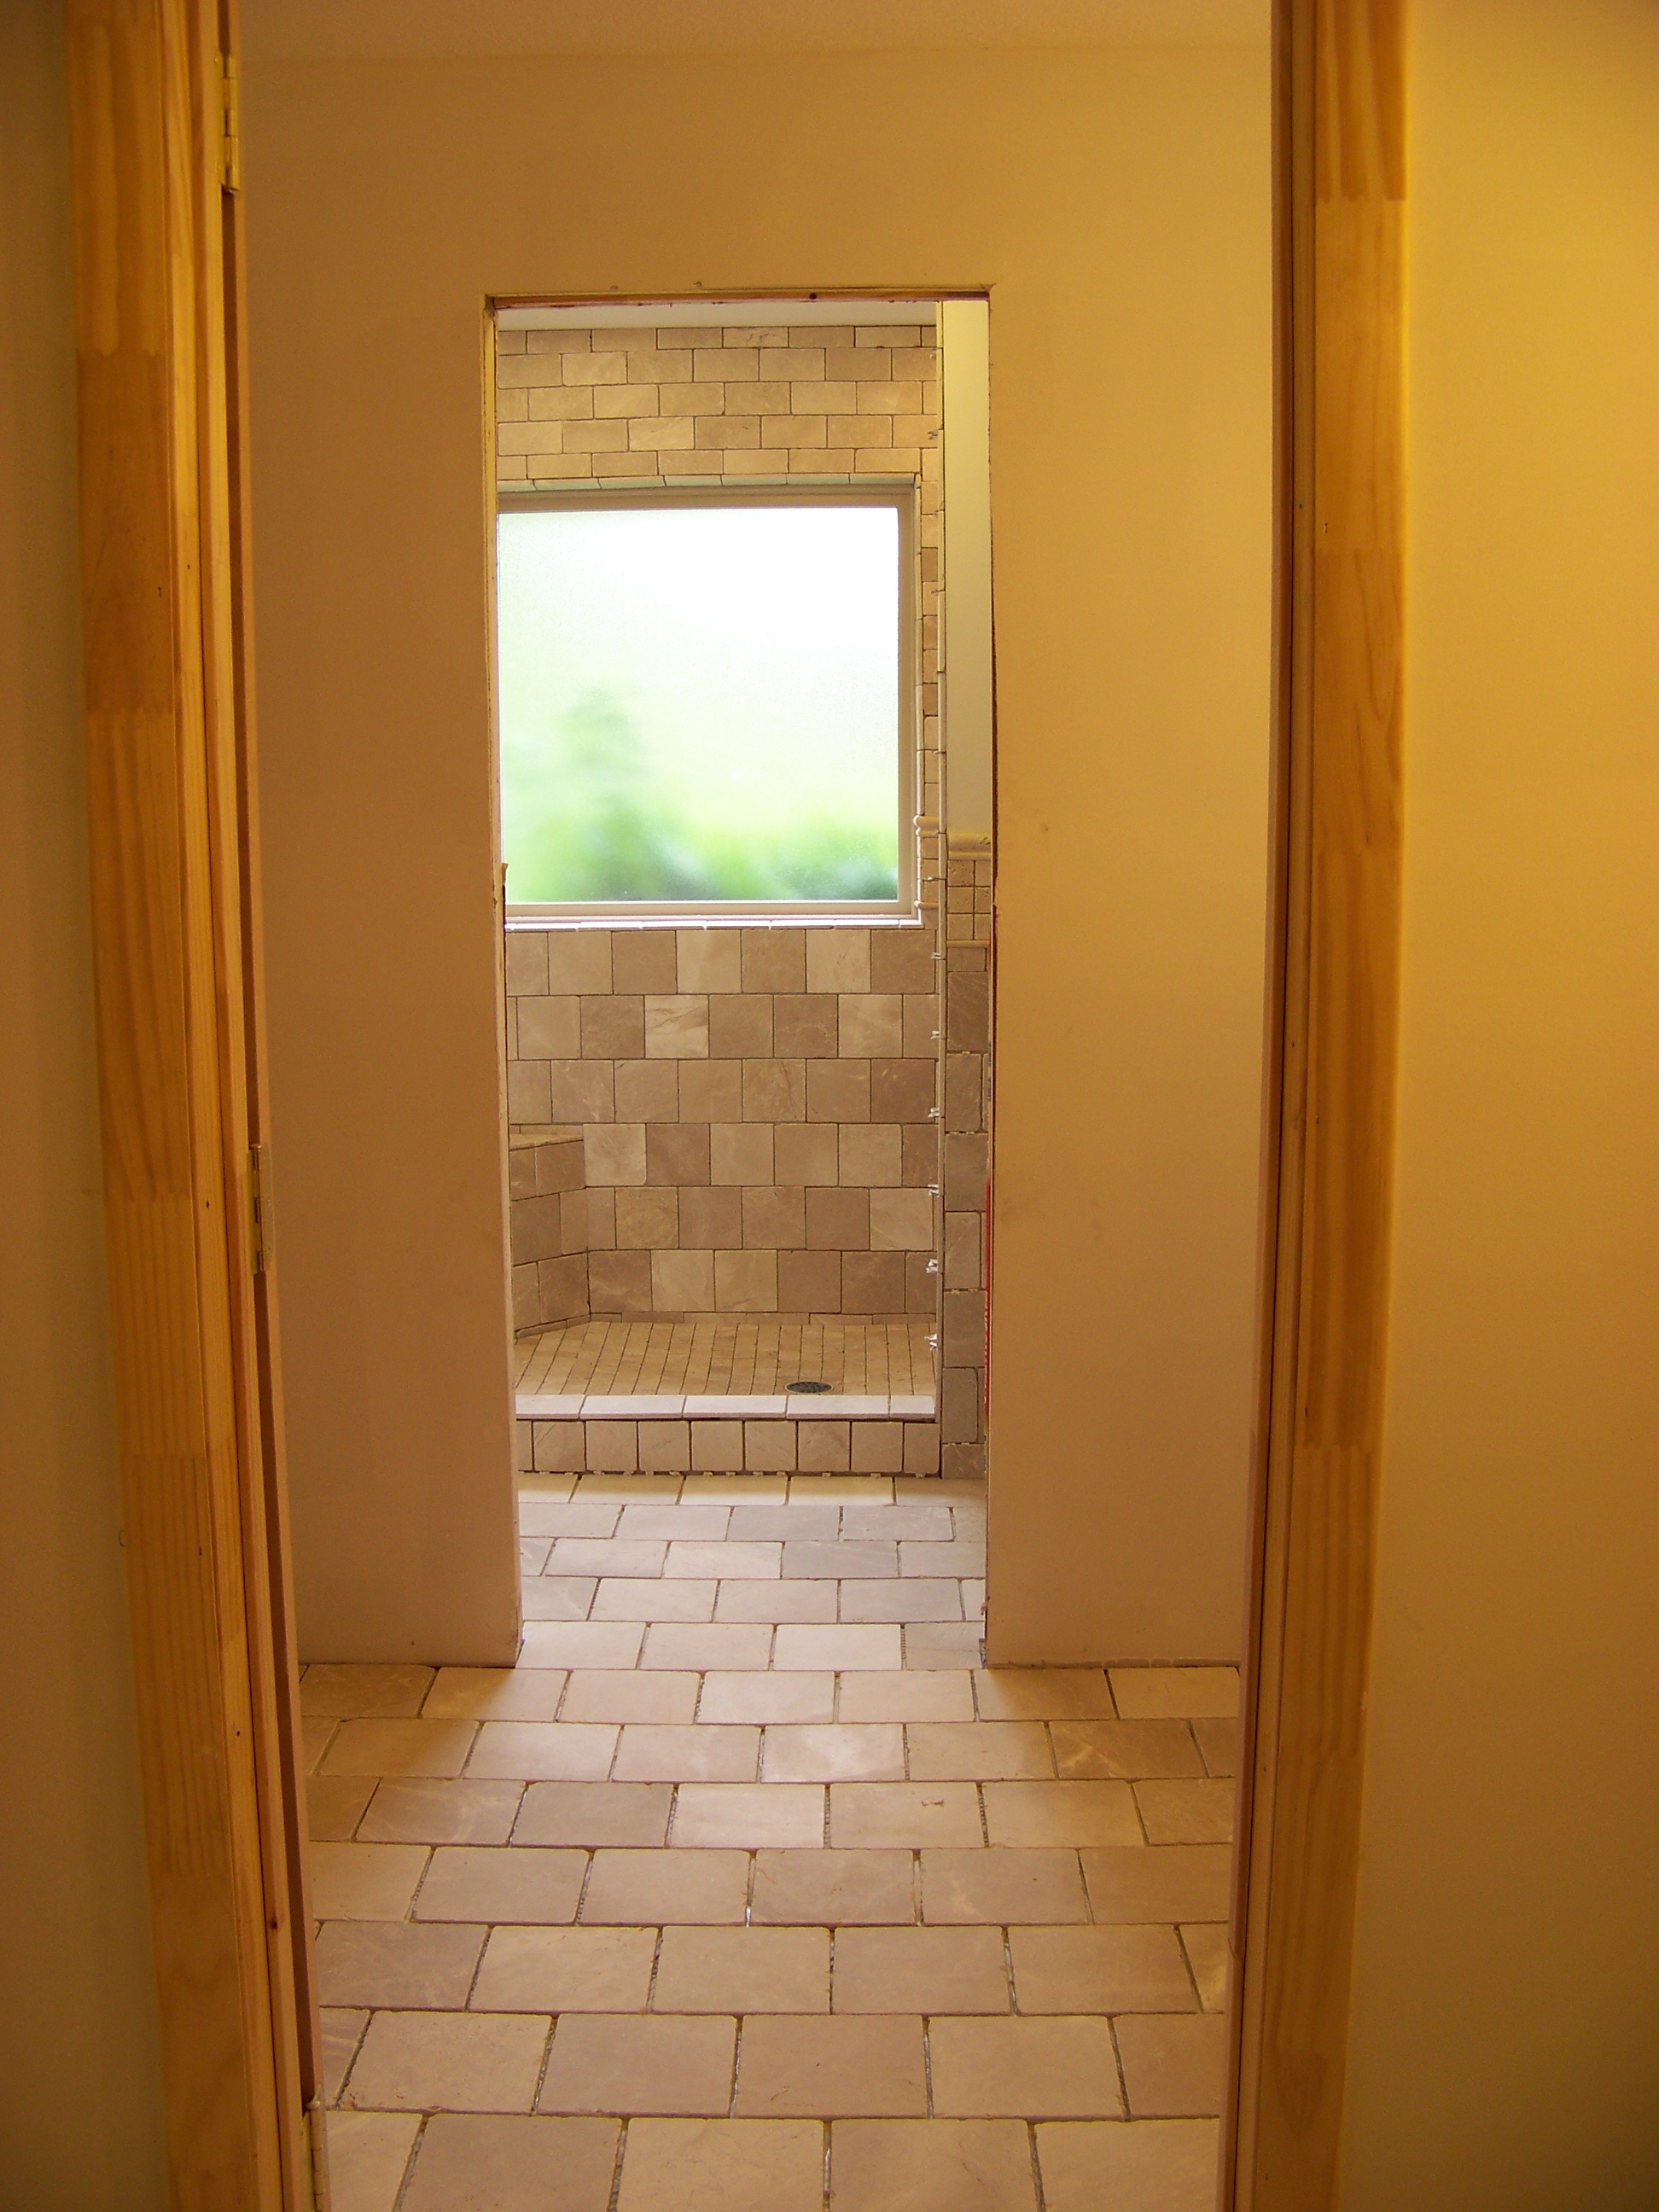
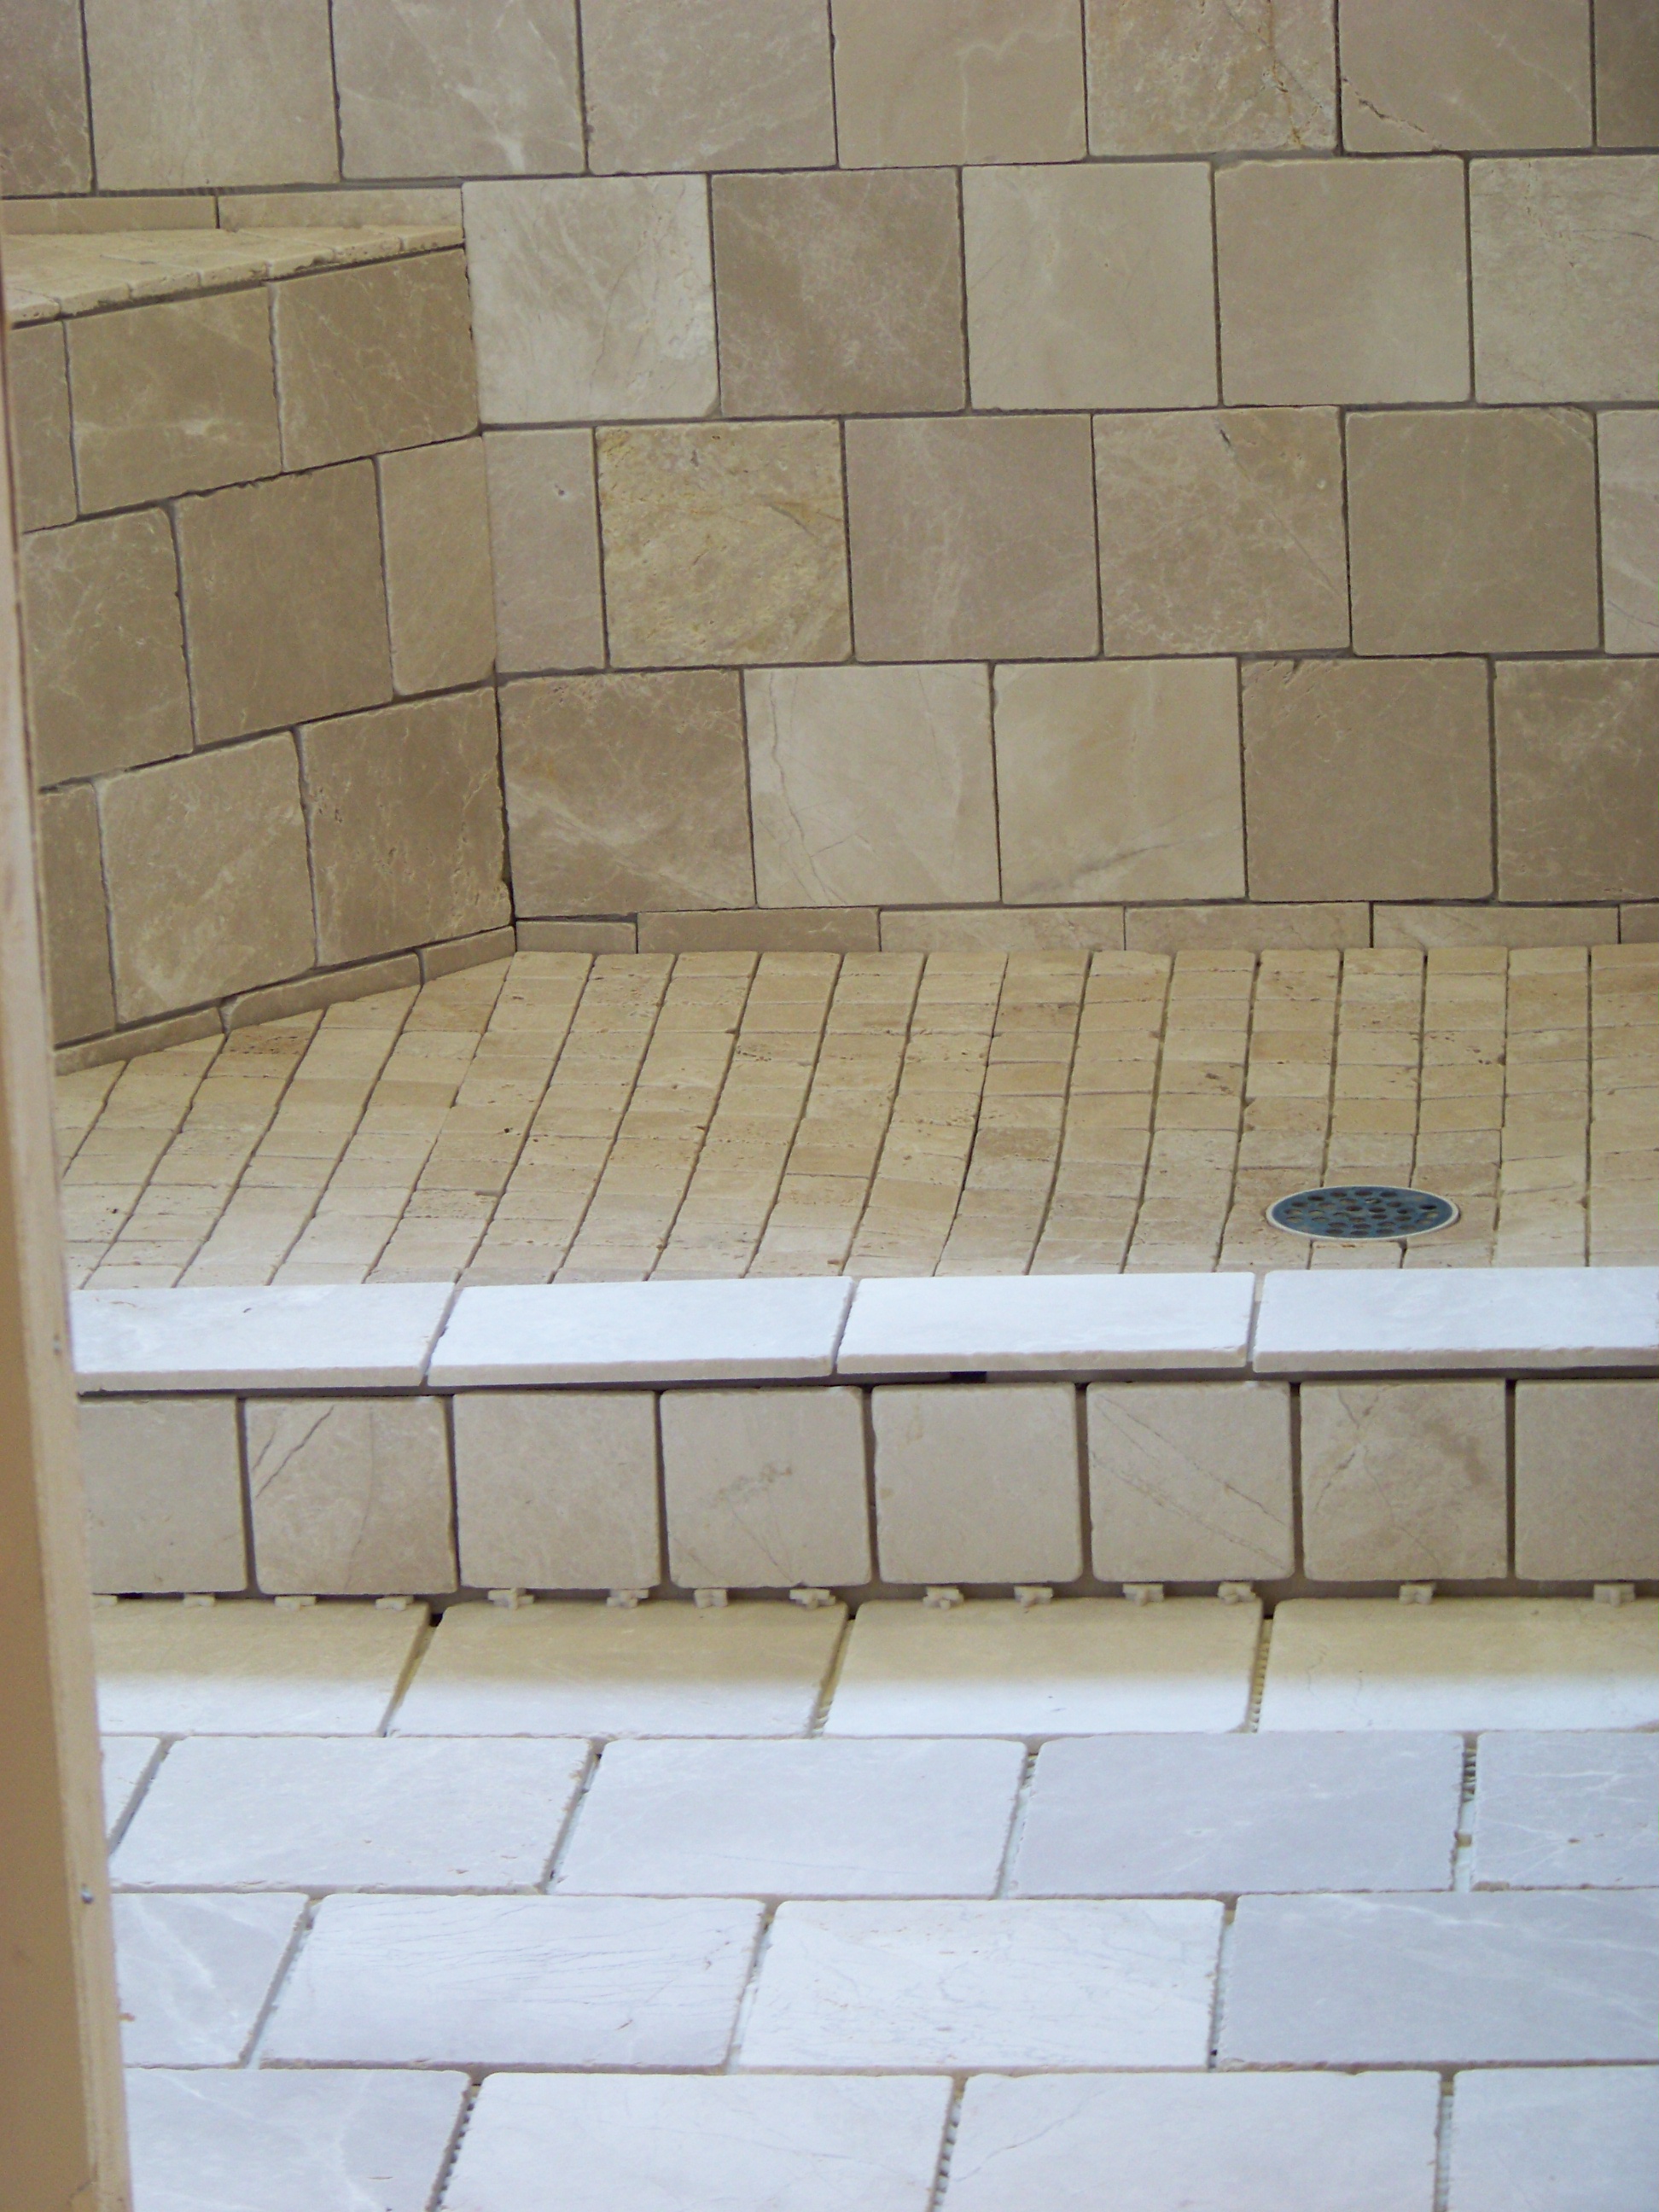 | This is a telephoto shot across the bathroom because we can't walk on the tiles yet. The shower floor really ties everything together. (Pay no attention to the spacers still in place here :-) ) |
 | The chair rail seems to be a different color than the wall mainly because of the lighting. Yours truly will be installing a toilet here soon. |
Construction Phase 3
This phase is all about doors, paint, trim, cabinets, counter tops and toilets.
Toilets
Saturday morning (8/25/08) we went to Lowes to buy toilets. There are way too many choices today--bowl shape, color, height, vendor, flush rating, etc. After a bit of reading, we decided on an American Standard Cadet 3 all-in-one kit. It cost $150 and came with literally everything we needed except the hose to connect it to the water supply. I have to say we are very pleased with it.
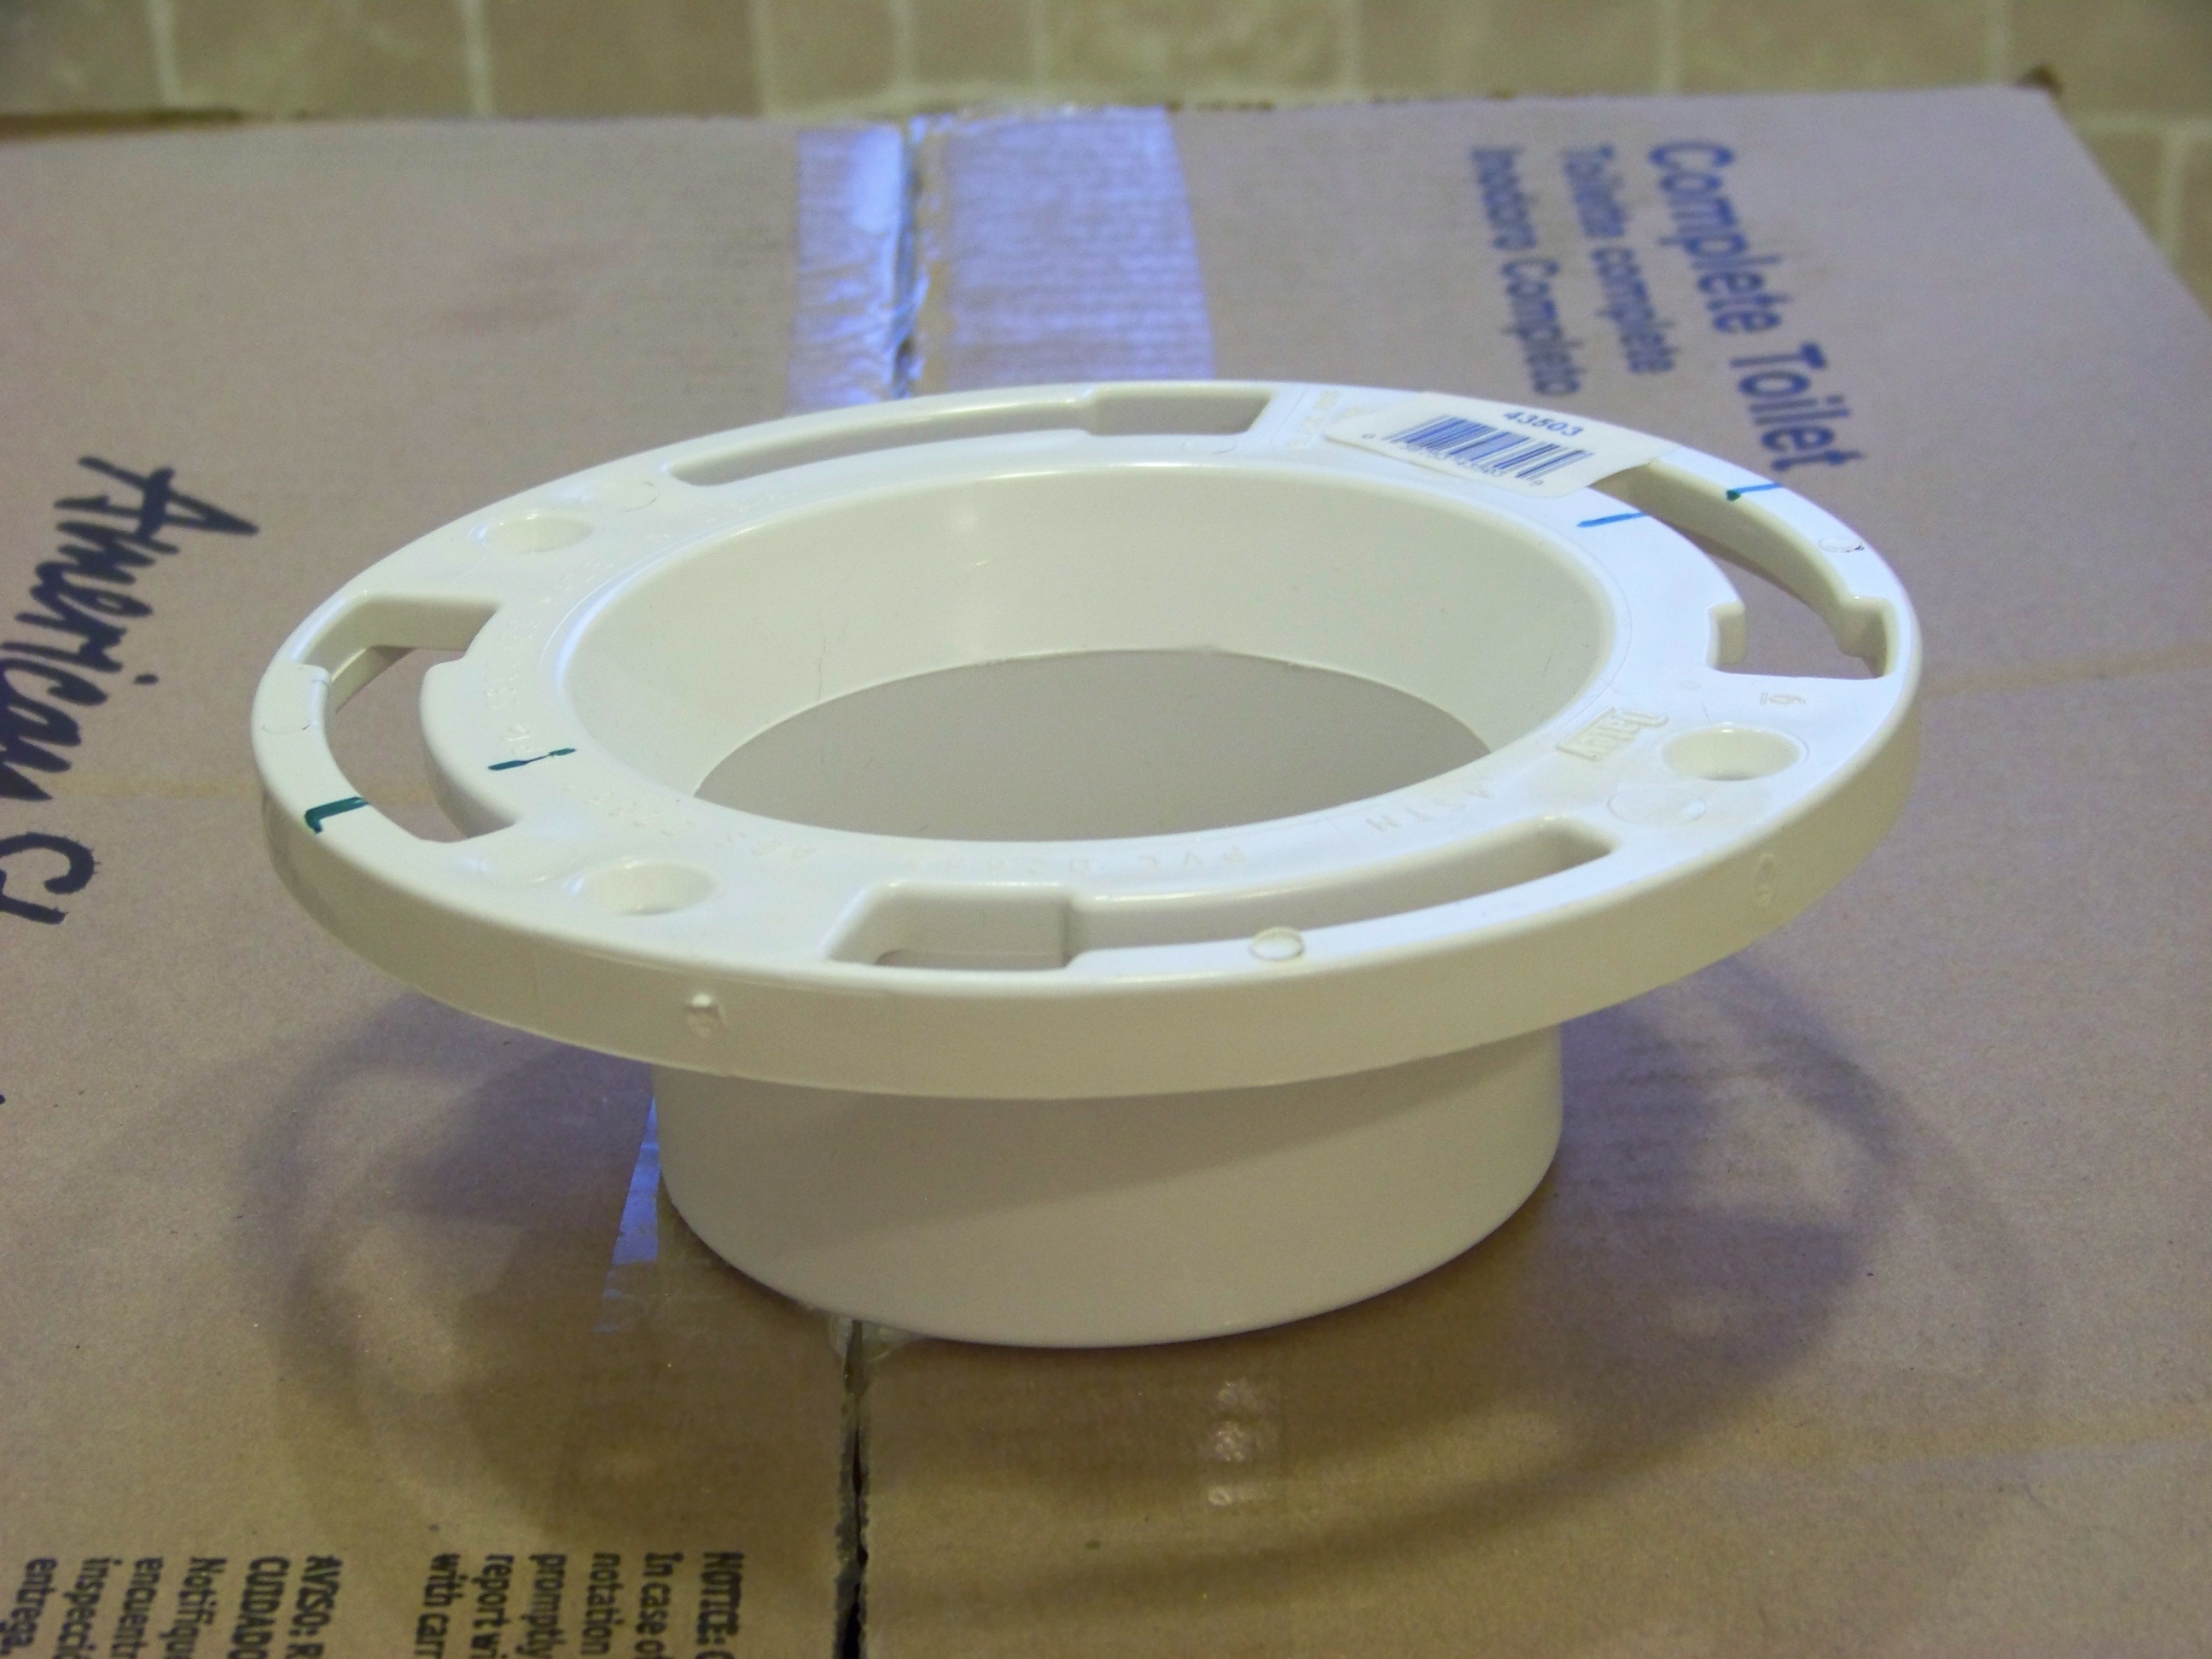 Step 1 was to cut the PVC drain pipe flush with the floor and install the toilet flange (seen at right). We just had to rotate it properly so the toilet bolts can end up in the right place (i.e. a line between them must be parallel to the rear wall). Simple enough...put PVC primer on the flange and the pipe, put glue on both parts, align the flange properly, and press down for 60 seconds. Done.
Step 2 was to install the toilet base. That was straight-forward. We put the wax ring3 on the toilet flange and inserted the bolts like the instructions said. Then I put cardboard on the floor in front of the flange to protect the toilet from the marble floor. No sense cracking a porcelain toilet because we bumped it on the floor. Then we lifted the toilet and positioned it over the bolts. It took a few minutes of gentle pressing to flatten out the wax ring, but the toilet sat firmly on the floor. We installed washers and nuts on the toilet bolts to secure it in place. Only problem is we had a large gap under the front edge of the toilet because our bathroom tiles are not perfectly level. More on that later.
Step 3 was installing the tank and connecting it to the water supply. This was a short task. The tank came with all the hardware pre-installed: the ballcock, float valve, flapper, etc.. This saved at least 20-30 minutes of work. We installed the large rubber washer on the bottom of the tank, and positioned the 2 tank bolts. I lowered the tank onto the base while Anita installed the washers and nuts. We tightened up the nuts, connected the water line with a pre-built hose assembly4. We turned on the water, let the tank fill up, and did a few test flushes. Working as expected.
Step 4 was adding the finishing touches. We installed the toilet lid (a $20+ accessory that came with our kit). Remember the uneven floor tiles in step 2? Our plumber had said that gaps larger than 1/8" should be filled with grout instead of caulk. Our gap was almost 3/8" high, so we did that. Luckily we had a partial bag of sanded grout left over from our recent tile job. I mixed that up, forced it under the base of the toilet all the way around, and created a nice beveled edge with my finger. We cleaned up with a sponge and a bowl of clean water.
With toilet #1 finished, we moved on to the next toilet. Same steps, same procedure. But things went wrong in step #2. When pressing the toilet down to compress the wax ring, we realized the bowl wasn't sitting on the ground at all. So we had to remove the toilet and the wax ring to see what was wrong. Turns out that a small piece of tile under the flange was angled upwards. It had prevented the toilet flange from sinking far enough into the drain pipe during installation, and now it was glued in place. How do we fix that?
 I consulted the plumbing guy at Lowes. He helped us choose our toilets in the first place, and he seemed really knowledgeable. I explained our problem and he gave me a hearty "been there, done that" laugh. We walked over to the plumbing supply aisle and he handed me a flat 4" metal toilet flange. He instructed me to cut off the existing flange, chisel away the raised marble, drill some holes in the concrete, and install this new flange with tapcon screws. I gladly bought the supplies for the task and returned home. It was a bit unnerving to think about the consequences of doing this wrong, but I had to keep going. 90 minutes of cutting and chiseling later, it was done. The metal flange was a perfect fit. The rest of the toilet installation was normal.
Summary: I hope I never have to do this part of a project again. Plumbing has high consequences when you do things wrong. One mental or physical error and you could spend hours making up for it. Its also unpleasant to work with waste pipes. Ours were new (i.e. sanitary) so it wasn't too bad, but getting an occasional whiff of the exhaust gasses reminded me why I don't want to be a plumber. 8-o I have new respect for plumbers...they deserve every penny they make.
Cabinets and Counters
We bought our cabinets from the KraftMaid collection at Lowes. We wanted our cabinets to be build of solid wood throughout, or at least be built with veneer plywood internally. But we couldn't find a combination of color, style, shape, and price that let us to do that. So we decided to go with solid wood fronts and MDF internals.
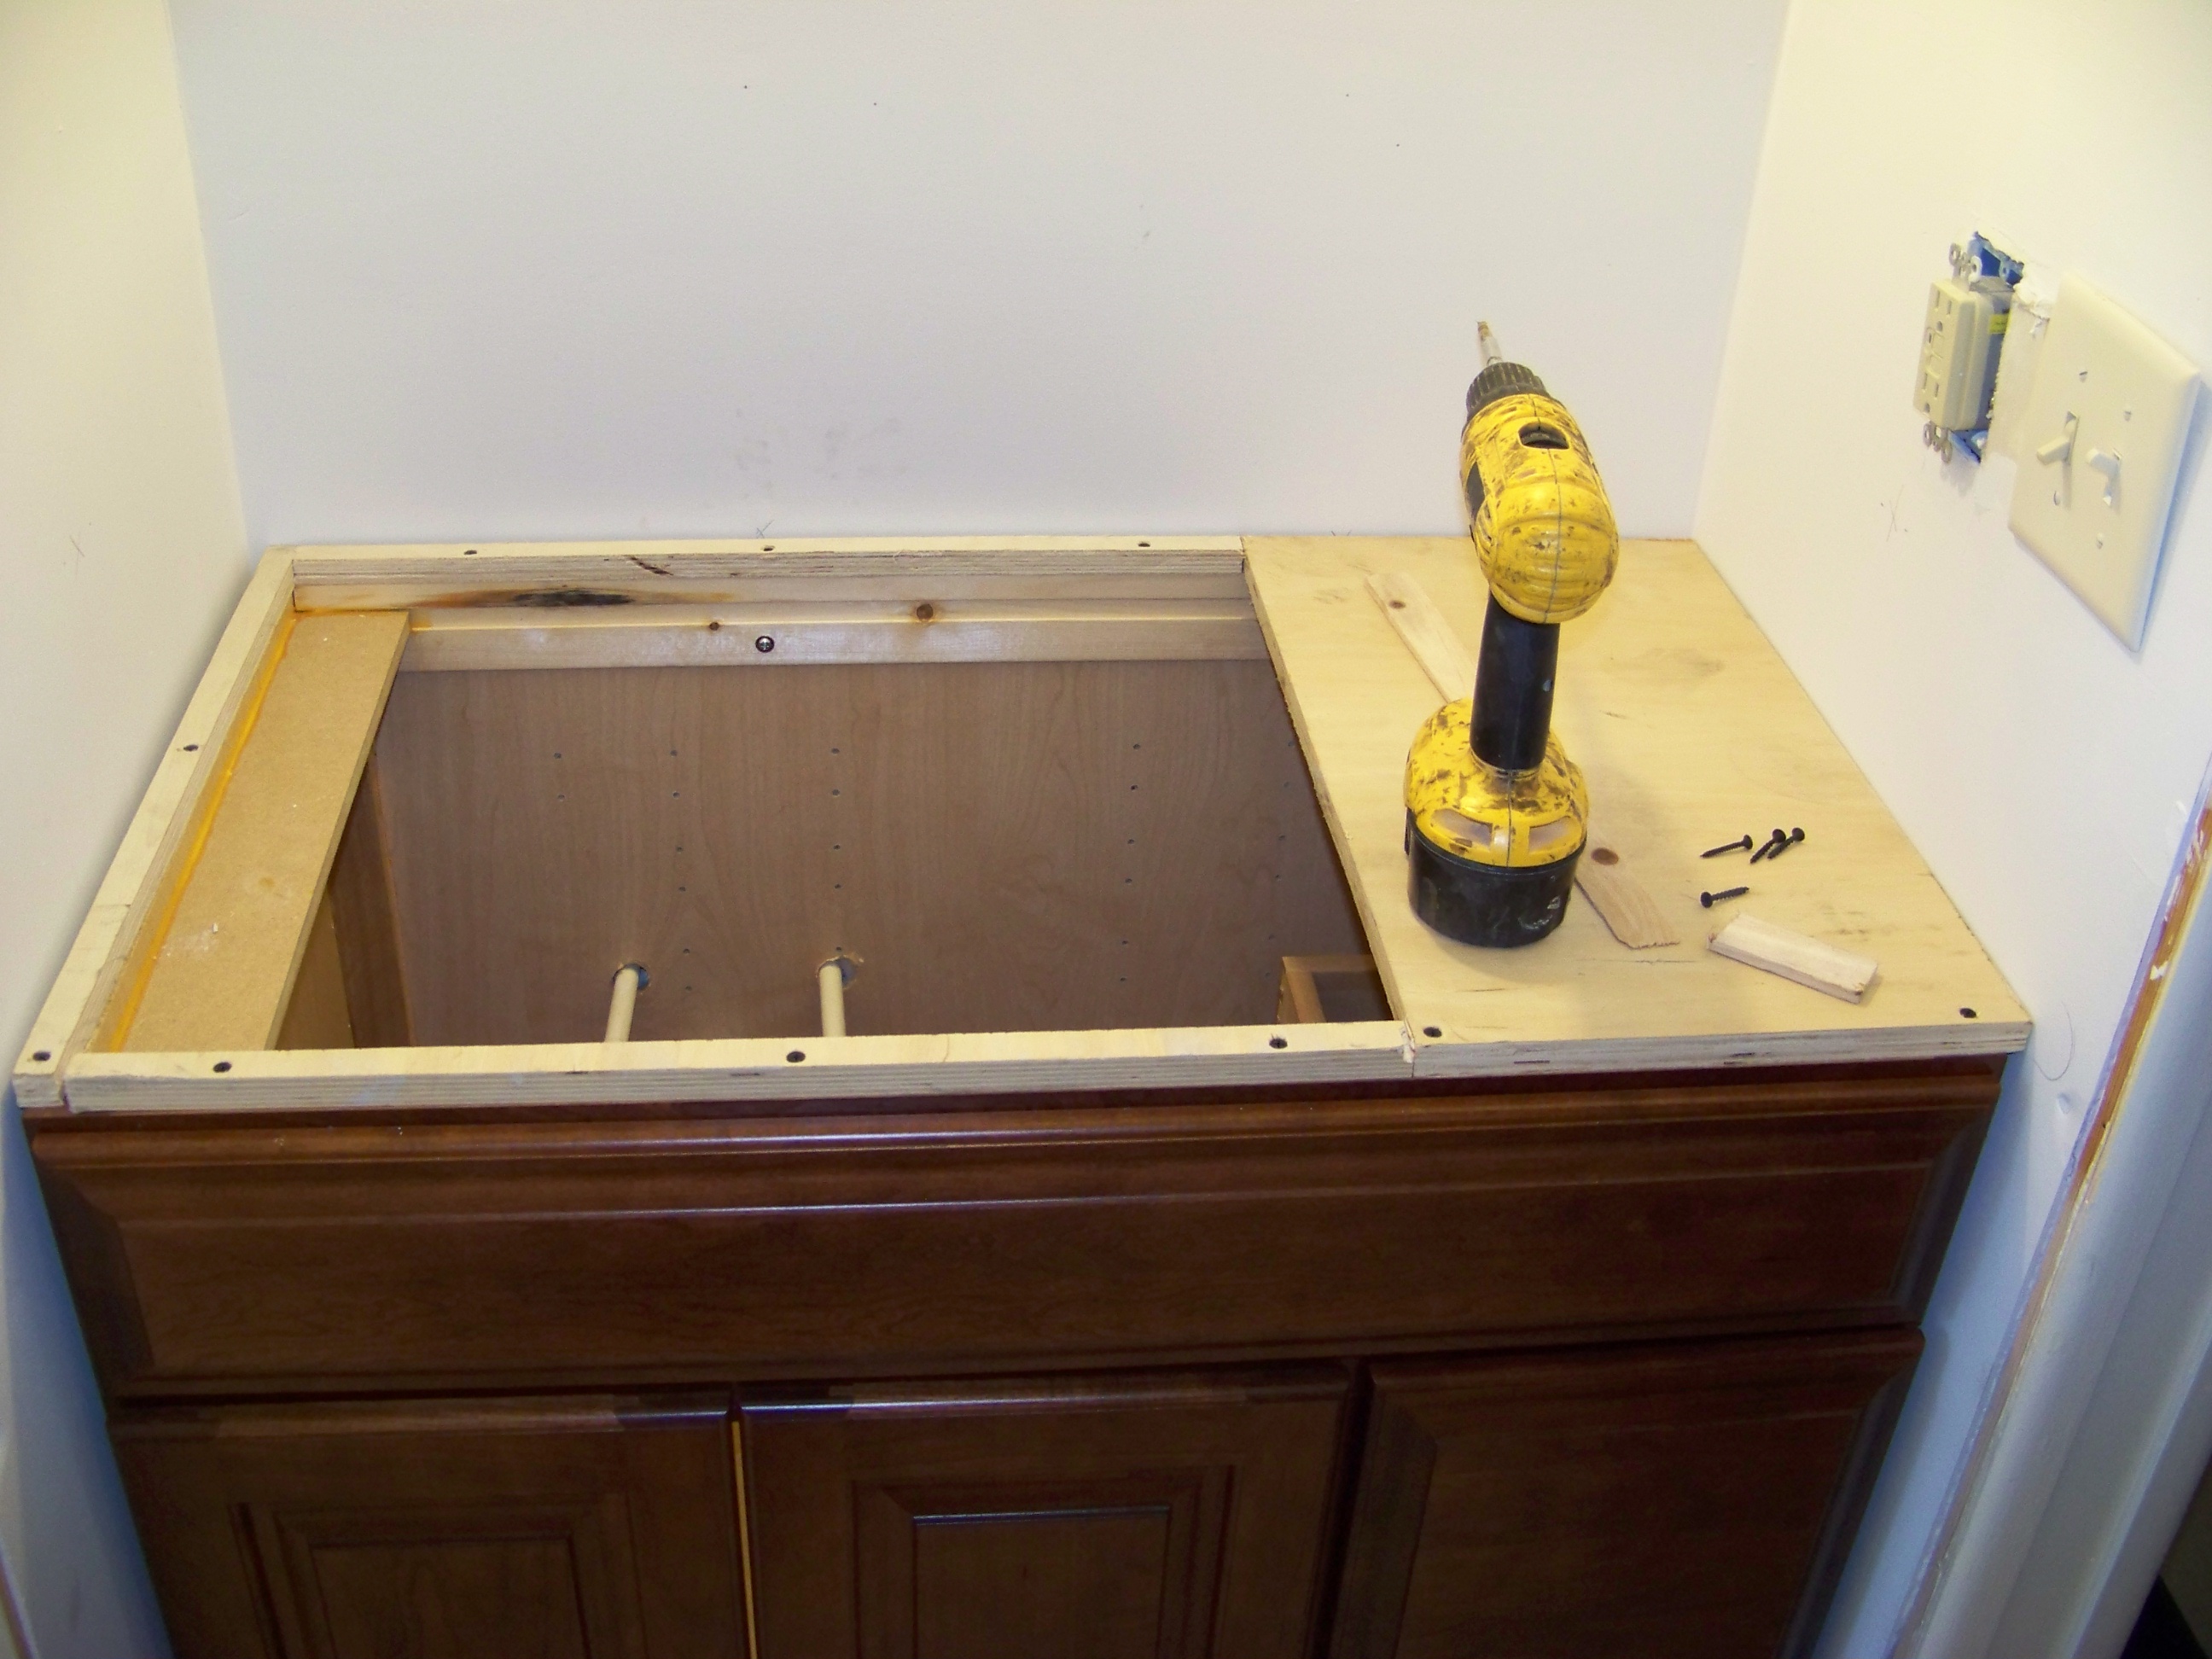
It was pretty easy to unbox the cabinets and get them in place. We had to drill holes in the back of the two large cabinets to let the plumbing pipes pass thru. Pretty easy job with a drill and a hole saw. I strengthened the cabinet joints by gluing/screwing some firring strips (i.e. 1x2s) into the corners. I also glued all the wood joints since that wasn't done at the factory.
The last step was securing the cabinets. We drilled holes through the side walls of the cabinets and bolted them together with 1/4" x 2" bolts near each corner5. We made sure they were square, plumb, and level. Then we used self-boring 3" cabinet screws to secure the cabinets to the wall. Piece of cake.
Our granite countertops came from L&T Kitchen Studio. Anita had looked at everything from granite to marble and quartz, to cultured marble and various composites. We decided on granite because its 'the original' stone and happens to be less expensive than other options right now.
L&T came to our house for measurements one afternoon, and we decided which stone to buy. They told us they would be back for installation in a week or so. They came back on Monday (Sept 8 2008). In less than 2 hours they:
- attached pre-measured pieces of marine plywood to the tops of our cabinets
- installed the counters
- installed the backsplashes
- cut holes for our faucets
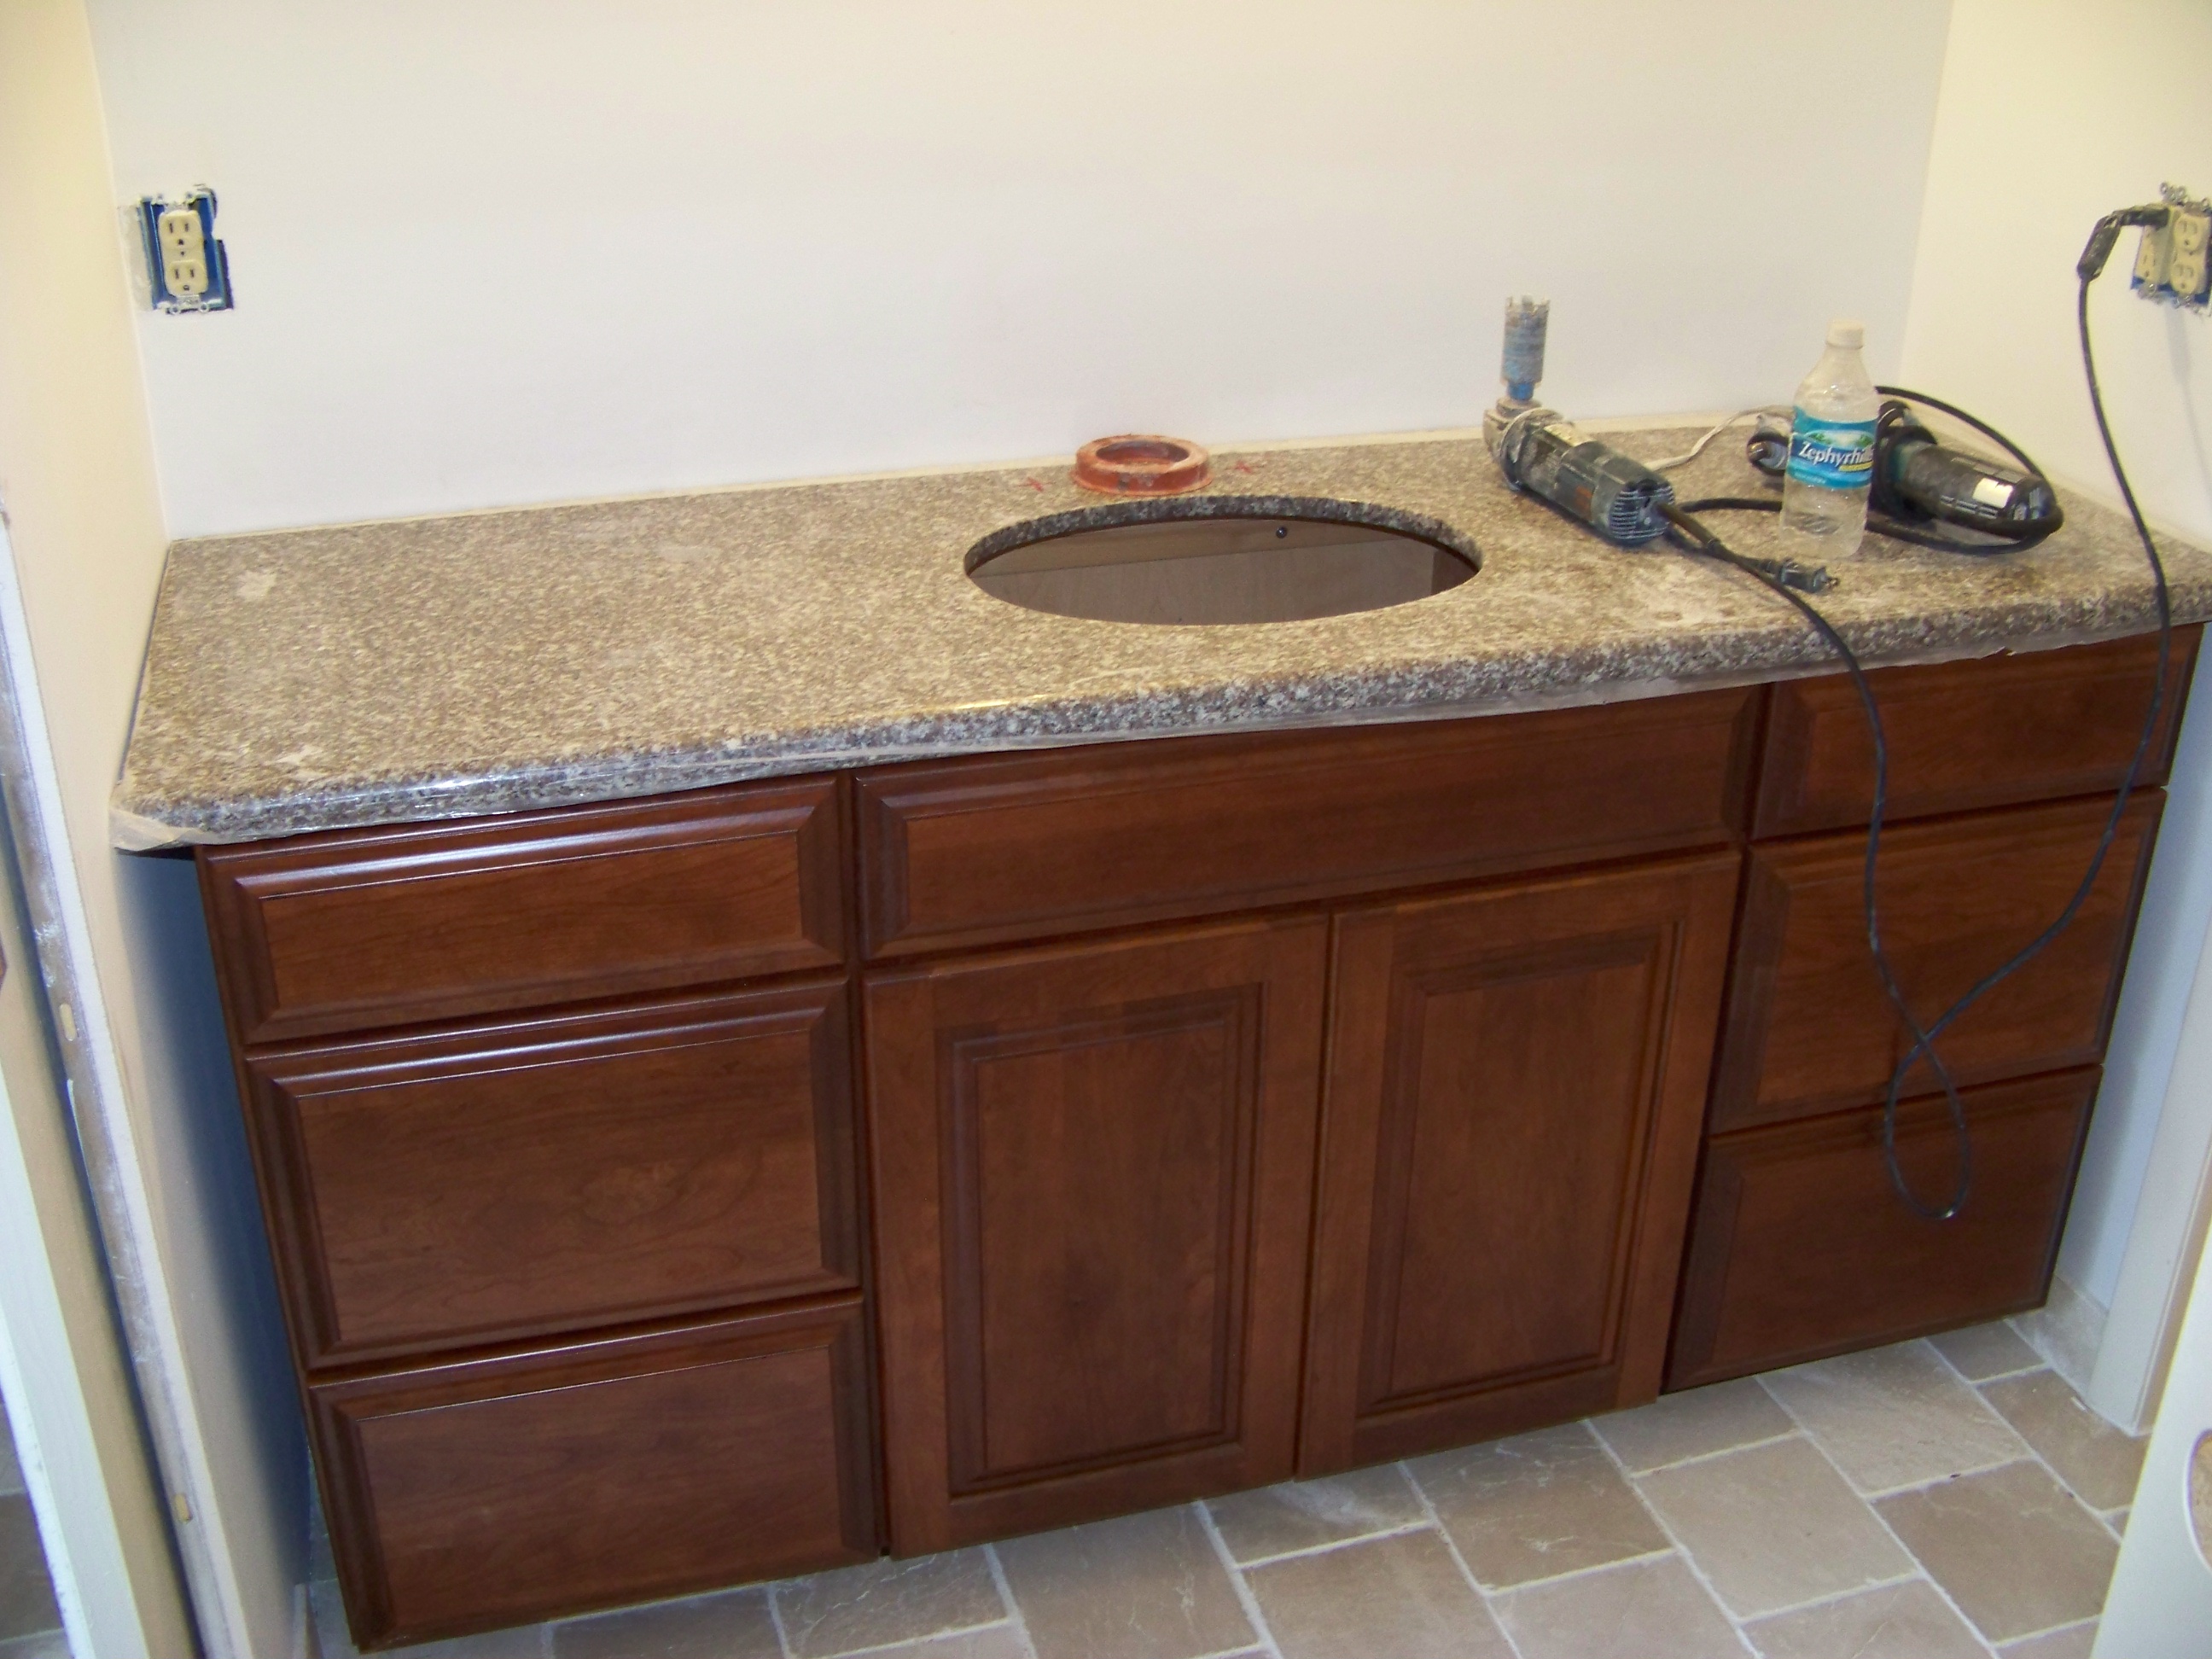
- installed the sinks
- caulked and siliconed everything
- cleaned up the mess
- gave us instructions on how to care for granite
They did a really professional job...its exactly what we wanted. Thanks L&T!! Check out these pictures.
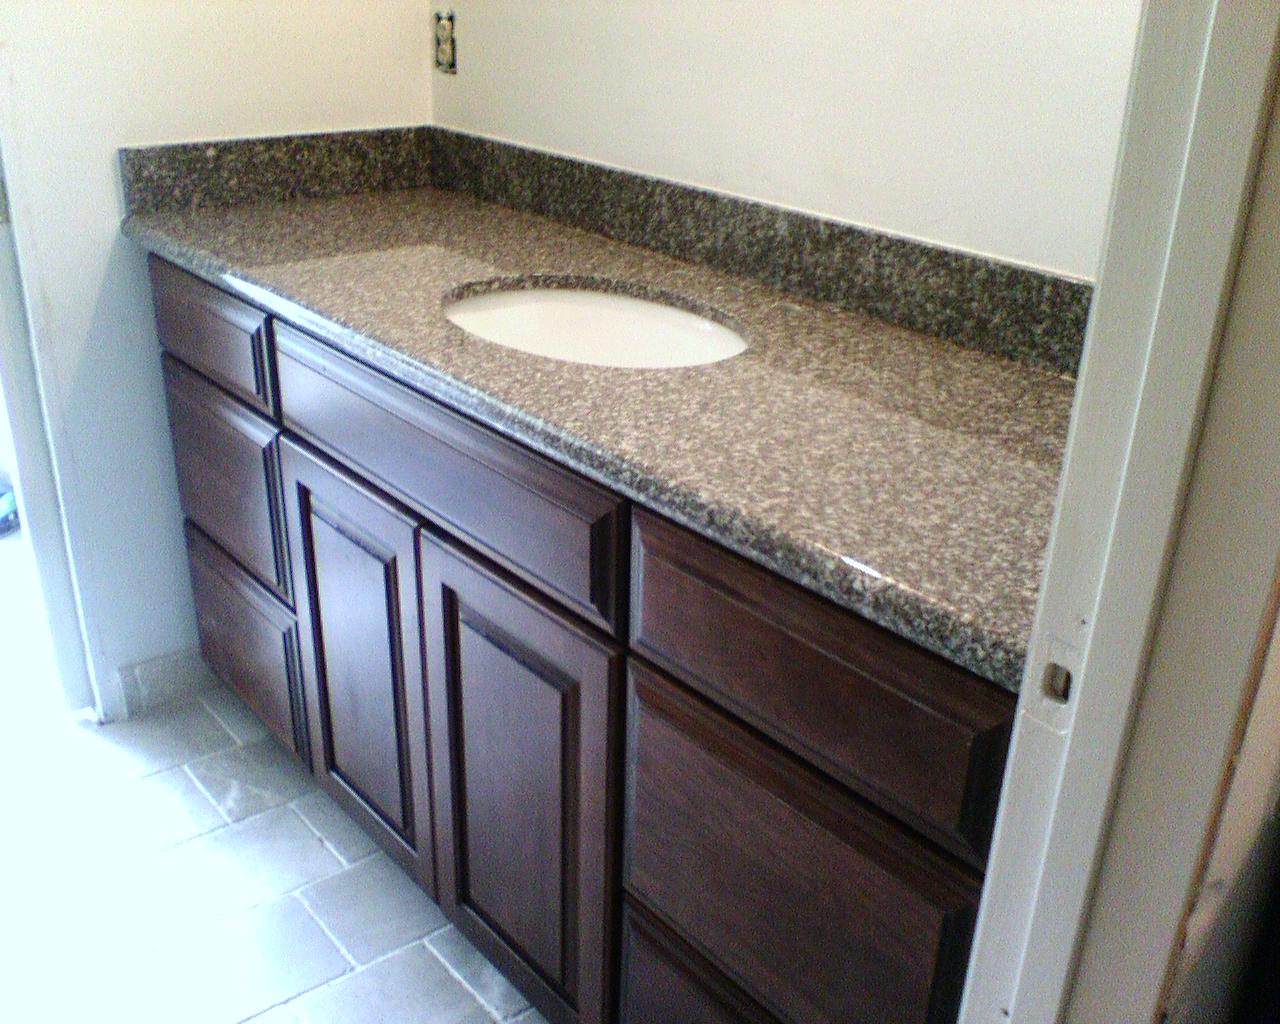
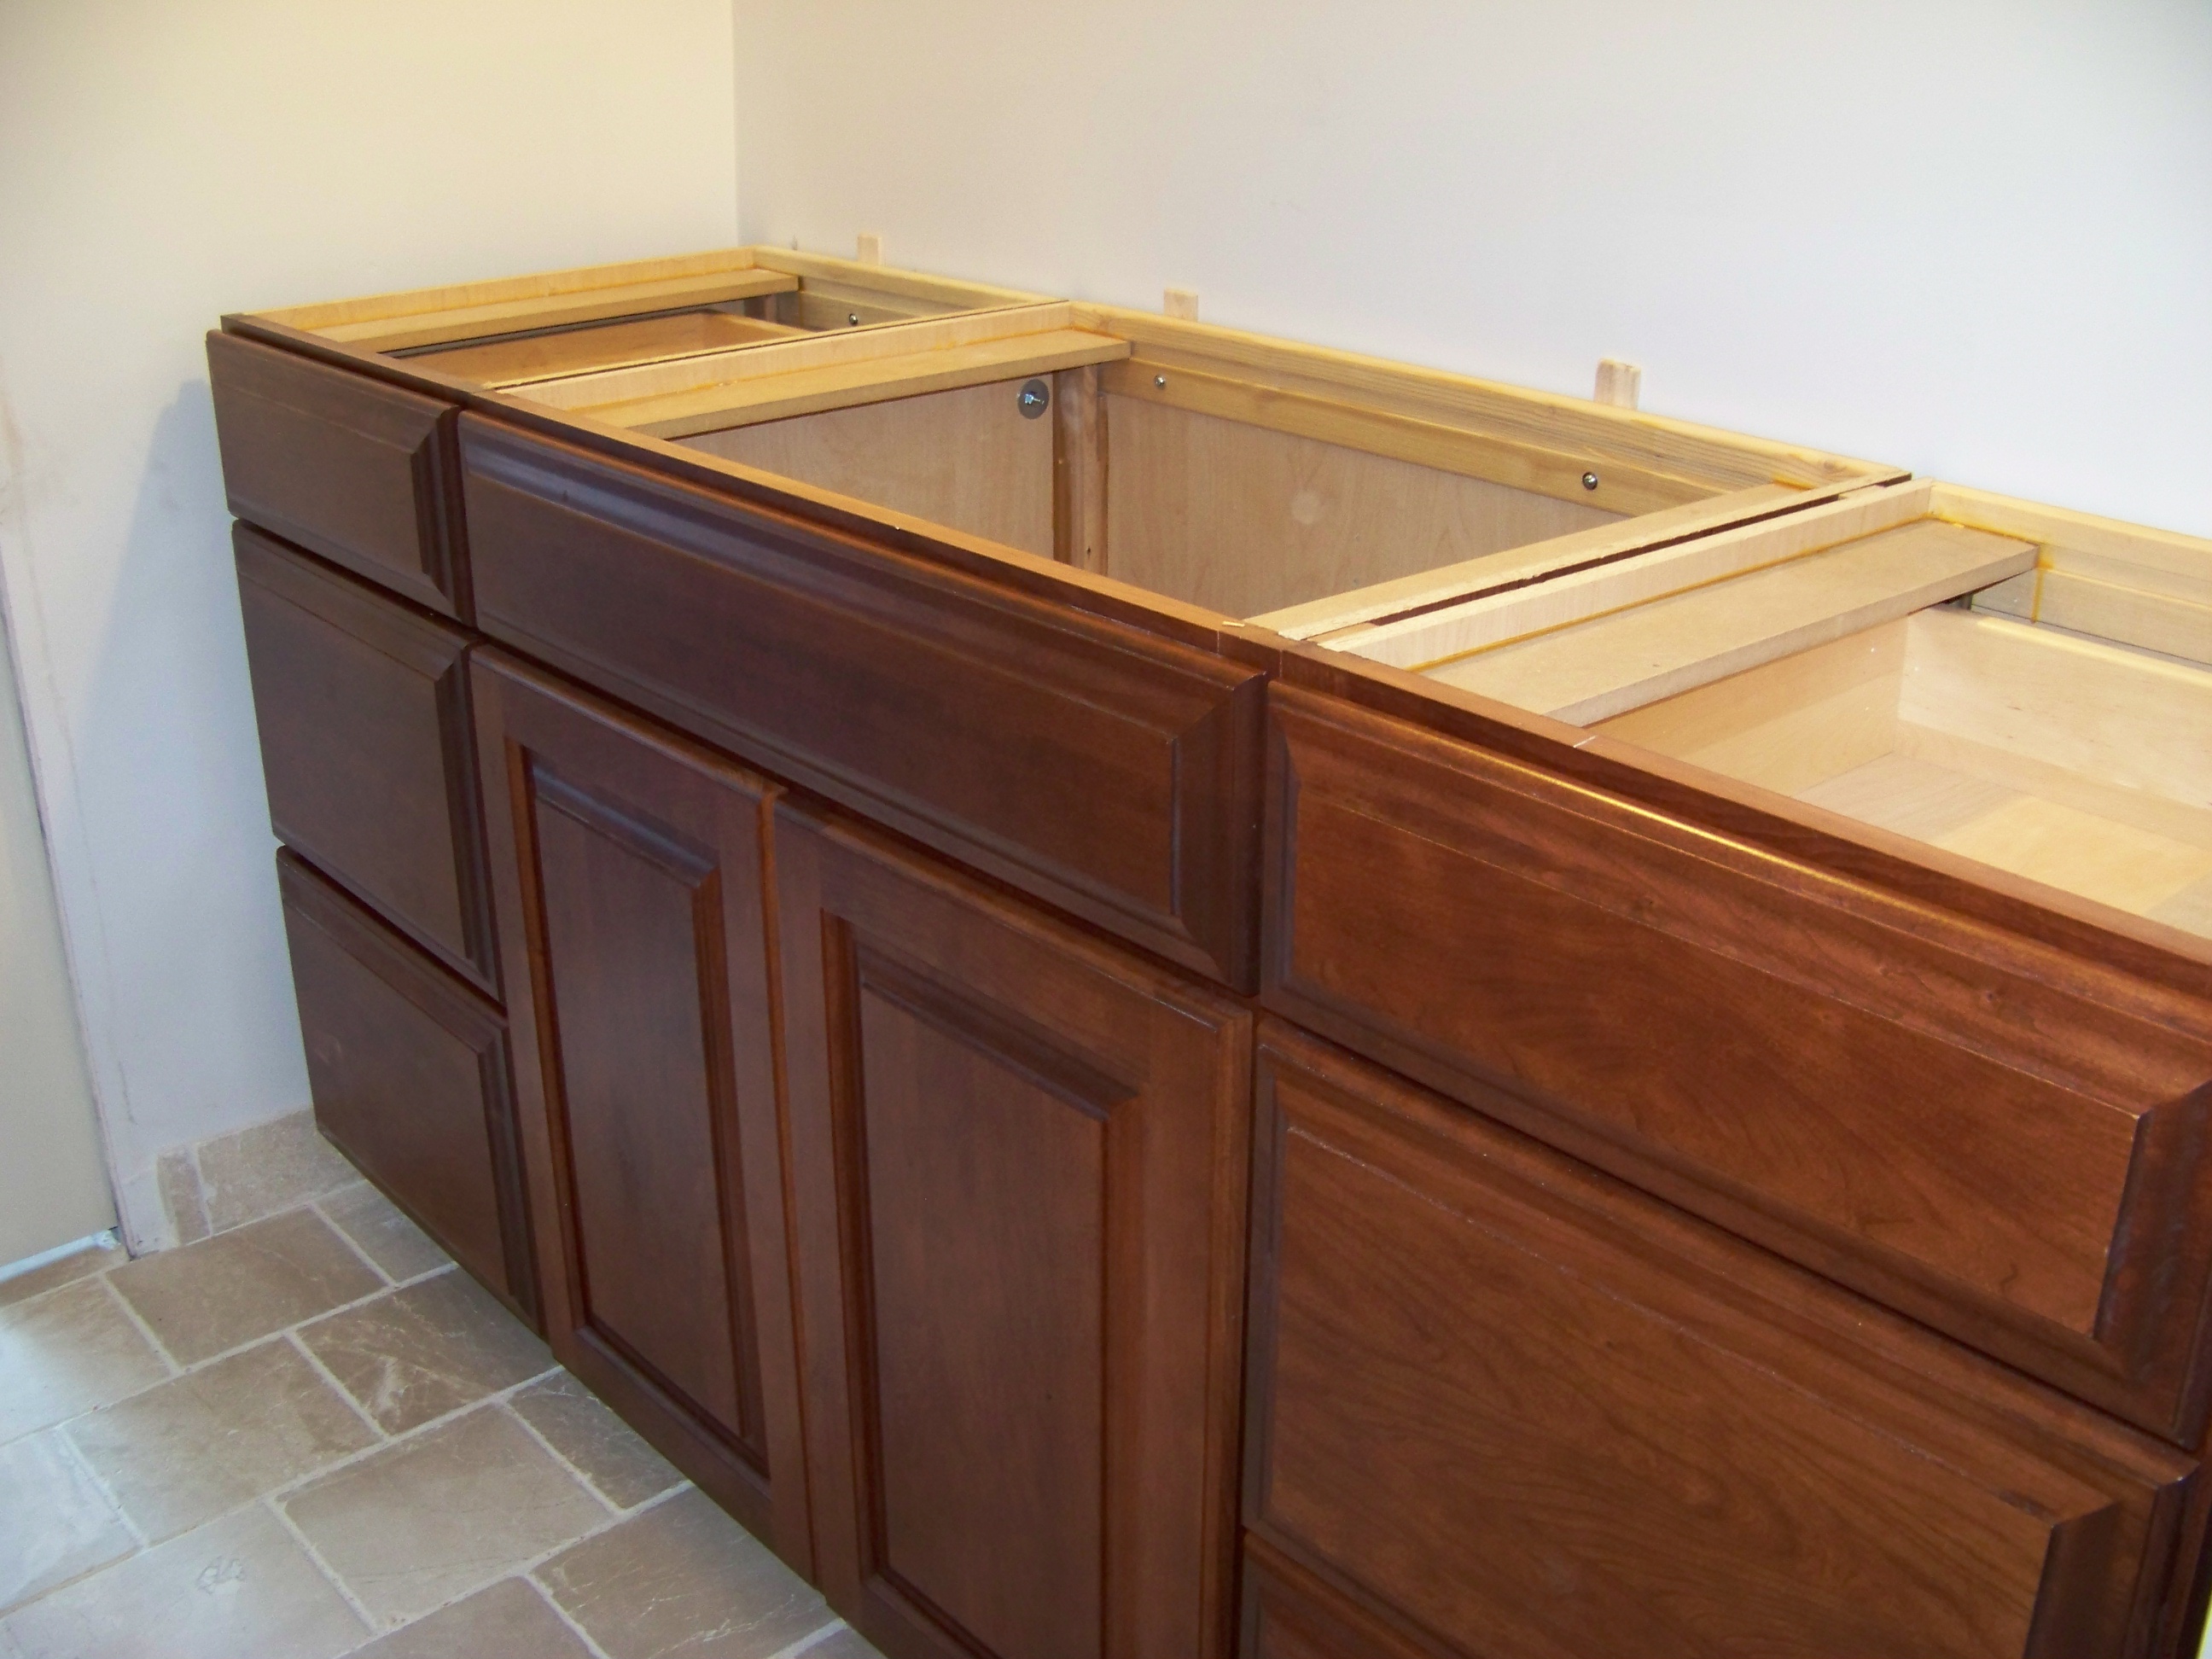 | Here are the 3 cabinets installed in the main vanity area. |
 | This is the cabinet in the half bath area. Plywood is being installed on the top edge to prepare for the granite. |
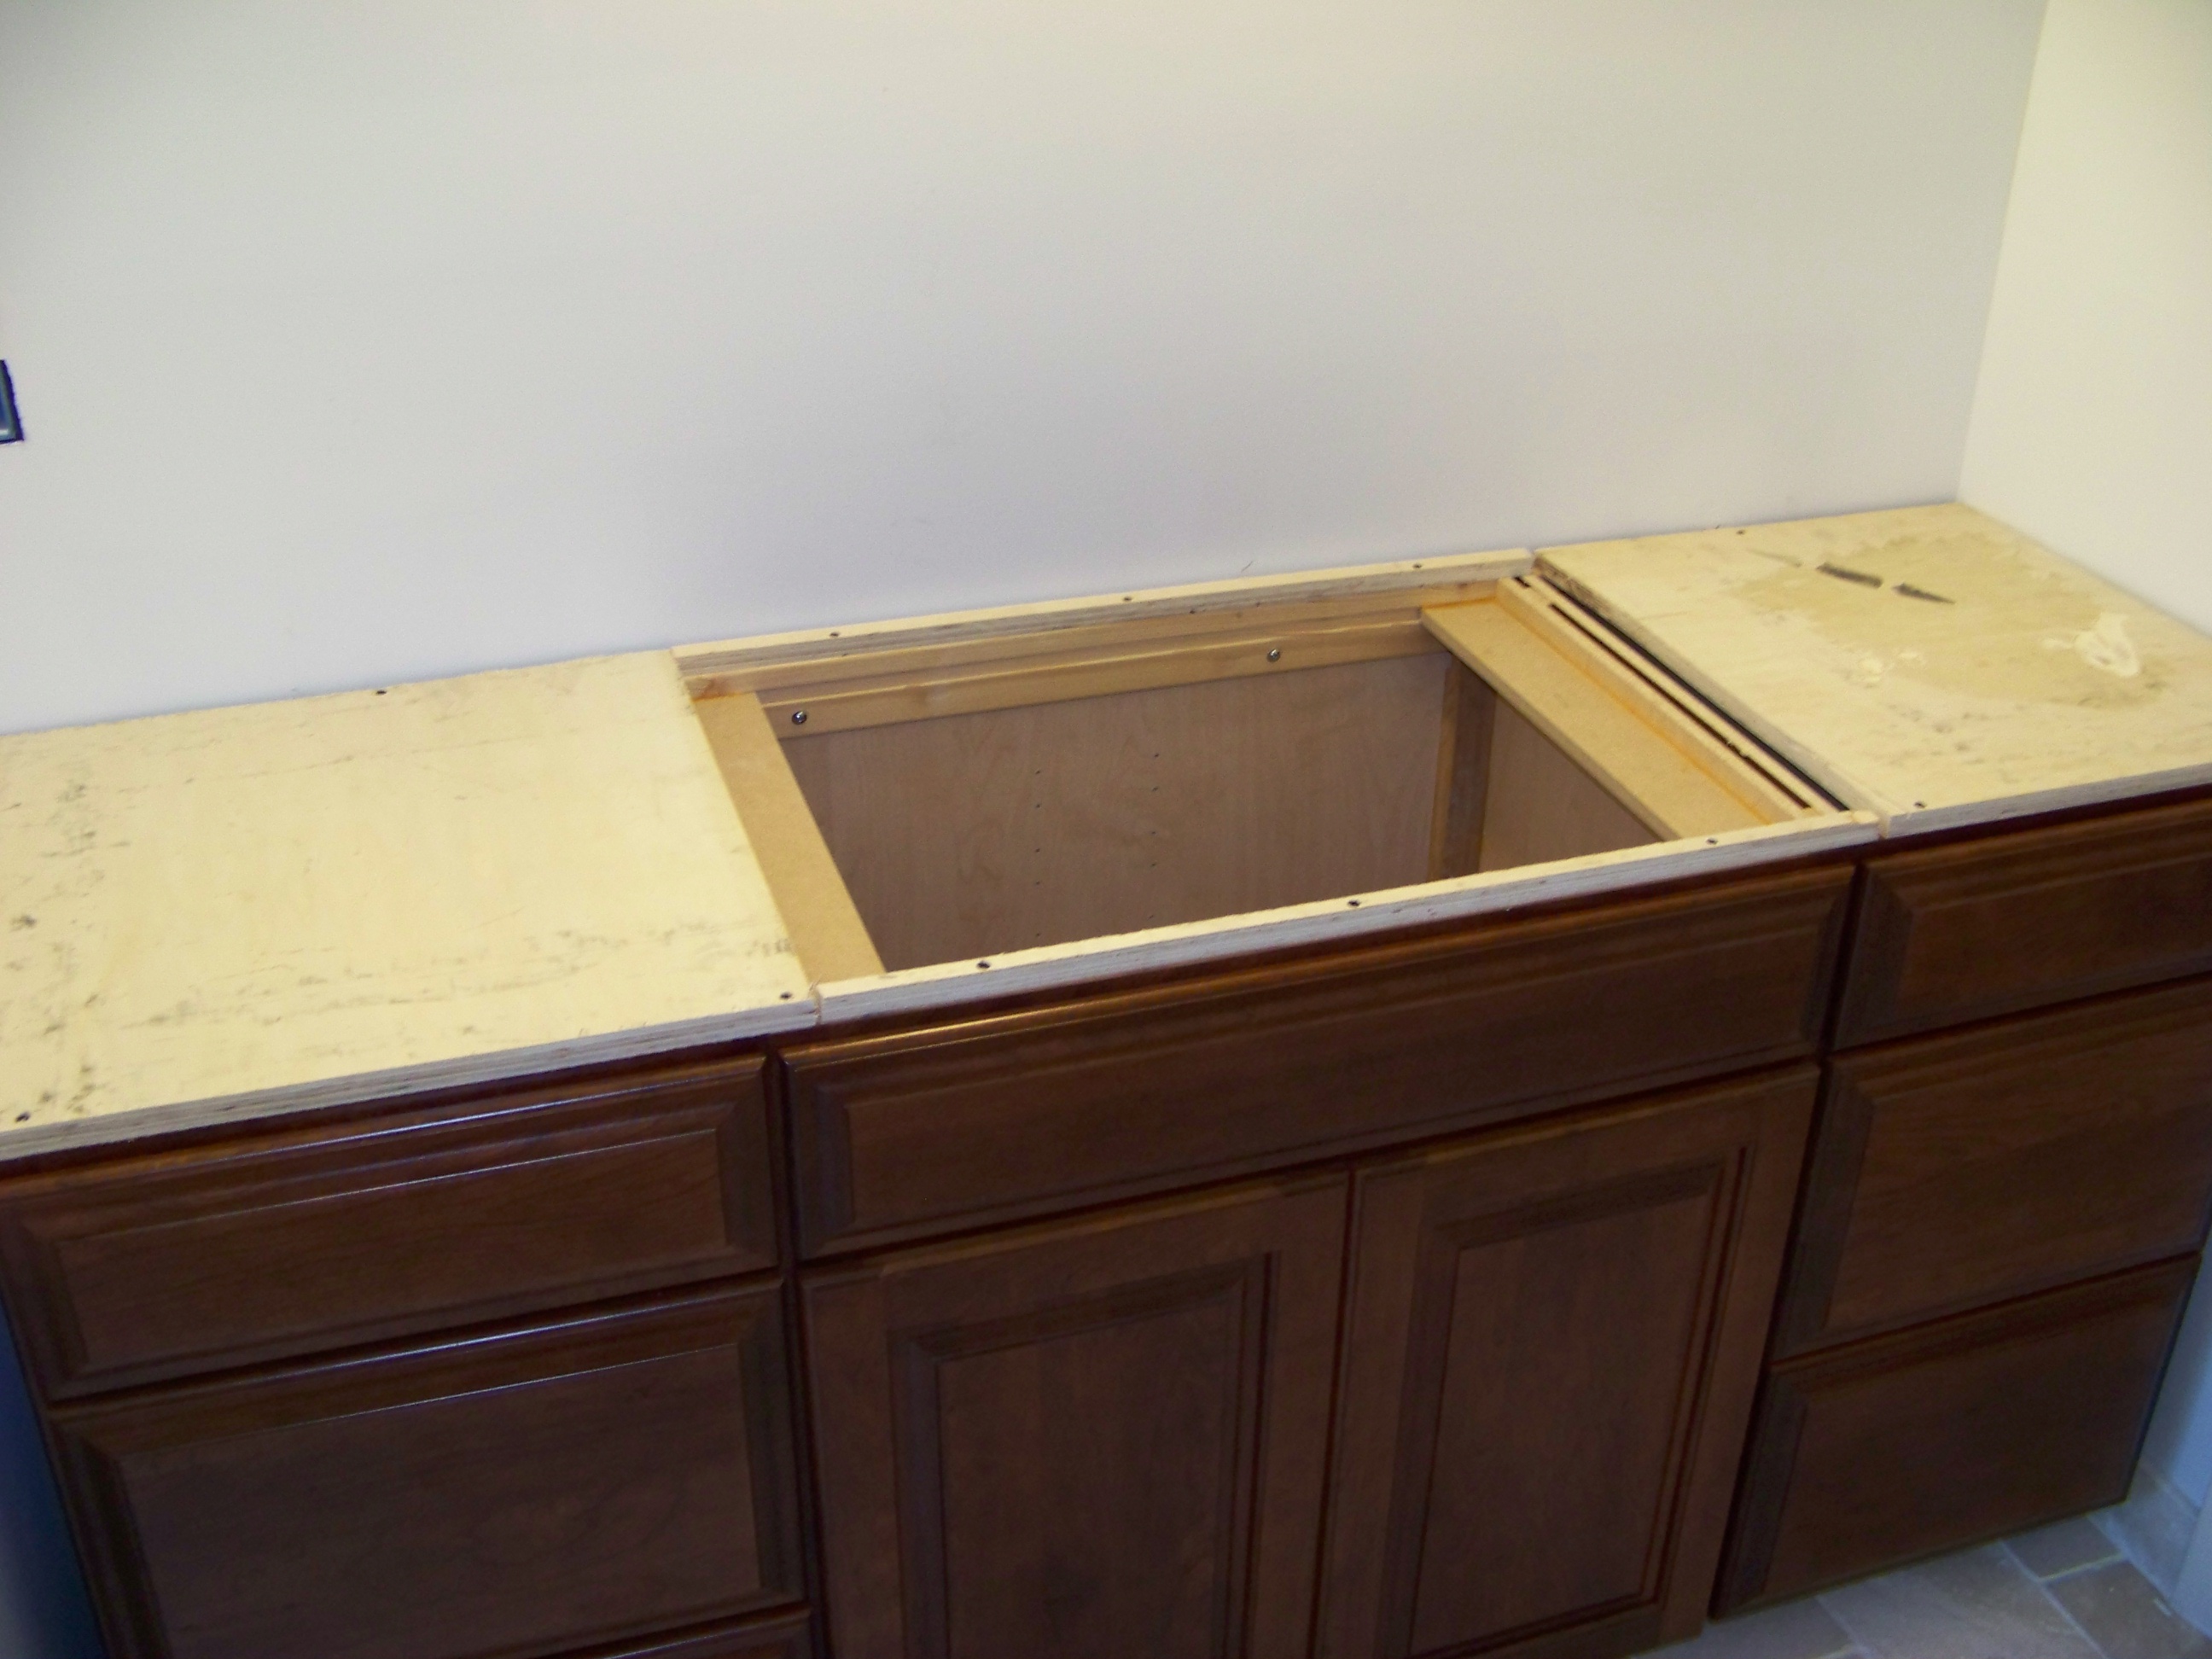 | The main vanity area with plywood installed. |
 | Granite slab installed in the main vanity. Protective plastic not removed yet. Backsplash not installed. |
 | Granite installed in half bath(no backsplash and no sink yet). |
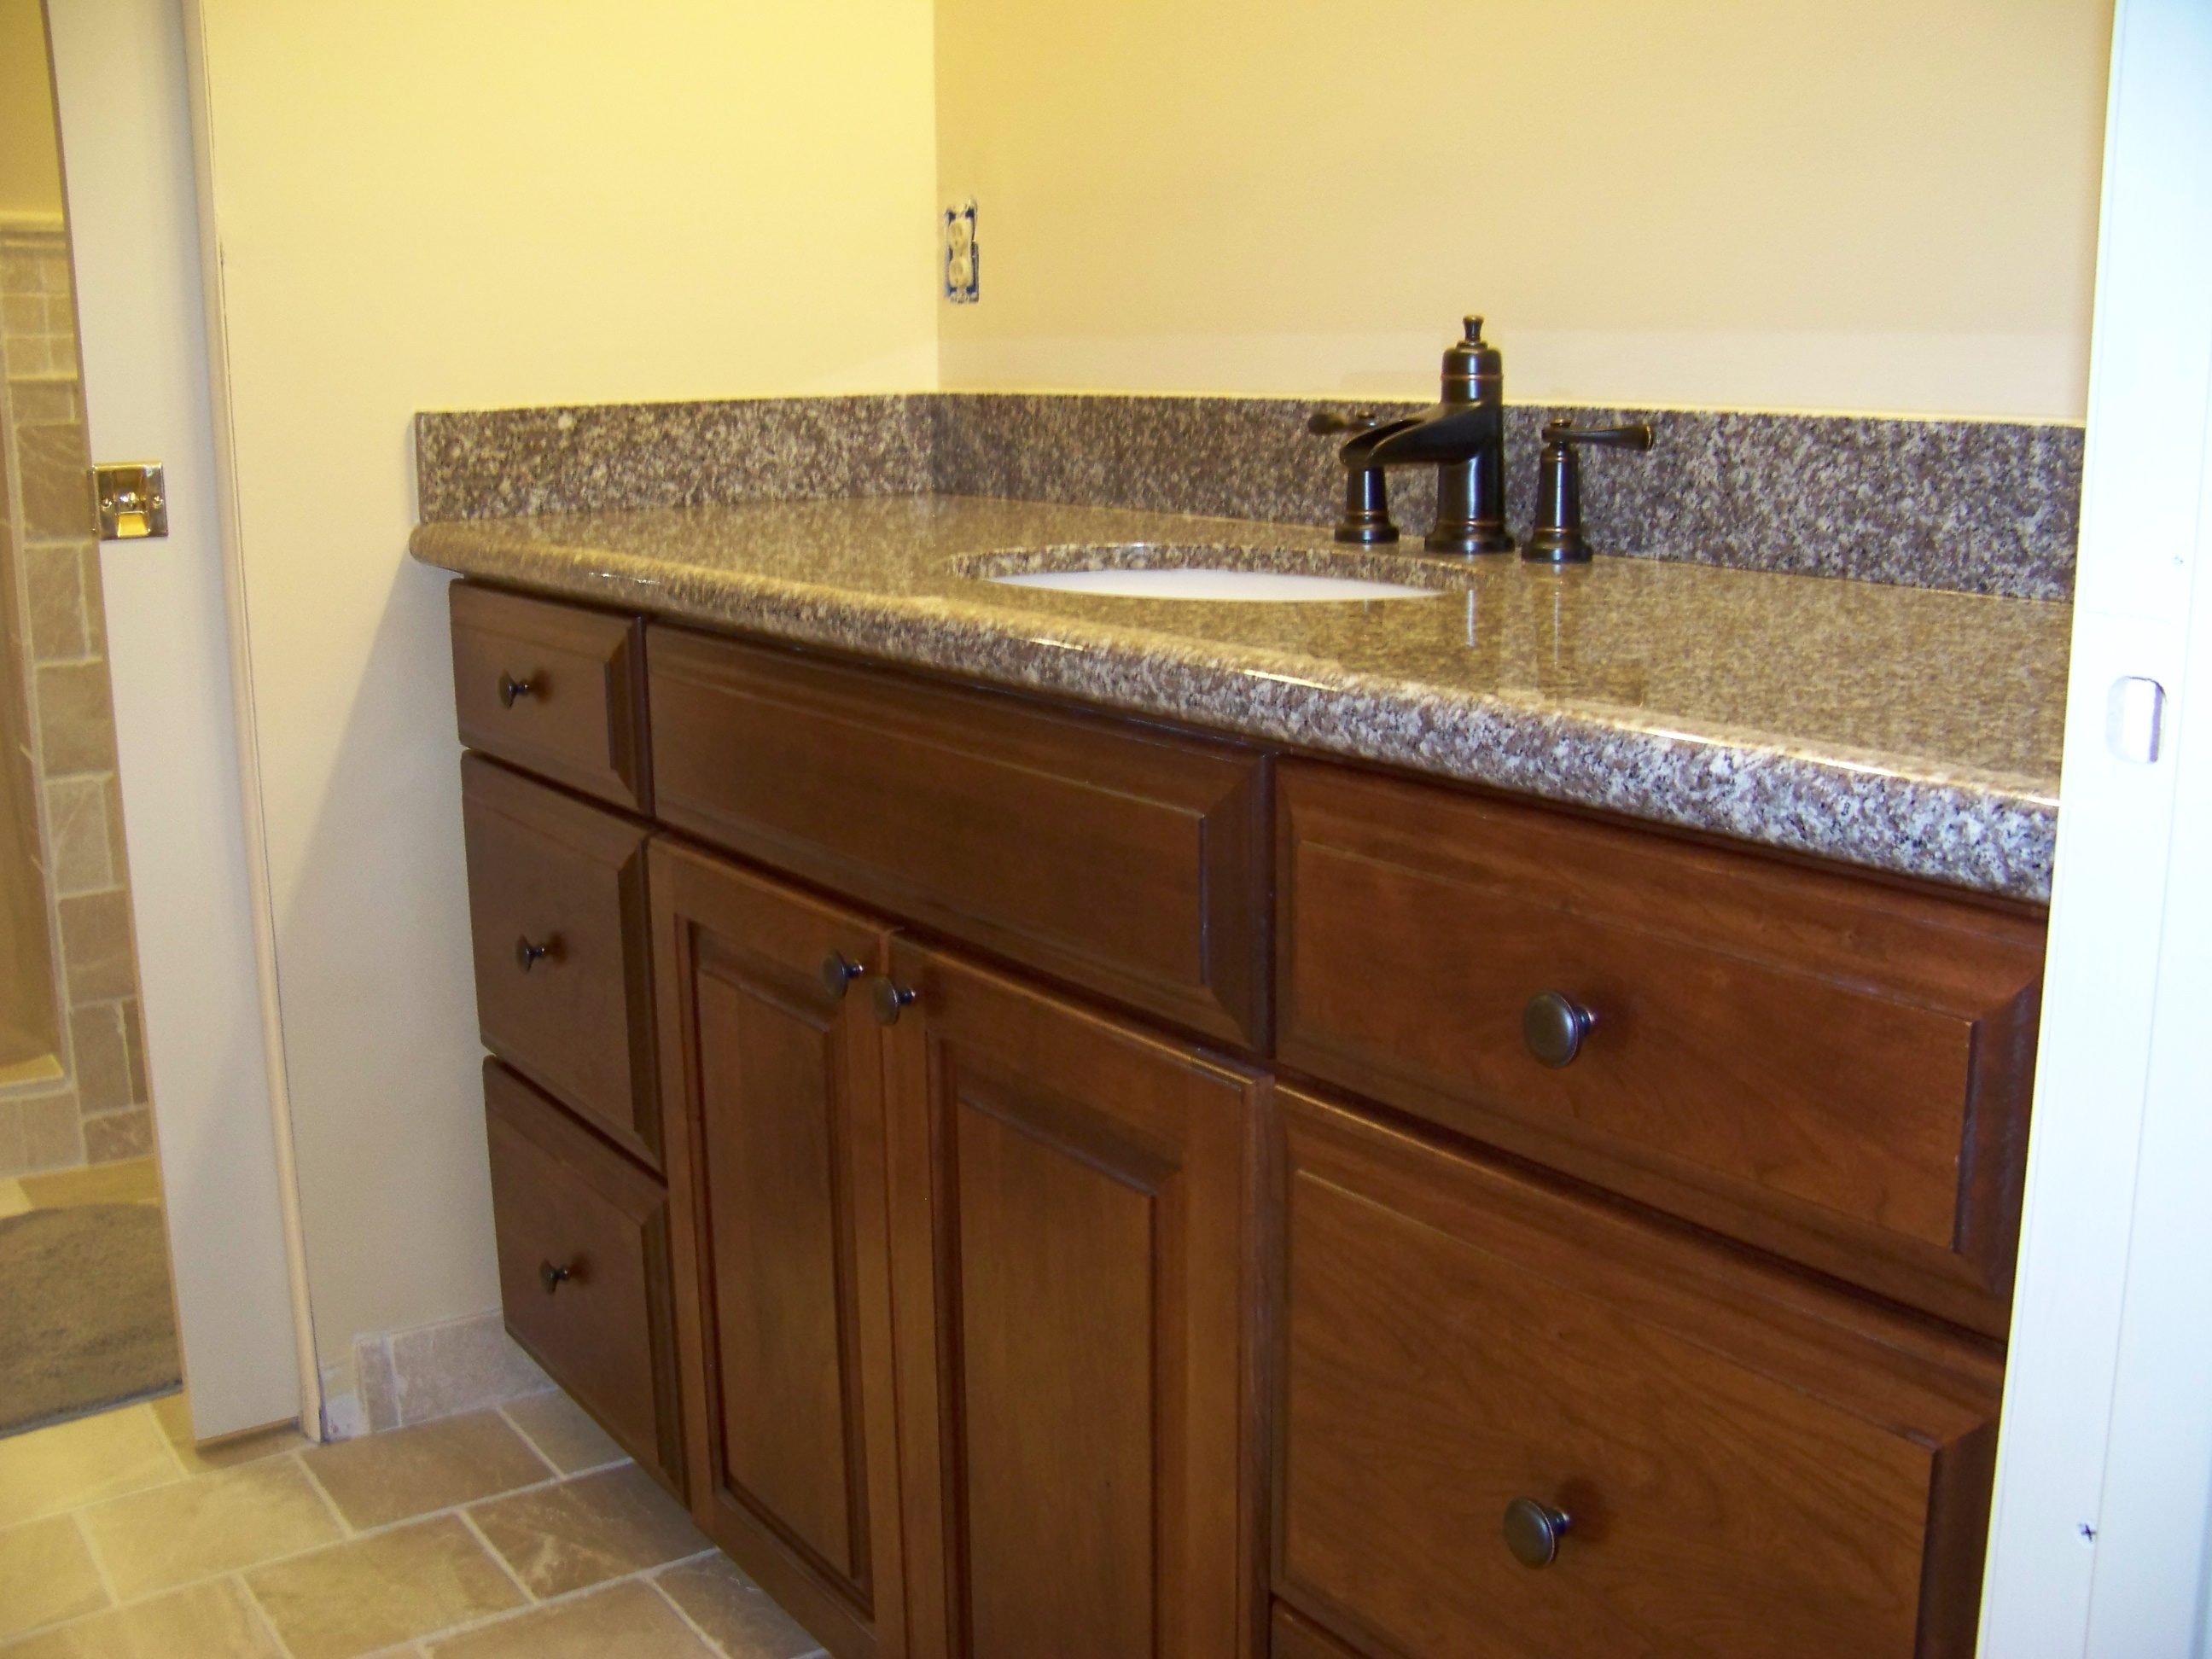
 | Granite, sink, and backsplash installed in vanity. Sweet! |
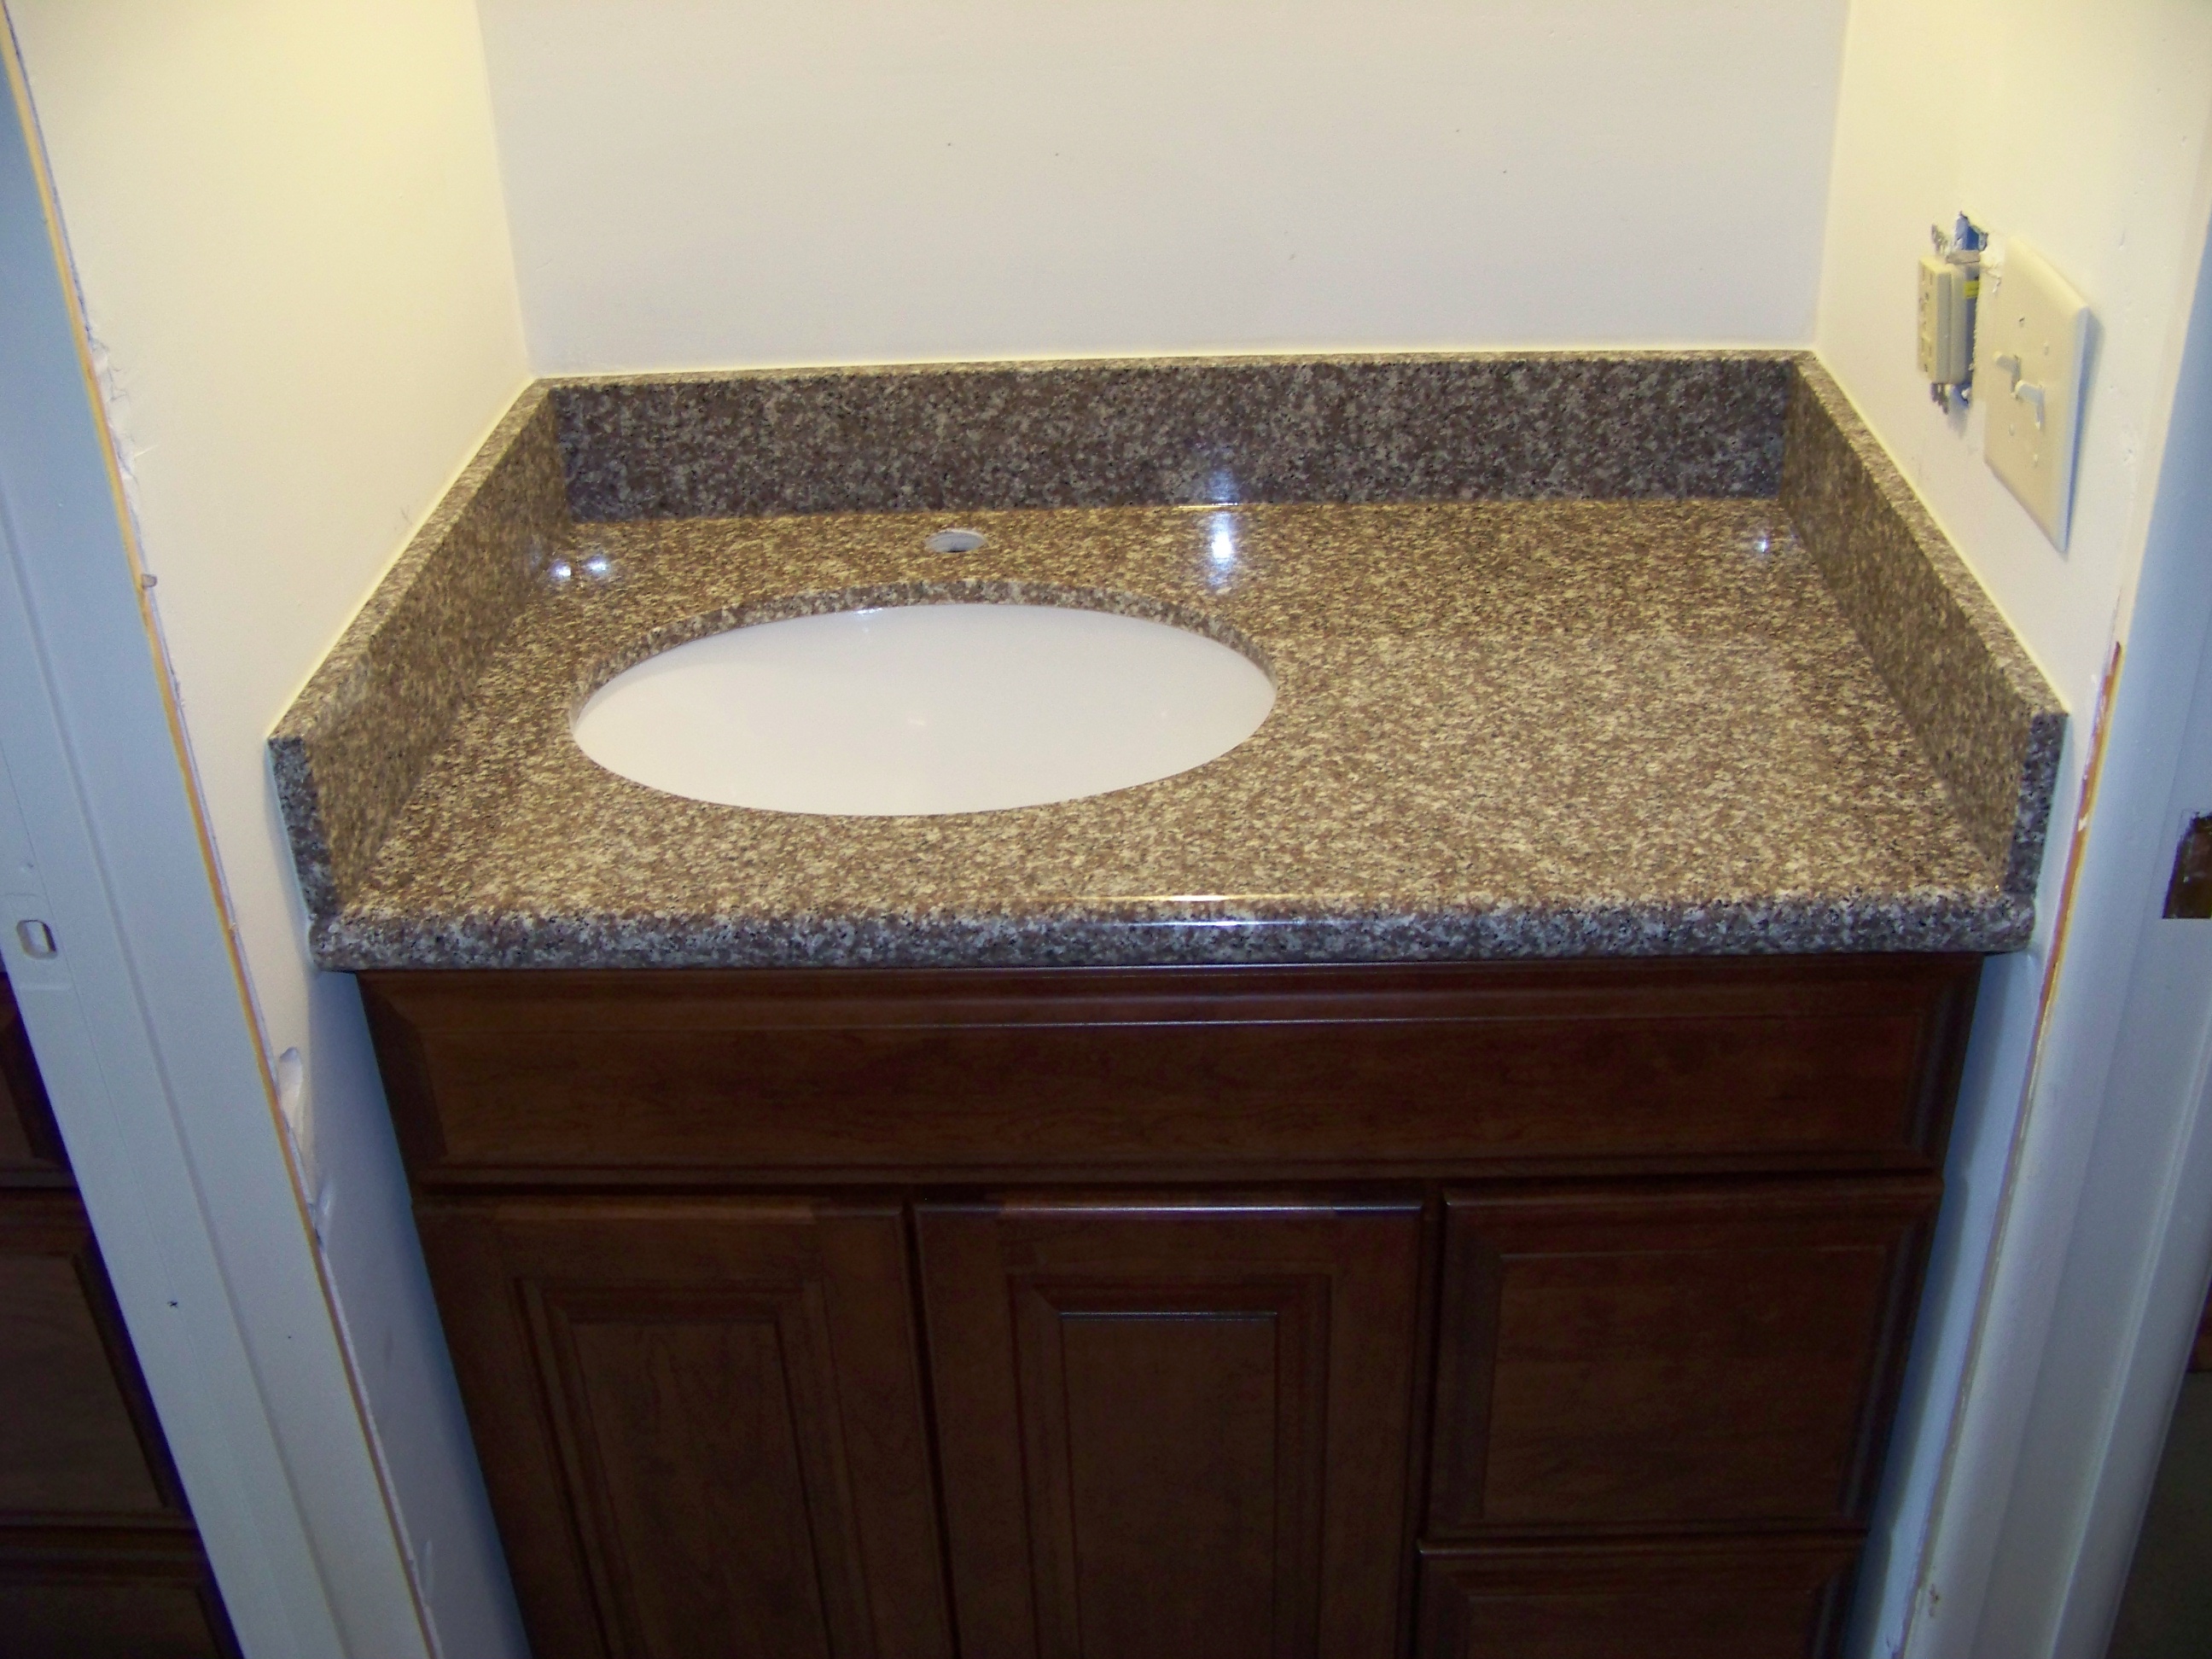 | Counter installed in the half bath. Backsplash and sink installed, and counter polished |
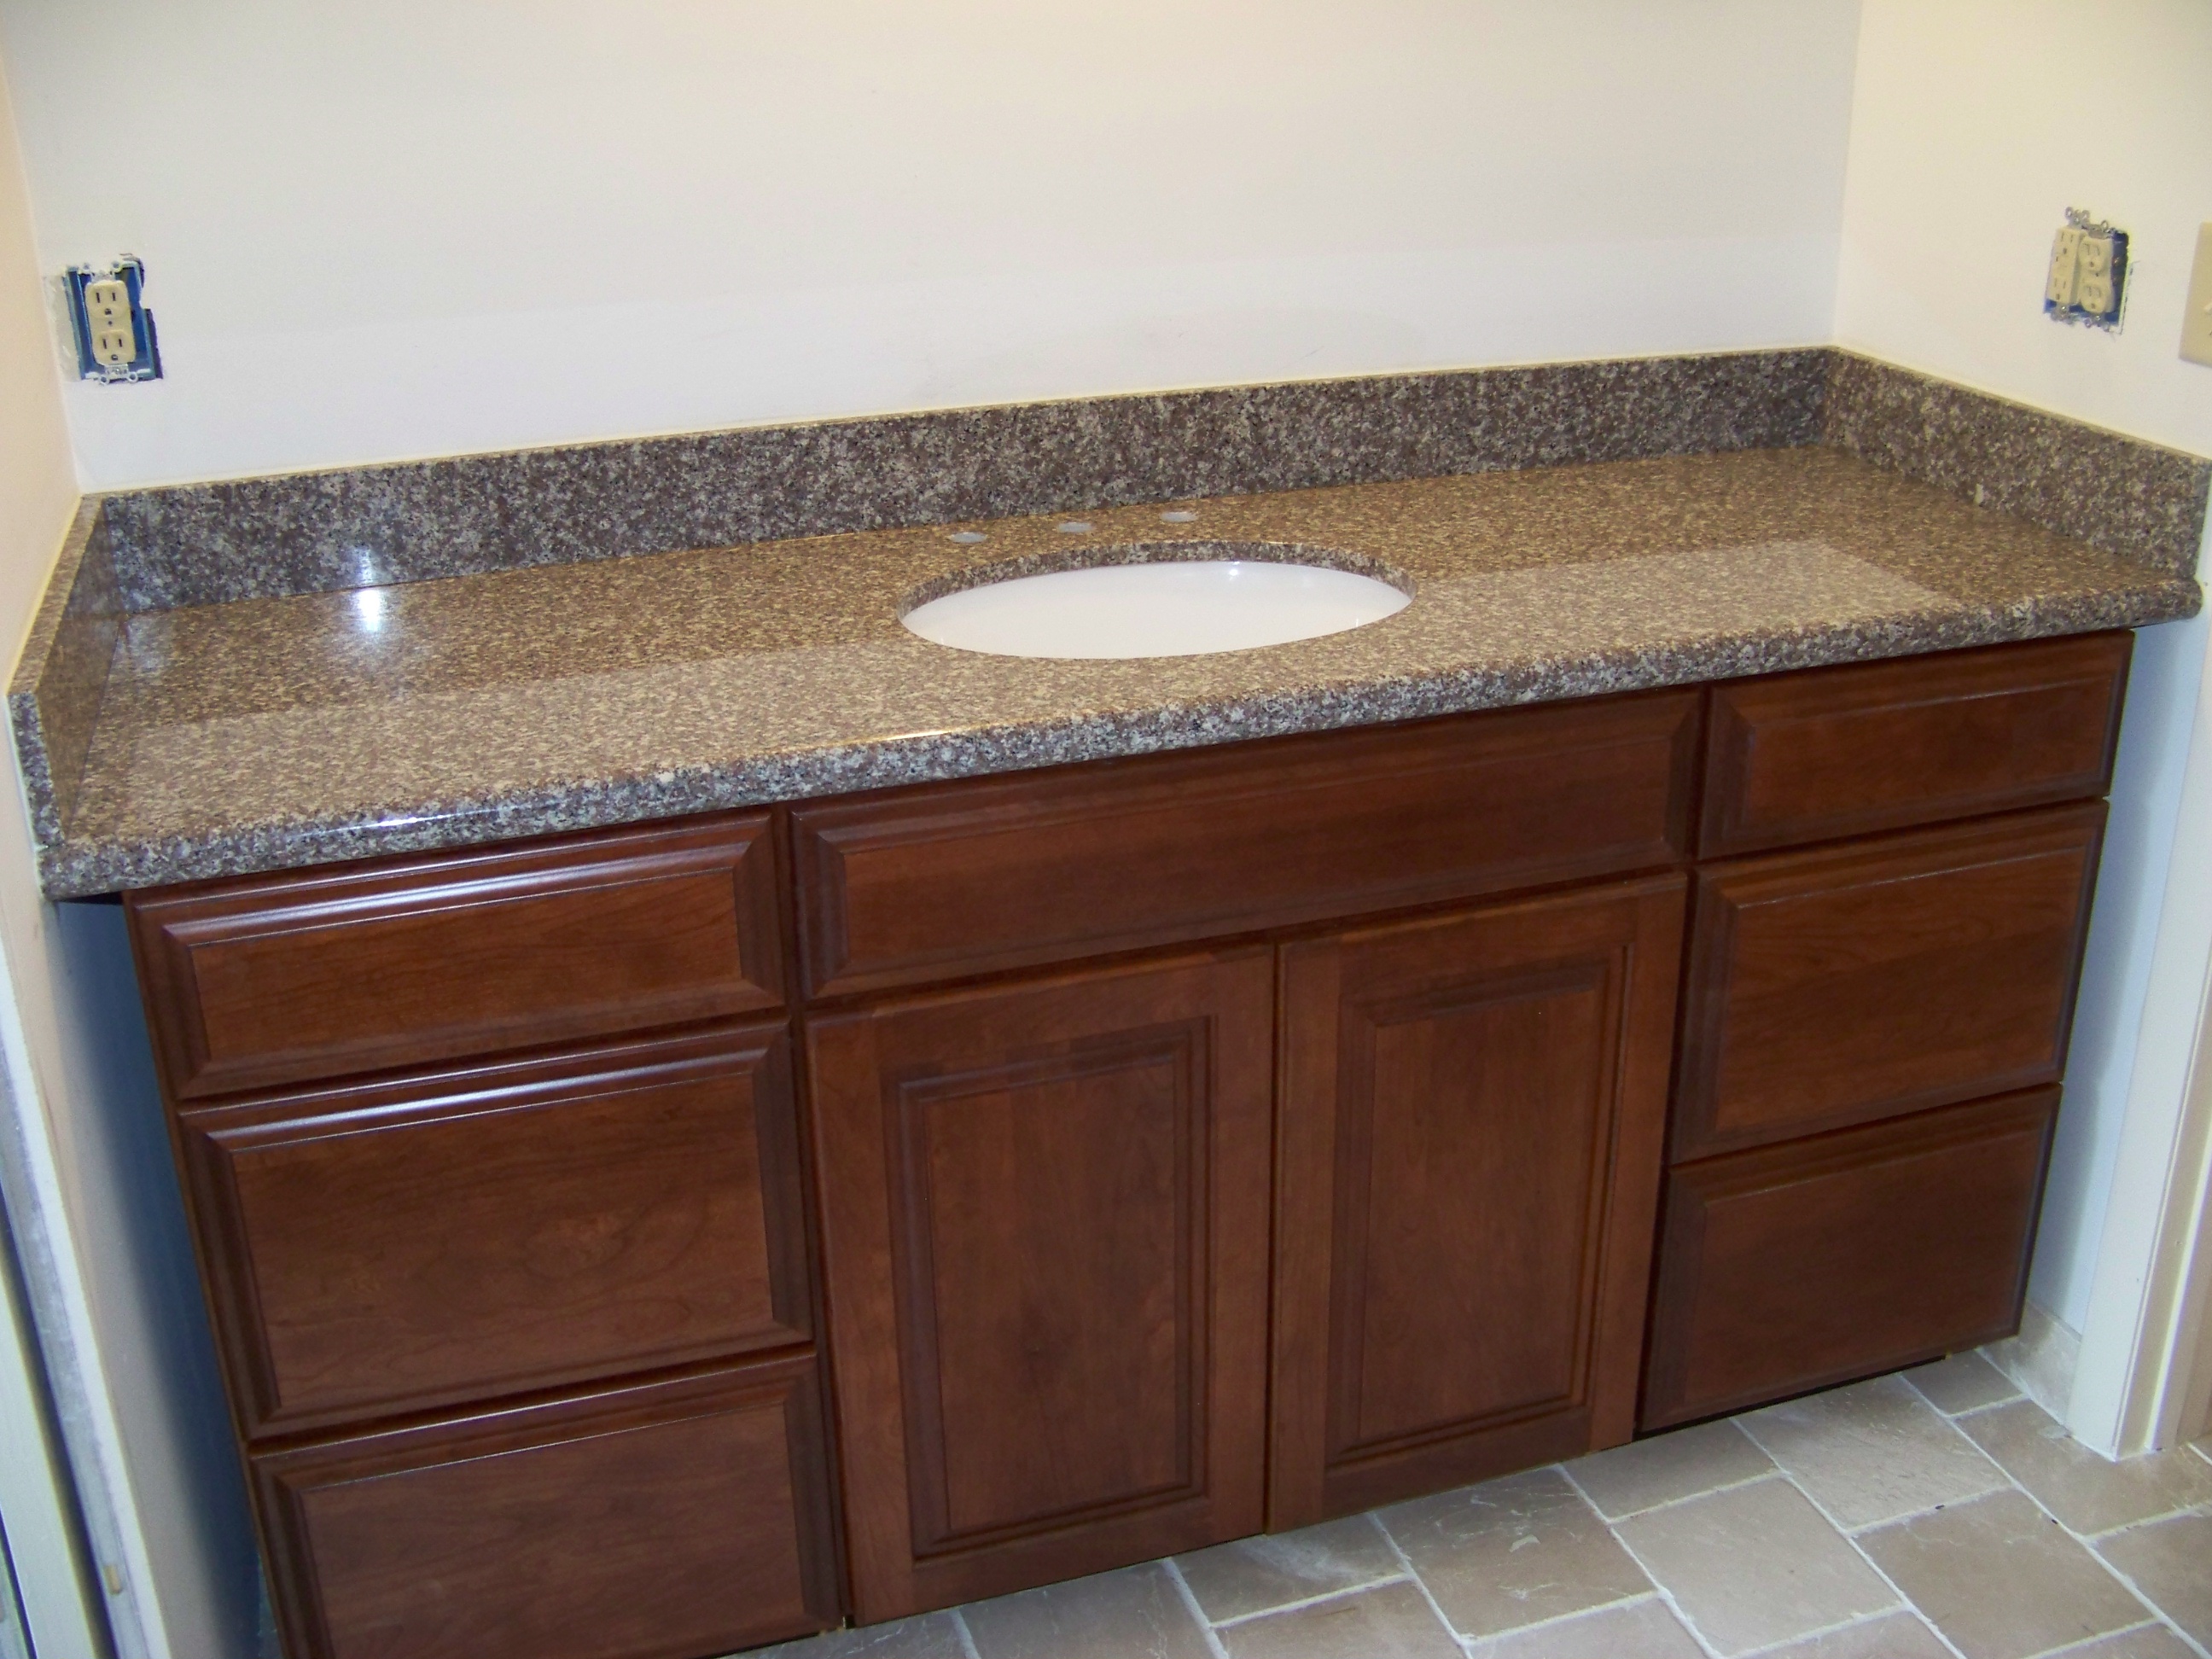 | Counter installed in the vanity area. Ditto. |
Faucets
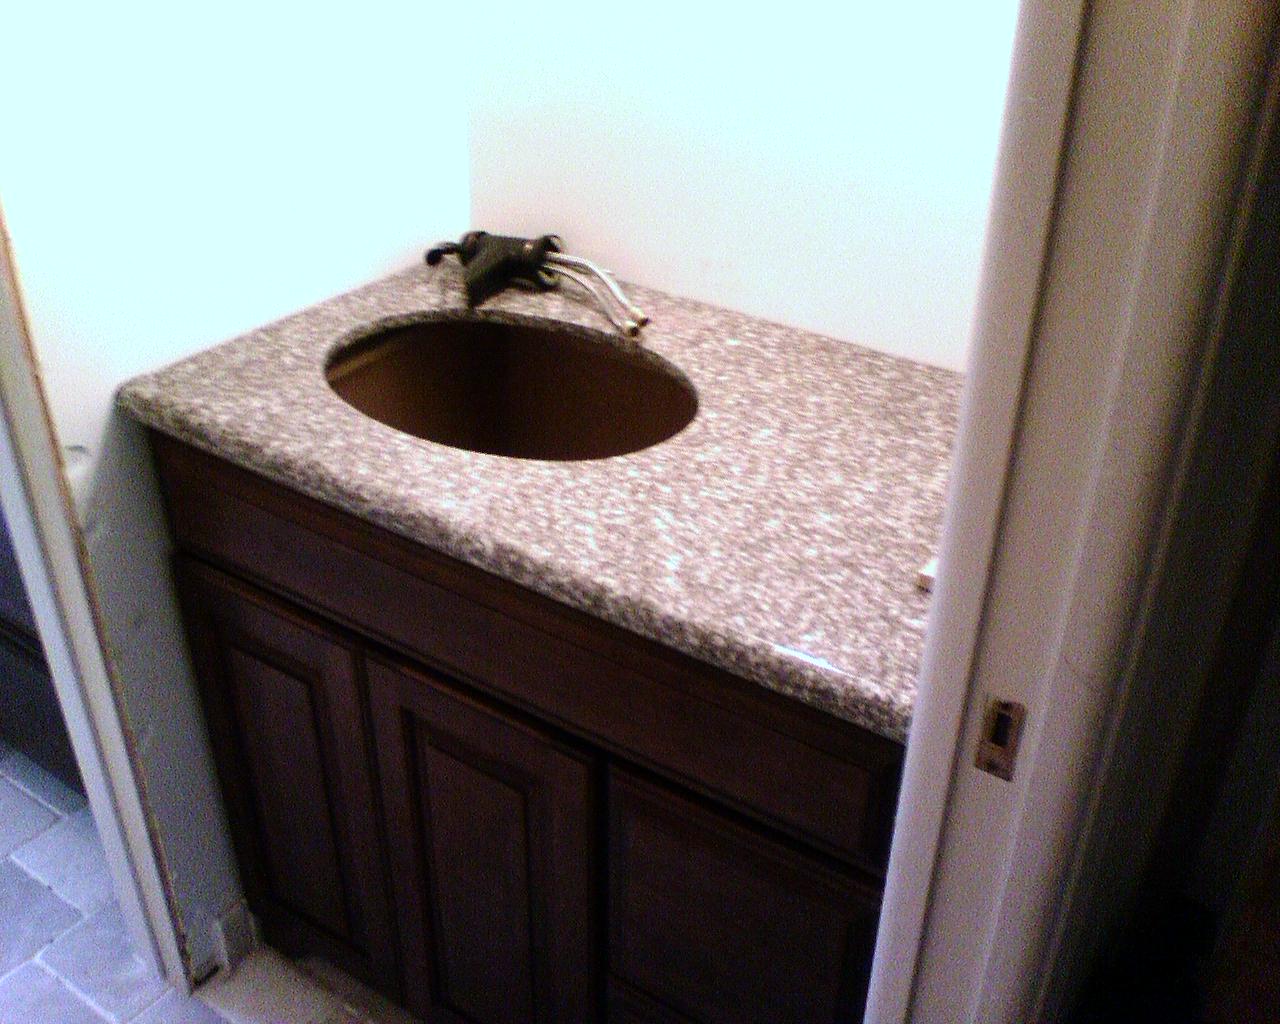
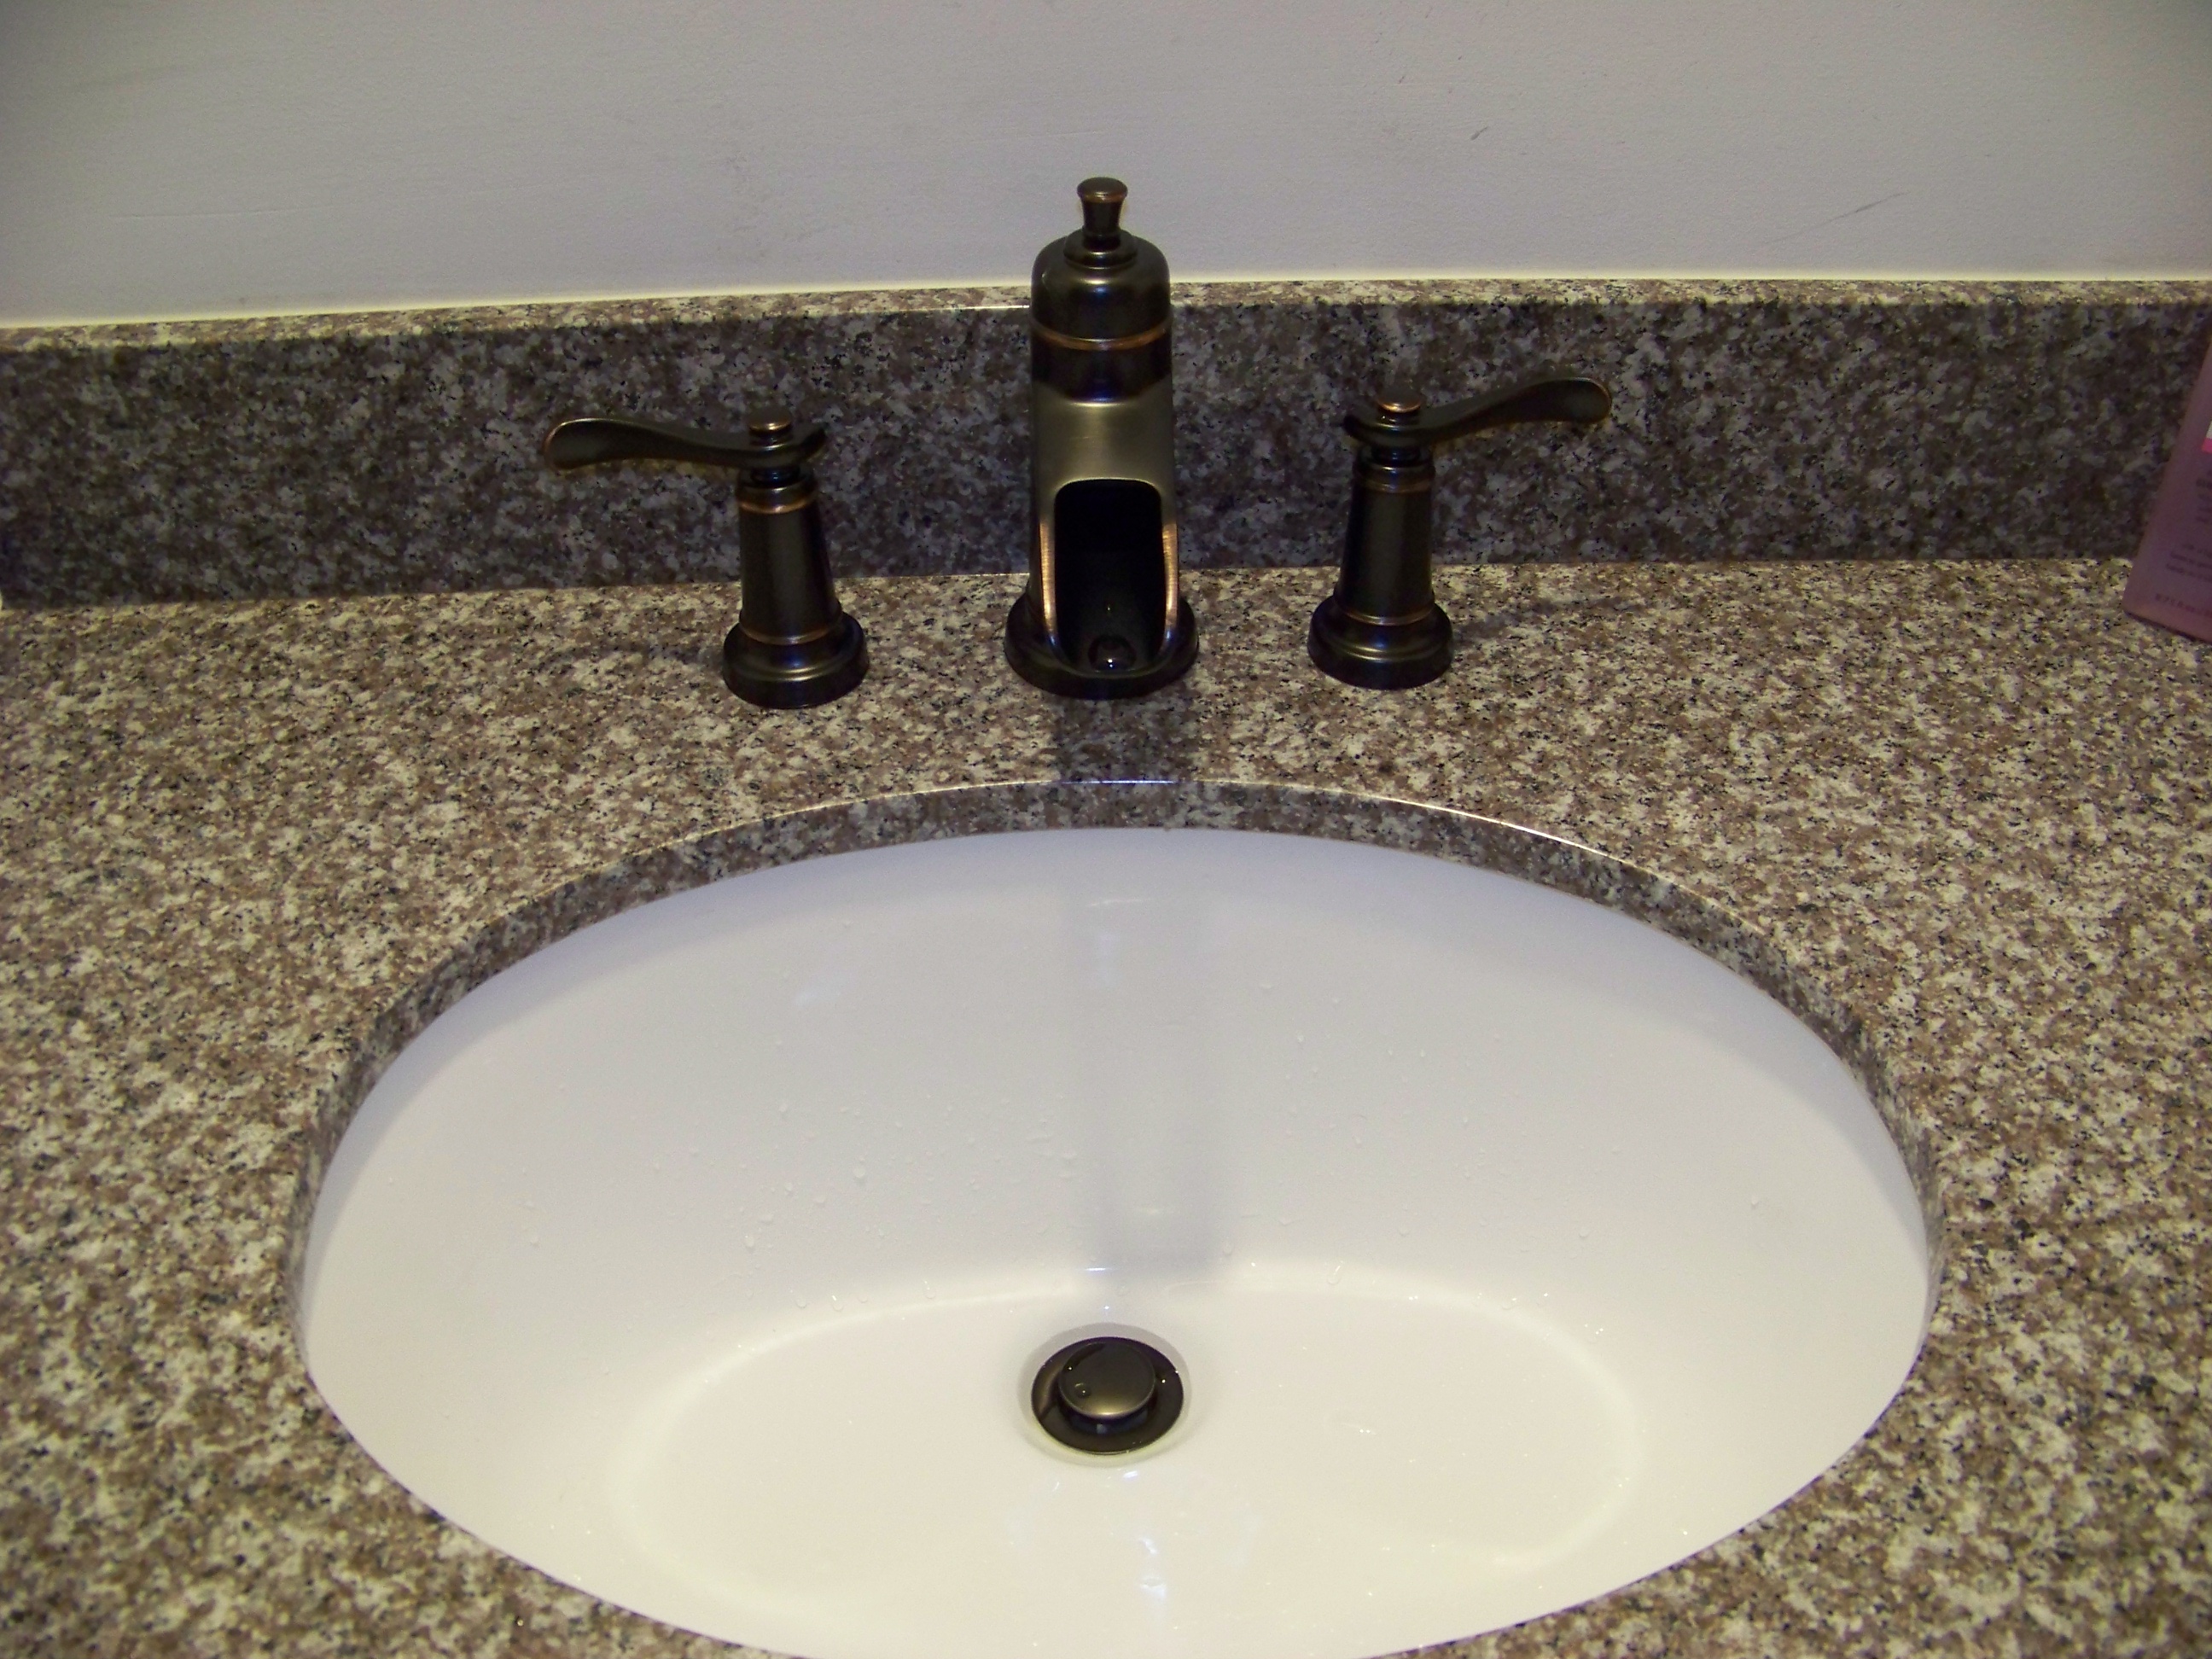 Things got a lot easier once the counters were in. We spent 2 evenings installing faucets. This was a long process only because we had to cut the supply lines to install cut-off valves (which means shutting of the water to the house---not easily done with 5 people in the house on a school night). Once that was done, it was purely a mechanical exercise: aligning and tightening drain pipes, connecting the supply lines, and testing the new system. Here is a picture of one of the faucets. We really like the Price Pfister Ashfield series, and got a 1-hole and a 3-hole model for our half bath and vanity, respectively. The design goes well with our granite.
Knobs and Accessories
It doesn't sound like much, but installing knobs, towel racks, and toilet paper holders can take a while, especially when drilling through tile. We didn't want the kind of trim we had before: the white ceramic pieces that are grouted directly into the drywall. Those are impossible to change out without damaging the wall, and definitely not stylish.
We made an effort during the framing stage to install extra wood pieces in the wall where our accessories would go. This would give us something heavy-duty to sink screws into. That gave us a real sense of confidence here at the final stage of the project.
We found some really nice accessories on sale at Lowes. They are made by Moen, and are solid wrought iron. I despise cheap hardware, especially the hollow rolled-and-painted sheet metal stuff that is so common today. So we gladly bought the wrought iron pieces and installed them. We also picked up some matching knobs for the counters.
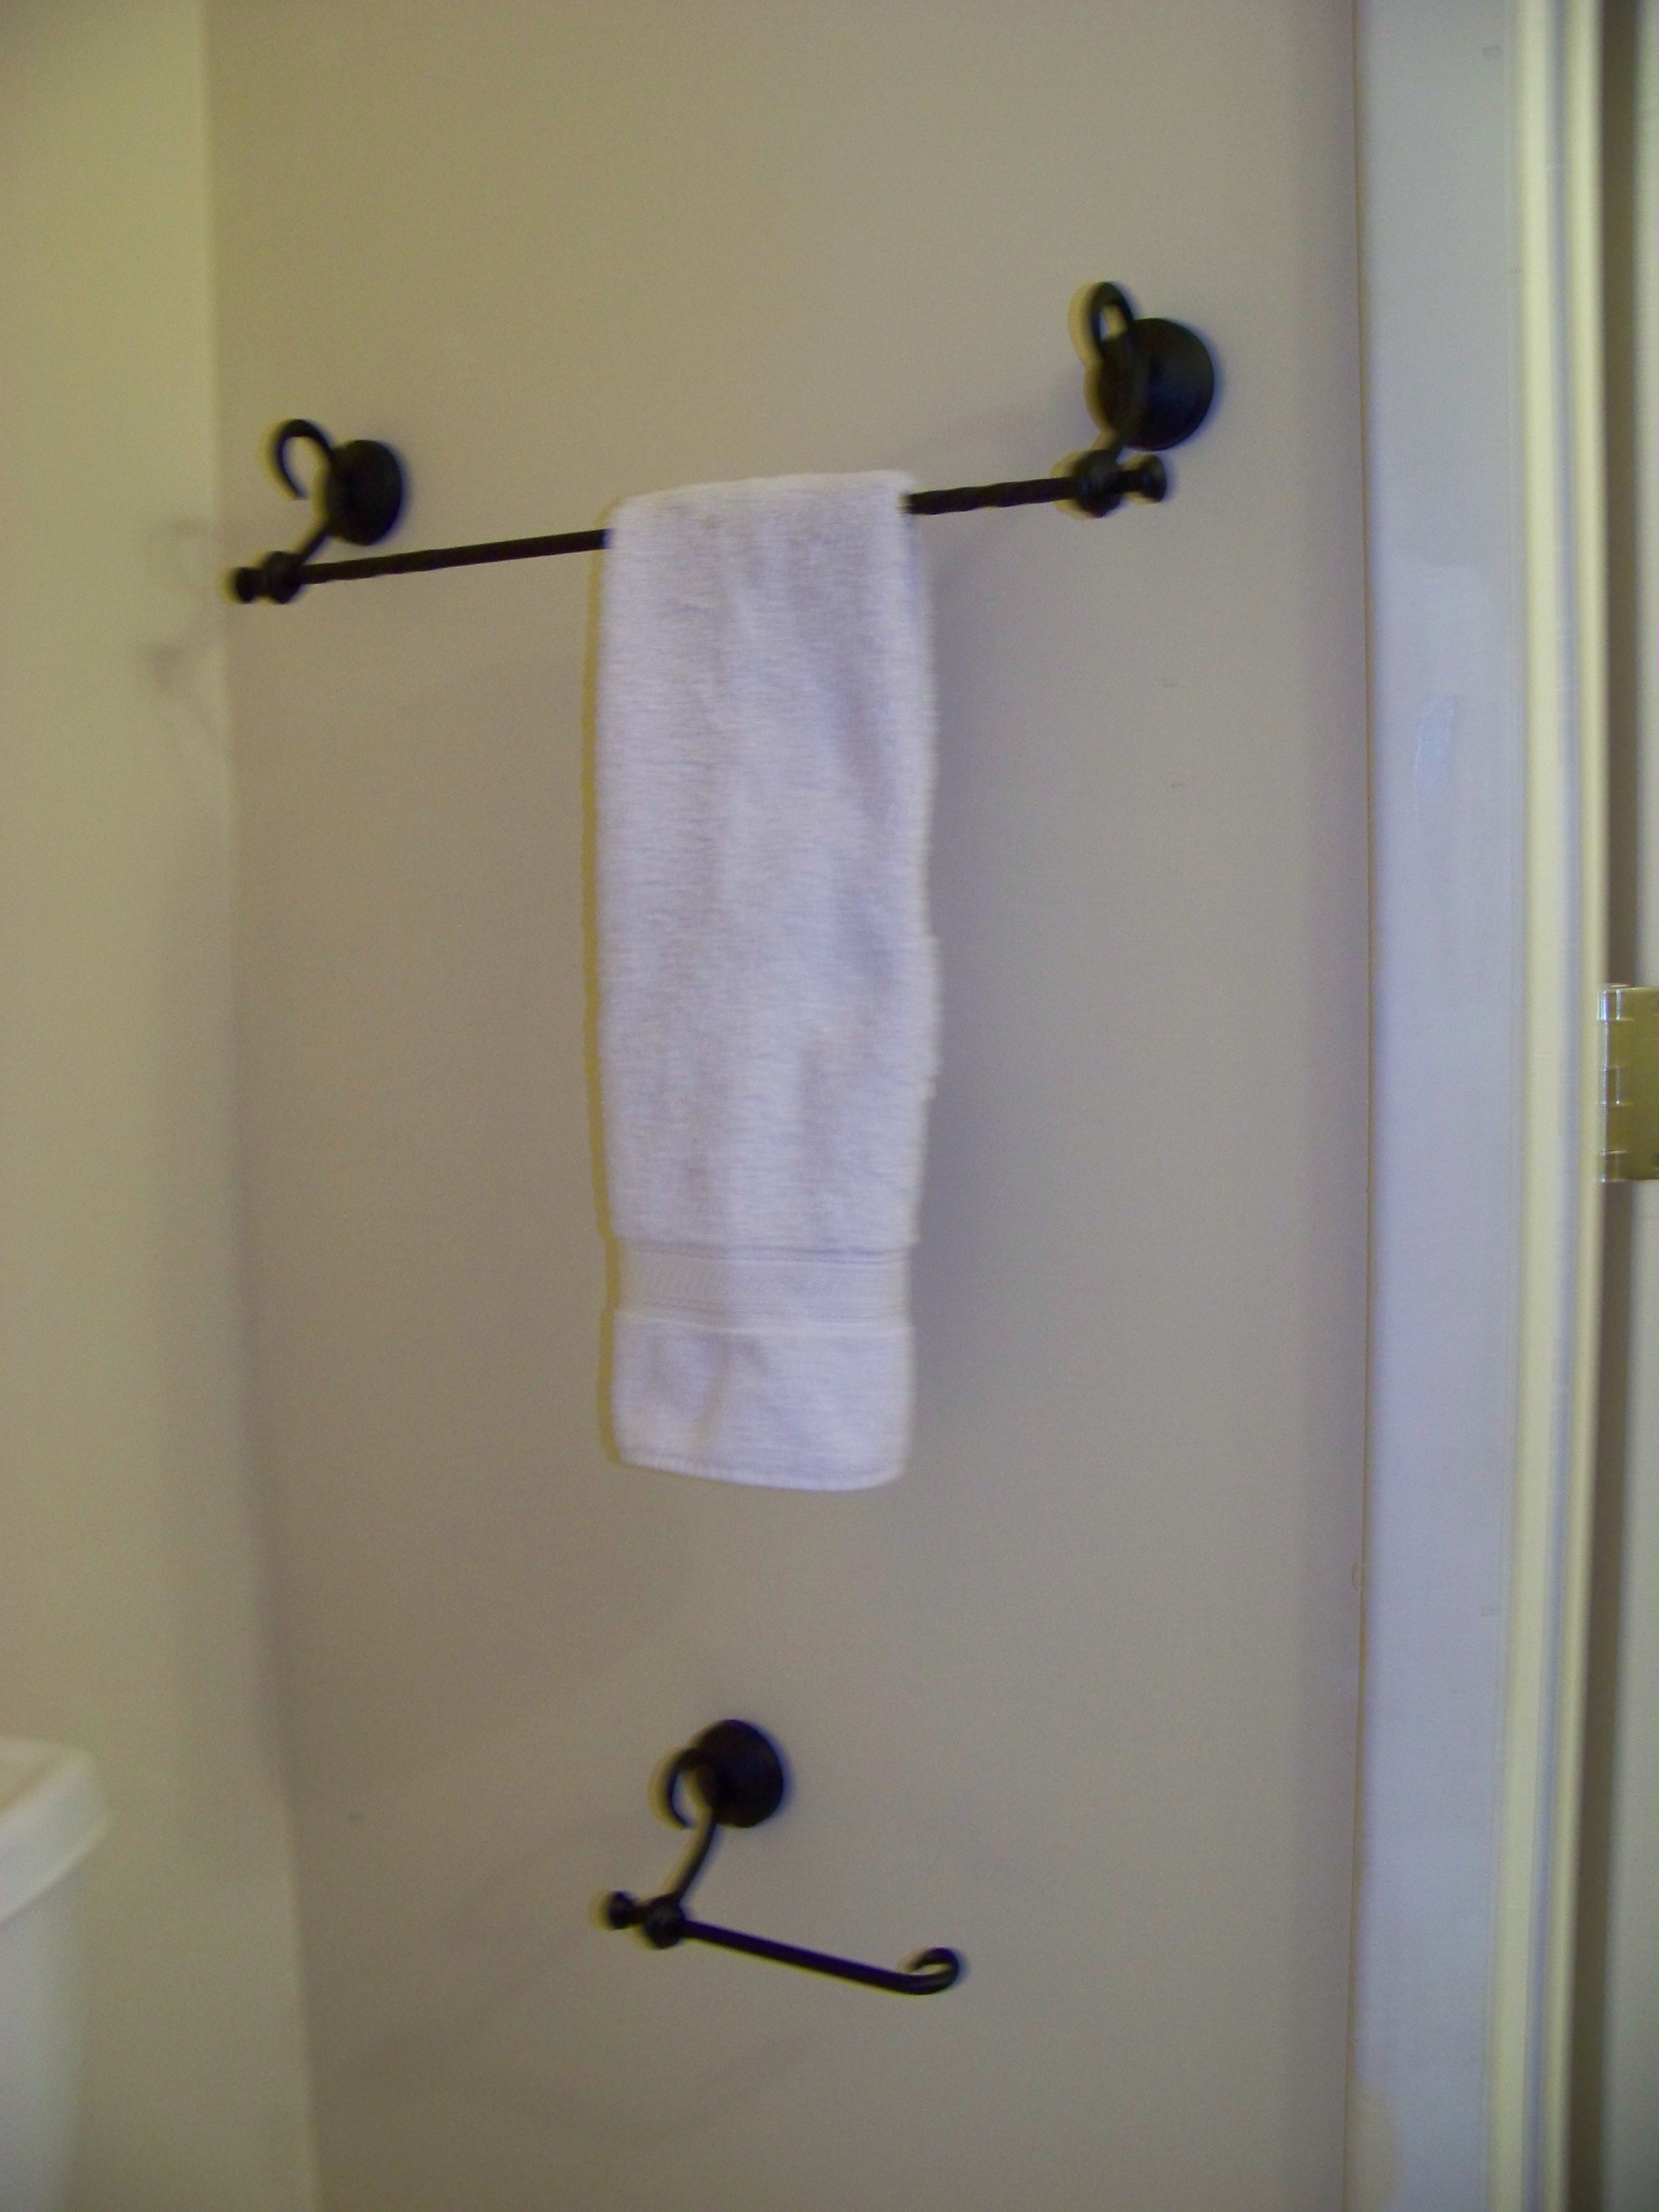 | The wall in the half-bath, showing the towel rack and toilet paper holder. These were tricky to put up because of the measurements. Its the only place in the bathroom where a towel rod is directly above a paper holder. So we installed the paper holder first, then placed the towel rod accordingly to leave enough room for a towel. |
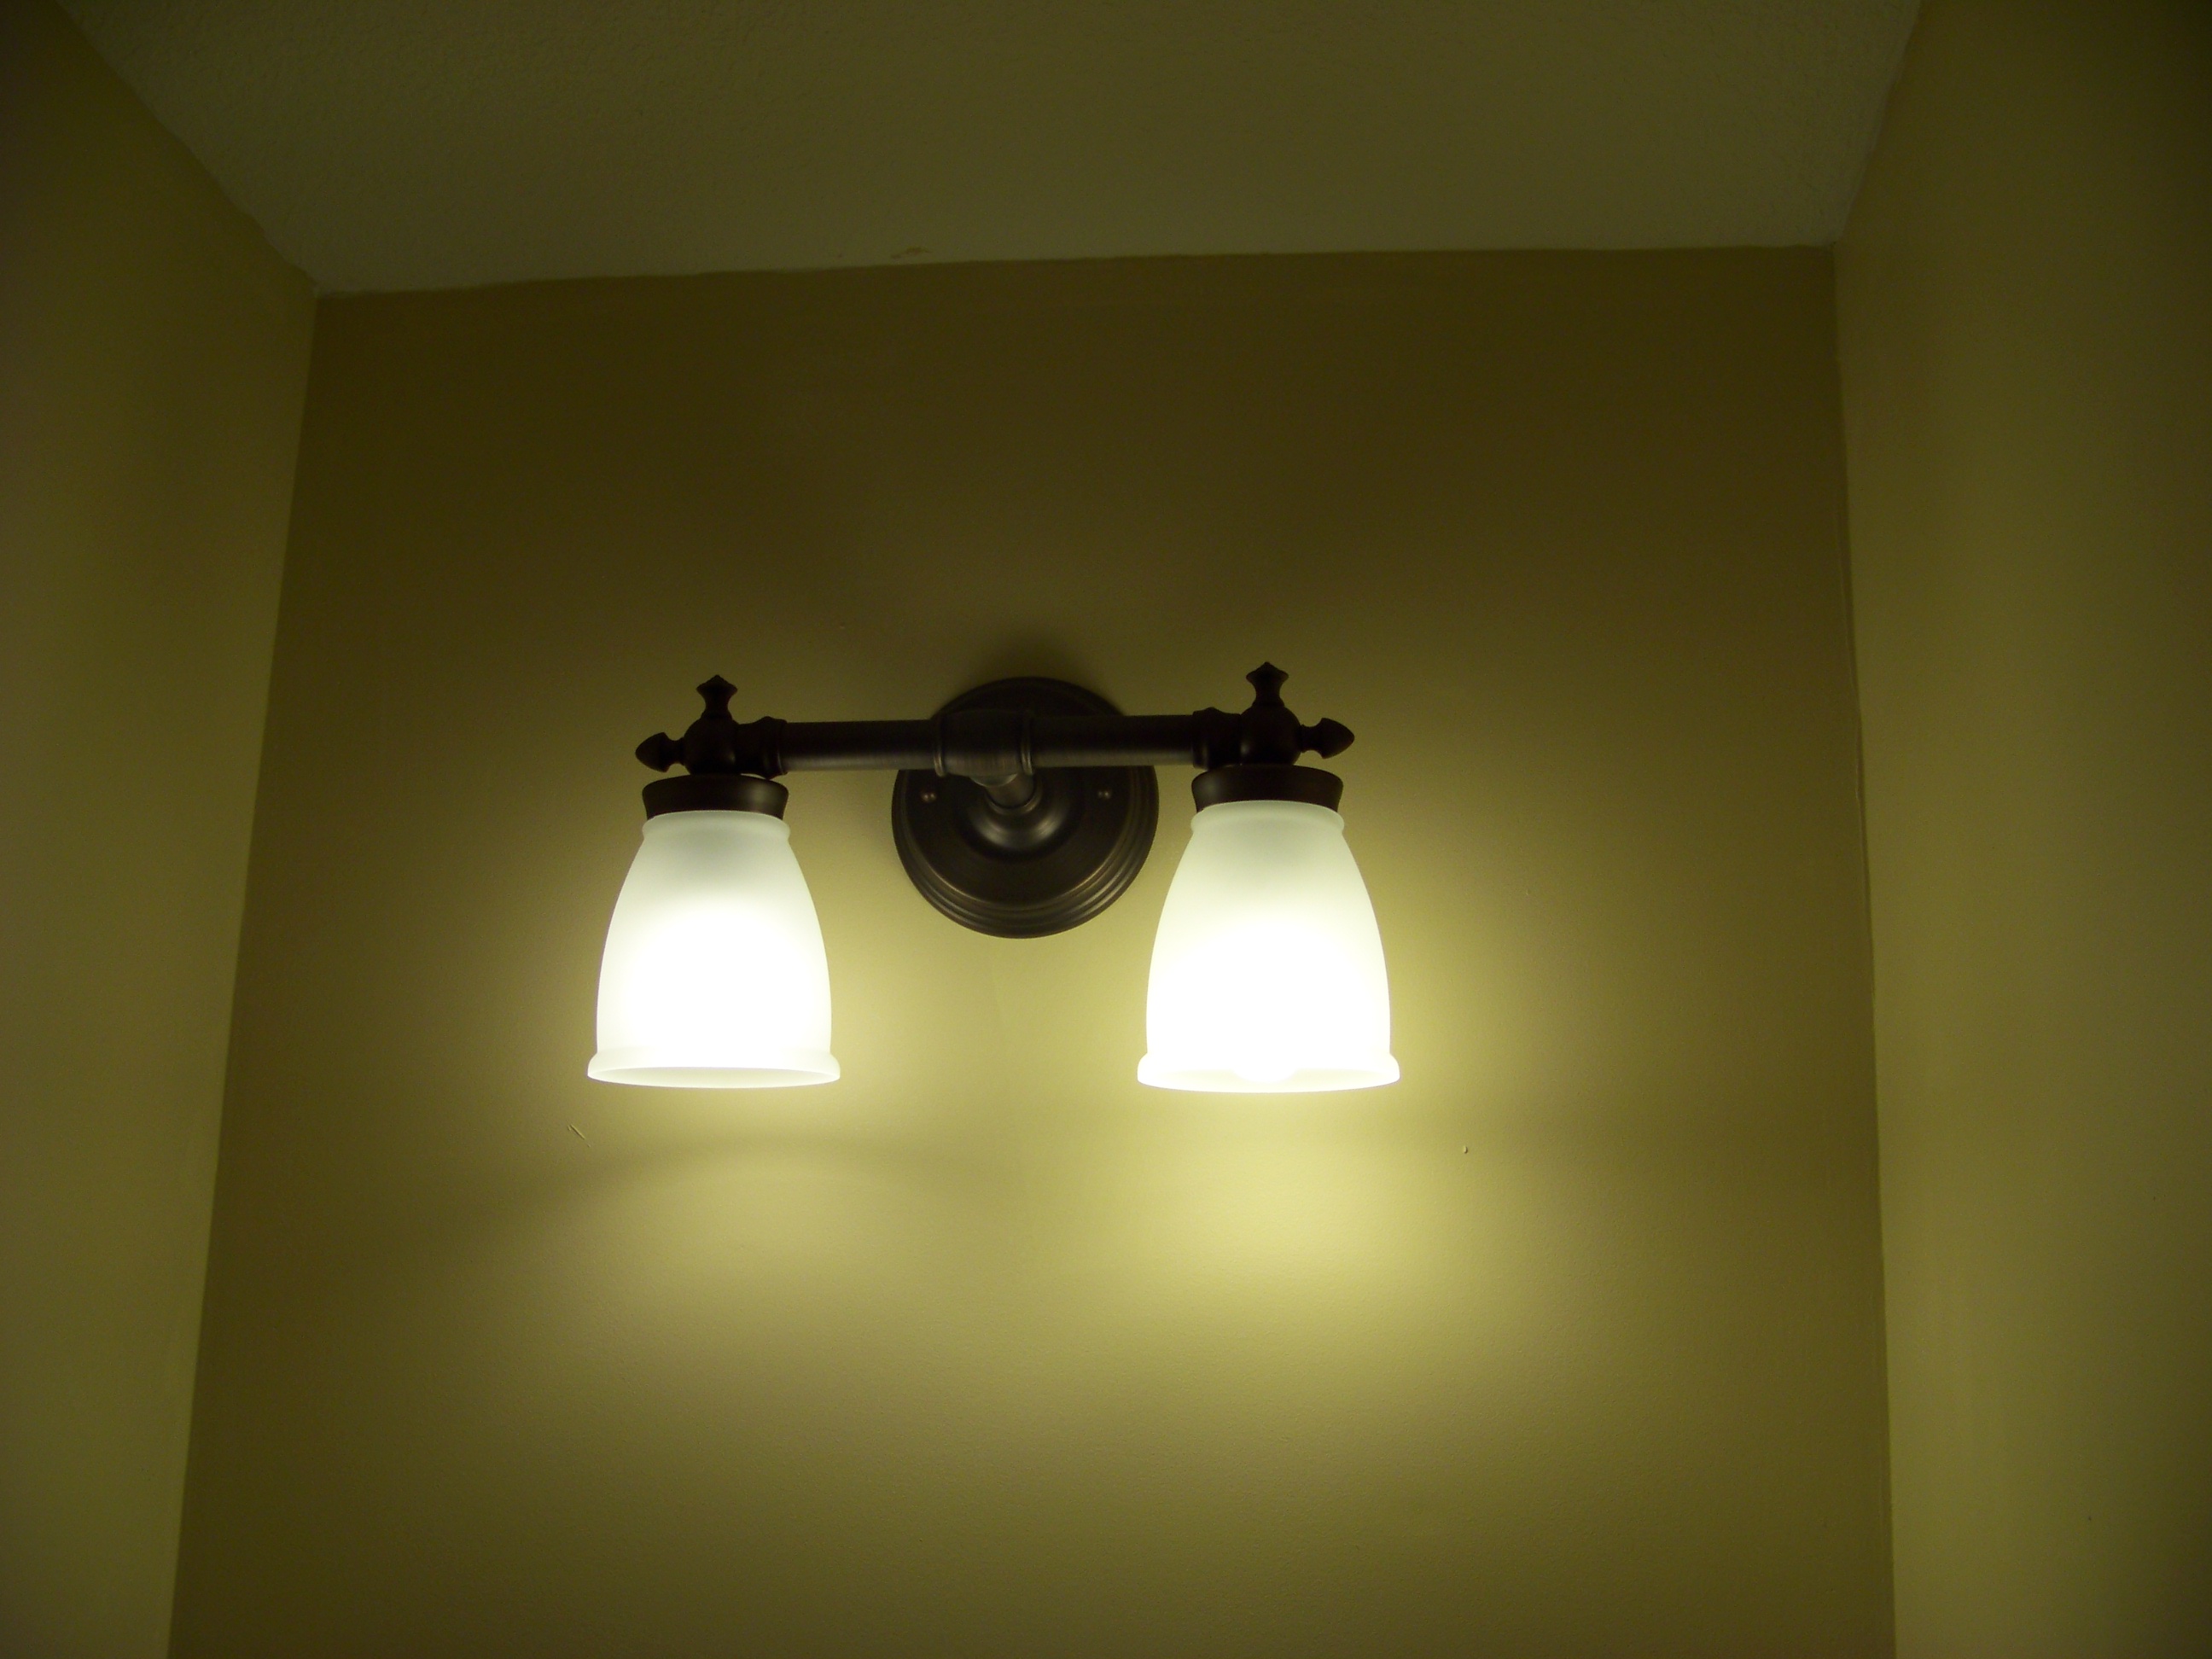 | Newly installed 2-bulb light fixture. Poor quality picture due to the camera adjusting its brightness. But you can see the style of the fixture if you look hard enough. :-) |
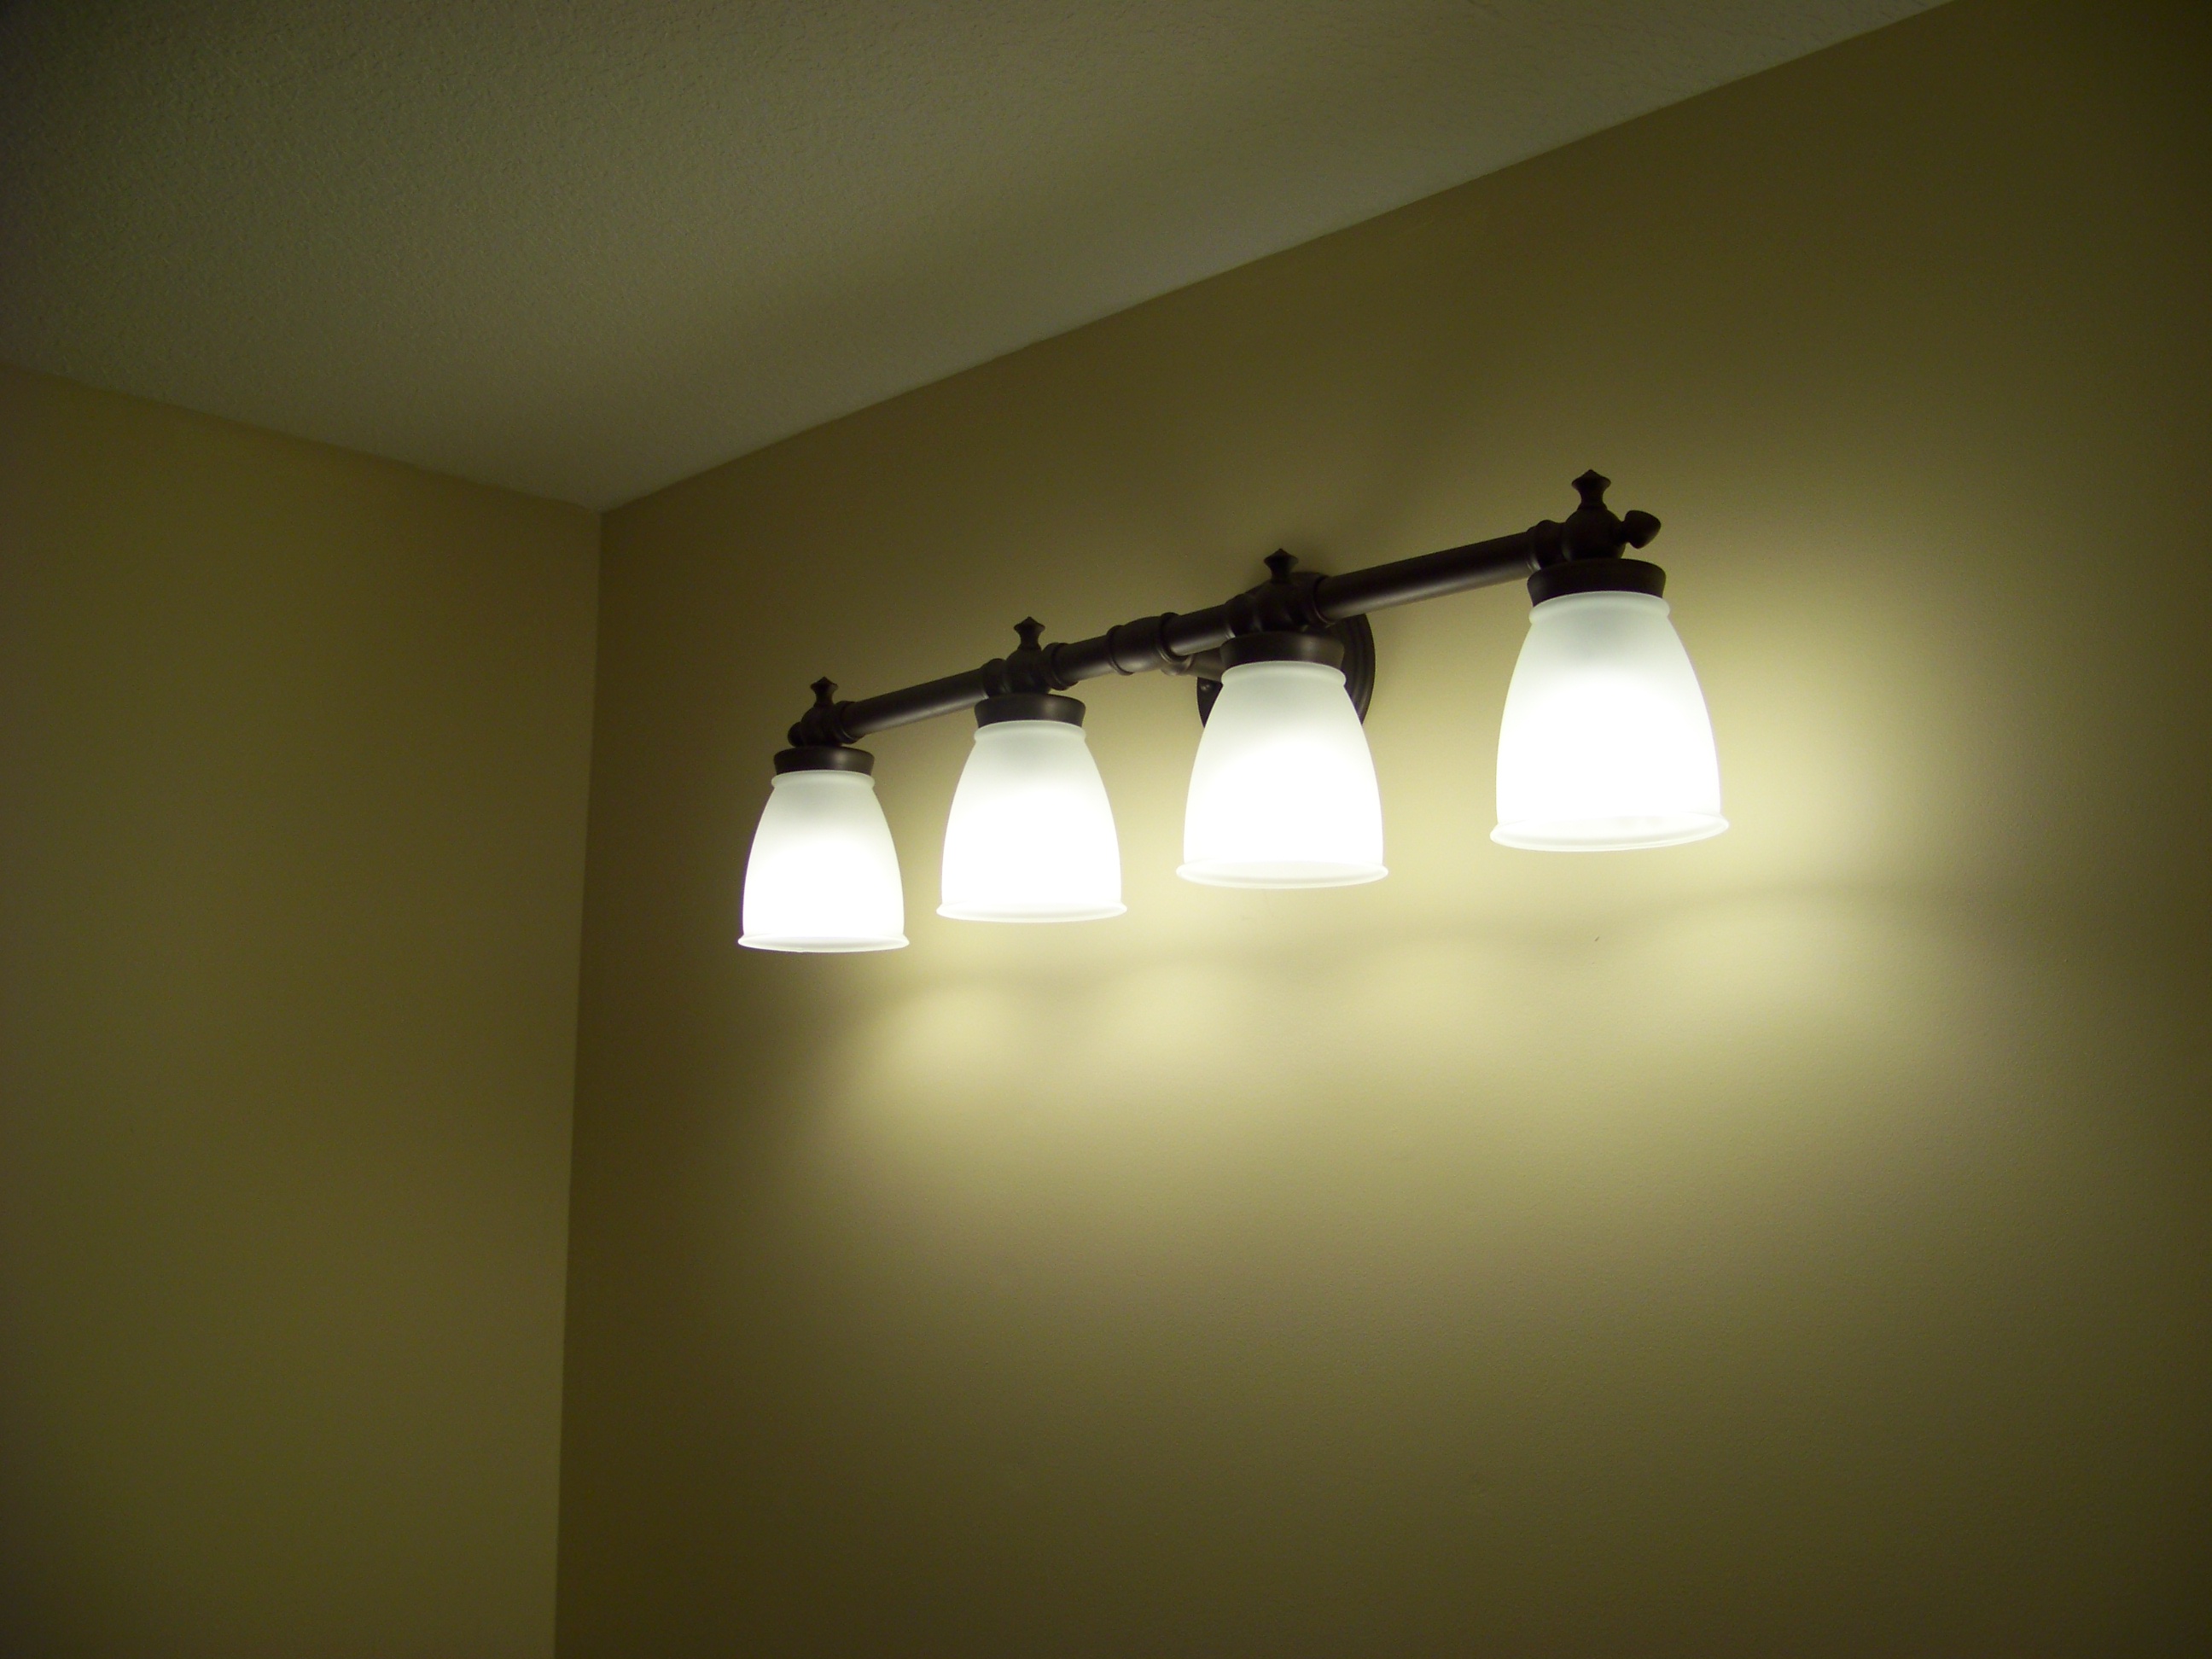 | A matching 4-bulb fixture in the main vanity area. |
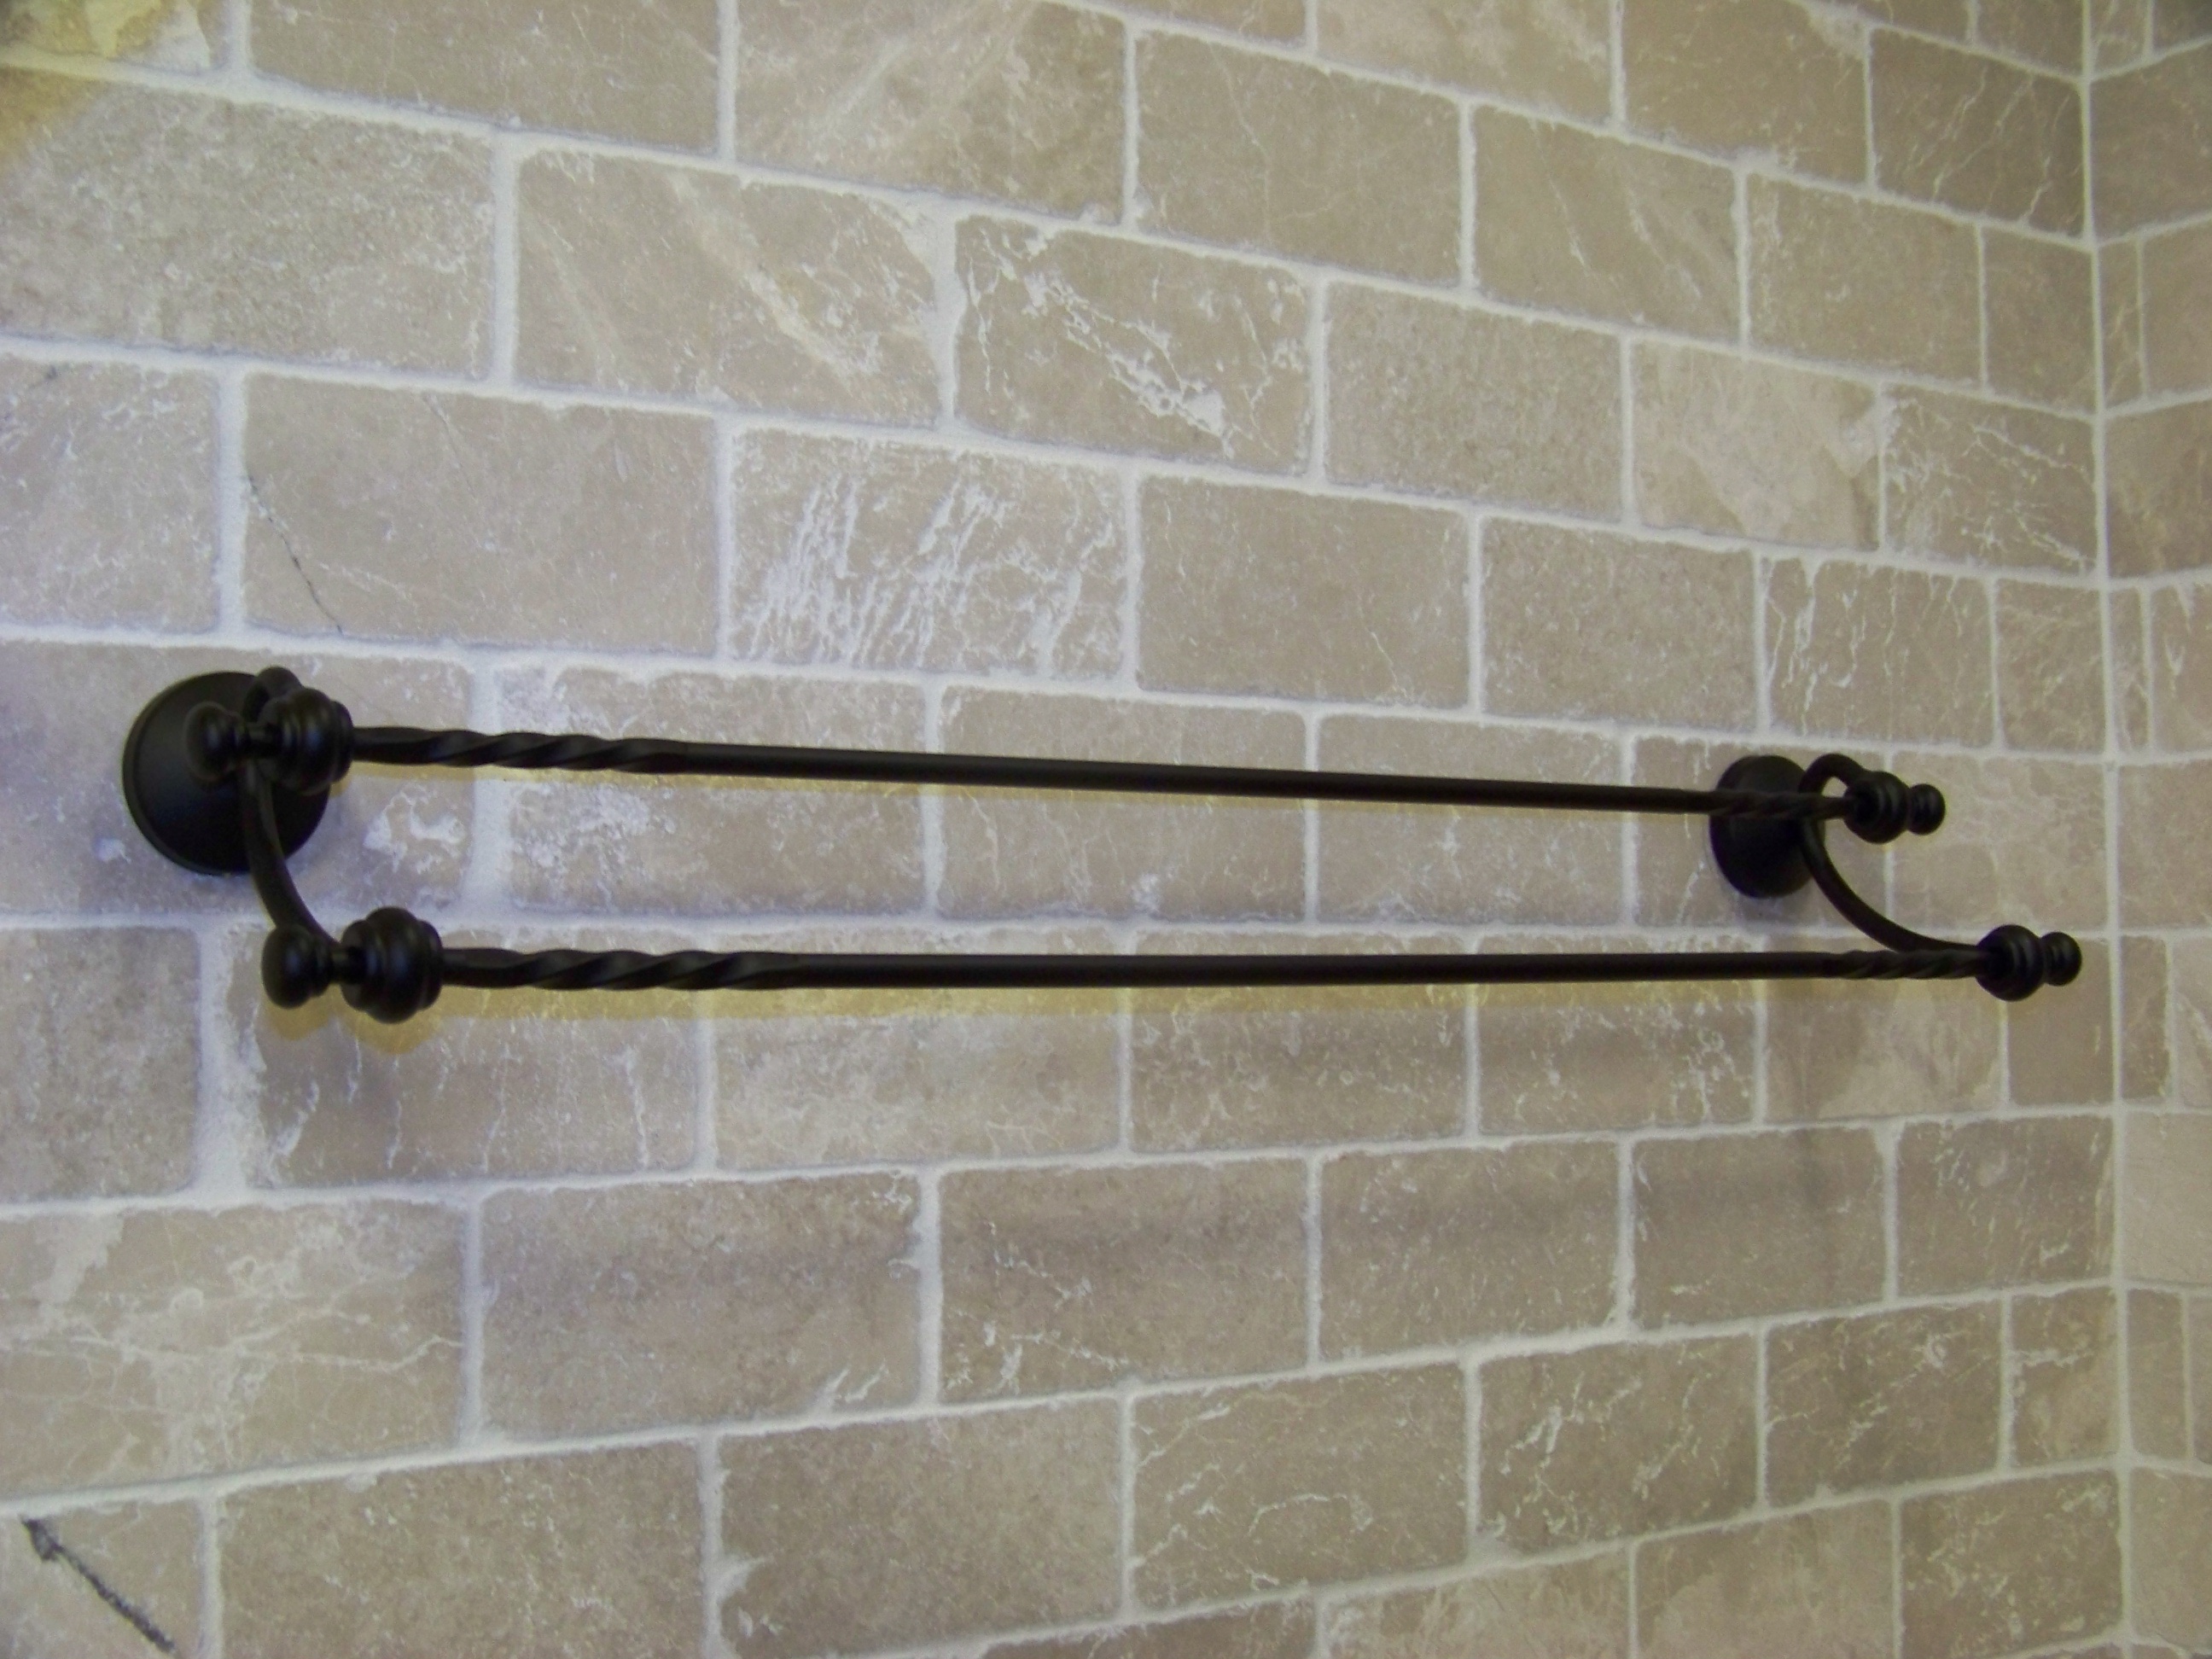 | Here is a wrought iron double towel rod installed in the shower area. To drill holes through tile, I had to buy a diamond-tipped drill bit and a special plastic water dispenser. The diamond bit has to be lubricated with water during the drilling process. |
 | Notice the dark knobs we installed. Anita picked those. They look old and tarnished like the faucets, and the complement the wood in a very subtle way. The brushed bronze/copper looks is really nice |
 | A complete shot of the cabinet and counter in the half bath. Same knobs. Notice the footer on the cabinet. Anita picked that too. |
Notes for Dealing with Contractors
Contractors are as varied as the people they deal with. Some are reputable; others aren't. Some are prompt; others aren't. And so on. When acting as your own general contractor, you assume the role of 'boss'. And as such, you need to be responsible with the 3 assets of any project: time, money, and the final product. Here are a few things that will help in that regard:
- Don't start looking for contractors in the phone book unless you have lots of money. Guess who pays for all those yellow page ads and that 1-800 number? Instead, try CraigsList or a local contractor magazine. Ask friends for references.
- Insist that contractors are licensed with the city/state where you live. If anything goes wrong you'll be glad you did. Ask for their license number, and call your city/state government to confirm their registration.
- Likewise, insist that your contractors have insurance. Ask for proof.
- Get separate quotes for labor and materials. Some contractors make money on materials. Don't facilitate that...ask for the labor price separately.
- Offer to buy the materials yourself. Sometimes this isn't practical--not everyone has a pickup truck. But you should insist that you'll pay for materials only when the receipts are given to you. This will keep everyone honest.
- Don't pay in advance. This sounds obvious once you've heard it. Contractors have historically bought materials for their jobs, so it was reasonable to ask for 1/2 payment in advance. But if you are paying for the materials, the contractors out-of-pocket expenses are minimized. You might be able to negotiate regular payments (daily, weekly, etc...) that are based on percentage of completion. And be sure to withhold a bit of money (maybe 10% or 20%) until the job is absolutely complete. You need leverage at the end of a project to make sure that last-minute fixes are completed and things are cleaned up to your satisfaction.
- Stay involved with your project. Don't trust that someone else is going to handle it. Ask questions. Make comments. Inspect the work. Think!
-
of course there are licensing and insurance issues to deal with---always ask to see credentials ↩
-
and by "low" I mean the shower only dribbles water when two or more other devices use water at the same time ↩
-
note to self: don't ever touch the wax ring again--wax is a sticky mess ↩
-
I highly recommend pre-made hoses. They cost about $5 and minimize the time you'll spend behind the toilet. ↩
-
its important to use very large washers (called
fender washers) on MDF to distribute the squeezing pressure of the nut and bold across a big area ↩